Basses for Newbies - Bass #6

Let's get #6 started. . . back to SX's . I've been doing a lot of jazz basses lately, so I figured I'd try something different with a P/J.

This bass was the one that's started this whole basses for newbies ordeal. It's been sitting in the studio making its way onto various projects that come through. I leveled the frets already, but think I need to take another look at the level job and probably cut more fall-off. Hopefully this one will be straight forward and fast. Mainly, this bass makes noise so I will try to shield and re-wire. . . and throw in neck inserts. I was debating the series/parallel switch on a P/J, but I think I'll put that in as well just for kicks and giggles. . . see what "super phat" mode sounds like.

Thinking about trying out a GFS p-bass pickup on the neck position and see if the shielding alleviates the hum issues on the stock bridge position SX pickup because the "SX effect" only seems to happen on the neck pickup. If it still hums, I'll have to look into a split coil bridge pup.


IJ Research F76 Compressor Build

The Universal Audio 1176 FET compressor originally released in 1968 is broadly recognized as one of the all time great audio compressors.  It seems every major studio has a few of these in their outboard racks and the particular way the FET circuit compresses is distinctive and a "familiar" sound due to the widespread use of the 1176 through the years in the industry.

The I.J. Research F76 is a 51X format FET compressor designed around Universal Audio's revision F 1176 with a few very useful added features most notably, the addition of a 2:1 ratio, a side-chain high pass filter, and relay controlled true bypass.  The kit also allows for a myriad of build options.

Igor Kapelevich based in Haifa, Israel can only be described as a prolific designer, and he is the mastermind behind the F76 compressor.  Igor's primary business is building complete turn-key audio devices for various studios worldwide and his custom work is not cheap, but he is very active in the DIY community and makes his partial kits and PCB's available for purchase as a side business so that DIY people have an opportunity to build some fantastic sounding pieces of audio gear at very reasonable prices.  For support and technical questions regarding this project, please refer to the official support thread.  To purchase PCB's and font panel/hardware kits check out the IJ Research webstore.  Complete kits may be available again from time to time depending on Igor's current stock of parts.  In this post, I will try to show a complete build from start to finish.


VP312DI Microphone Preamp Build

One preamp that was very interesting to me from my initial DIY research was the VP312DI kit from Classic Audio Products of Il.  One of the main reasons I wanted to try this kit was the feature set seemed very conducive to live use for bass guitar.  It has some really cool modular features that allow for a wide range of customizations.  In particular, this preamp has easily detachable modules to allow for 4 completely different flavors of DI.  It also has a built-in switch to bypass the DI module and inject the signal directly into the opamp which yields a different sound option that is built-in and always available.  In addition, the opamp is a standard footprint 2520 opamp.  Because this preamp comes in a full 51X Alliance standard configuration, not only are API-type +/- 16V opamps accepted, but a number of +/- 24V opamps can also be used.  The DI section of this kit also has a selector switch for 16V and 24V operation depending on the module being used.

So, in short, there are a mind-boggling array of possible configurations for this preamp kit that can all be changed quickly and without soldering.  For this build, I will explore a few of them.

opamps:  GAR2520, APP2520E (+/- 24V)
DI modules:  FET DI, Picatron passive transformer DI, and the IC chip DI

The current revision of the VP312DI preamp has a new option on the PCB for stepped resistors on the gain knob, so you can now choose between the constant variable Bourns pot (as depicted in this older revision build) and the Grayhill switch with stepped resistors when purchasing this kit.


There is no in-depth step-by-step assembly guide for this build, but a lot of critical build information is consolidated in the official support thread on the http://www.groupdiy.com forum.  All of the critical build documents (schematics, bill of materials, and assembly guide) are also sent via email upon purchase.  In this post, I will attempt to detail every step of the VP312DI kit build.

Basses for Newbies - Bass #5 (part 2)

This is the continuation of the Bass #5 build.

We start out this installment with new electronics being installed.


Basses for Newbies - How to Install Copper Shielding Foil

It seems like there are a lot of folks out there with questions about how to shield the control cavity and pickup routes. I figured I'd take some more in-process photos on this one and see if it's helpful. This may very well not be the best or cleanest way to do this, but it is "one" way that works for me.

Let's start with the hardest part. . . the pickup cavity. I start from the bottom of the route and work my way up, so the first step is to make our bottom piece. I measure a piece of 50mm foil to the length of the pickup with an extra ~1/4" on top and bottom.


Basses for Newbies - Bass #5

So, curiosity killed the cat, and this cat was very curious indeed this weekend.

#5. . . something's a little different about this guy. I ended up picking up 2 "Mexican Standard" jazz basses this weekend locally. I backed out of the deal I previously almost got into from the classifieds here on TB. At any rate, #5 is a 9.56 lb. dark burgundy metallic copy and set me back $235.00 . . . the other one (black) set me back $300. Both is great condition.


Basses for Newbies - The "SX Effect"

After playing the stock SX pickups for a while, we discovered a serious sonic defect.  While these pickups have a unique sound that is punchy with a nice mid-forward growl. . .super fun to play by the way. . . when pushed past a certain threshold during aggressive playing, the pickups distort severely.  For lack of a better term, we started calling this the "SX Effect".  This clipping is very abrupt popping sound as the pickup spikes.  It sounds very similar to digital clipping when an A/D converter is driven too hard.  In the studio, the instrument sometimes really needs to be feathered to stay just under the level where the "SX Effect" rears its ugly head.  Some players would probably never push the pickup to distortion, but if a player is unaware of its existence and finds himself in the middle of a recording session, the engineer may spend hours trying to chase down the clipping because all meters and indeed the input signals would be showing very normal levels.

While I was unhappy it would drive the cost of the instruments up . . . perhaps quite significantly, I deemed the stock SX pickups unsuitable for the mission which is to deliver an instrument capable of going the distance (an entire lifetime) and stay with a student from beginner all the way through professional use.  A few players I know are lucky enough to still have that first instrument, and I wanted to put an instrument into the student's hands that could still be a go-to gigging or studio weapon of choice well into a playing career.  After all, there is always ample use for a nice 4 string jazz or p-bass in the studio.  Sonically and ergonomically, it needs to be able to run with the big boys.

The search for a replacement pickup lead me to a conversation with Carey Nordstrand of Nordstrand Pickups, Inc.  through and introduction from a friend who was developing his electric guitar designs.   Nordstrand is a premium brand, and there was much debate about whether the pedigree and cost of these meticulously spec'd pickups is too high for newbies.  They are after all manufactured in the US on state of the art CNC winding machines with the finest materials and processes.  In my mind, there was only one way to find out and that was to test them and discover with my own fingers and ears if there is some magic left in pickup development that has not been successfully translated to off-shore manufacturing.


GDIY 51X Power Supply Build

This post is part 2 of my GroupDIY 51X rack build.  The key benefit of the 51X platform is the design flexibility it provides with its 5 supply voltages +/- 24V, +/- 16V, and 48V phantom power.  The GroupDIY 51X alliance power supply is a robust design capable of powering 11 devices at +/- 16V to VPR specification.  It can also simultaneously power 11 modules at +/- 24V.   Not all modules draw the maximum specified current, and very few modules utilize all of the power rails, so with some planning, it is quite possible to power more than one rack with a single powers supply.  In this post I will walk through a build of the 1st generation power supply kit.  The circuit for the power supply has not changed, but the enclosure configuration for the current versions have changed a bit.


GroupDIY 51X Rack Build

The GroupDIY 51X Alliance is a collaborative, cross-continental effort within the DIY audio community to produce a new standard that is compatible with the popular API 500 series card format but adds some cool features to support a broader range of designs.  The original API 500 series rack utilizes a 15 pin edge connector and supplies +/- 16V power rails as well as +48V phantom power.  At the heart of the 51X standard is the use of an 18 pin edge connector that allows the top 15 pins to remain identical to the 500 series cards and retain full compatibility but the bottom 3 pins allow for the addition of +/- 24V power rails.  This innovative feature allows for the easy design and development of modules that natively run on +24V like NEVE, Neumann, and Telefunken based circuits.  It also allows for devices from Forsell, John Hardy, and APP Studio to utilize the higher power +/- 24V rails. 

The 11 space GroupDIY 511 rack is in its 4th production run, and there are now over 300 units in operation around the world.  In the wake the successful launch of this standard within the DIY community, a slew of new designs and kits have emerged.  For my part, I simply happened to be exploring the idea of DIY while the rack kit, power supply, power transformer details were being finalized by capable 51X Alliance members in Germany, UK, and the United States.


GAR2520 Discrete Opamp Build


One of the true gems in the sea of DIY recording equipment is the GAR2520 discrete opamp designed by Gary Barnett.  These are sold in kit form by Classic Audio Products of Illinois.  They are also available fully assembled and tested as an add-on option for CAPI's preamp kits.

This opamp circuit is a modern component interpretation of API's mid 1970's Huntington era 2520 and operates on bi-polar +/- 12VDC to +/- 20VDC power supply voltages.  For my studio, this righteously priced kit has been an absolute life saver due to the sheer number of opamps required for the various preamps, EQ's, and other outboard audio equipment we utilize.  While I have never been hands-on with a vintage Huntington 2520, many people who are intimately familiar with the vintage opamp feel the GAR2520 is sonically "hair-splittingly close" to the original that it is modeled after.  What I can say is in my experience, this opamp has sounded gorgeous in every device I have tried it in, and as such, it is my go-to baseline opamp for the many API-family devices I build for the studio.  There are many fine pre-built options currently available, and people often equate high cost to high performance, but make no mistake, a properly built GAR2520 is capable of holding its own when compared to any of the other top tier API-type opamps available.  Slight sonic variations and colors aside, the pedigree of this device is on par with the rest of the field.


For this article, I will build 2 complete GAR2520 kits to the best of my abilities.


VP26 Microphone Preamp Build

One of the most important components of audio recording is a high quality microphone preamp, and one of the problems with tracking drums and basic tracks is the need for a handful of quality preamps for all of the tracks being simultaneously recorded.  This is even more critical if you are not recording through a large format console.  Luckily, a number of companies and small businesses in the DIY audio community have created some outstanding cost-effective preamp kits.  If wisely chosen, these can save thousands of dollars on the way towards building a fully operational, professional recording setup.  One of these companies is Classic Audio Producst of Illinois.

In my opinion, the all discrete Classic Audio VP26 preamp delivers the highest cost to performance value among all of the kits currently available.  It also happens to be one of the easiest builds for a first time audio DIY project and was my entry point into the world of audio DIY.  In this post, I will try to show the entire build step by step.


Basses for Newbies - Thoughts on Bass #4

This one sounded special to me when I played it out of the box. Highly subjective, but sometimes an instrument just speaks to you. This one had richness, resonance, and complexity in the acoustic sound that I liked. The SX's that I've handled range from just above 8 lbs. to just over 10 lbs. which is quite the range with most falling between 9 and 10 lbs. This one measures on the extreme low end and the body is really a featherweight for alder.

The neck pocket is the most often screwed up areas in an SX. There is no reason with CNC machining that they can't make the neck pockets consistent and the screw holes precisely align so that necks are truly interchangeable, but I have yet to see one align on an SX. Also, I'd estimate that only 1 out of every 5 SX's don't need to be shimmed because the neck pocket is un-molested. This is only critical if you're trying to get nice, low action. Otherwise, you'd never know or care. It's just a roll of the dice as far as neck pockets. Threaded inserts mitigate the effects of the problem to a large extent I think, but still, mechanically, it's best to not have a shim.

I've tried to keep things economical on these builds and refrain from replacing anything on these basses without reason. The tuners, bridges, and nuts have remained even though there are better options out there because they do the job (as well as any vintage bridge). The pups are falling short and holding the instrument back. I'd like for these instruments to be capable of serious work, and I think they can stand up to that kind of scrutiny. If replacement is necessary. .. might as well do it right.

At the end of the day, these are still cheap SX's and will never be able to measure up to a premium bass in terms of fit and finish, but they CAN be made to handle and sound phenomenal. The tape doesn't lie and I think there is still unexploited potential in these basses. I'd like to hear what an SX sounds like with good mics onboard. Right now, the dynamic range of the instrument is getting cut off by the "SX effect".

Basses for Newbies - Bass #4 (shielding and controls)

I picked up some copper shielding foil on Ebay direct from Hong Kong. The interesting part about is, while I paid about double what I would have paid to buy it at Stewmac, I got 30 meters of the 18mm and 50mm width tape while stewmac would have only given me 6 meters of 55mm and 19mm width. That's 2x the price for 5x more material. Since the last batch from Stewmac lasted me about 5 basses, this one should last me darn near forever if I finish it at all.


Basses for Newbies - plugging a neck

An SX  P/J neck arrived in the mail the other day and after inspection, I thought it would be good to pair it with #4. 3 of the 4 screw holes did not line up, so I started plugging the holes with some 1/4" maple plugs I cut on a borrowed drill press. First, I had to drill out the existing holes.


Basses for Newbies - Bass #1 finds a home

#1 arrives at it's new home at Nueva School's junior high music program. . . the kids are gonna flip.

Basses for Newbies - Thoughts on Pickups

The "SX effect" we discovered in testing has been bugging me. That is, everything sound beautiful under a certain threshold. . . then, dig in a little too hard, and the bass distorts. All 3 instruments exhibit this trait. It was particularly evident when tracking the slap lines on Fantastic Voyage. You really had to feather the bass and tread lightly.

So far, this is the only critical deficiency I've found on the batch. I am thinking about standardizing on Nordstrand NJ4 and NP4 pickups for the rest of the builds.

I've ordered 2 sets to test. Still on the prowl for something more affordable, but I figure I can keep the leads long, the pups will not lose much value just by themselves since they are a well-known item.

(audio clips) Basses for Newbies - Bass 1-3 Studio Testing

Not much progress lately on the 2nd batch of basses. I'm waiting for some parts to come in the mail. I ran out of copper shielding foil so I bought some directly from Hong Kong via Ebay. Quality looks good. I don't need the conductive adhesive because I solder the joints. . . plus, the conductive adhesive on the Stewmac stuff has measurably less conductivity than the soldered joint.

I went into the studio last night and recorded some VERY nice test samples of all 3 basses in different genres utilizing some different control/pickup settings on the bass. I will need to mix those down and post, but for now (jasaman on the bass):


Basses for Newbies - Bass #3 field report

 This just came in from Jasaman who has #3:

"I'm amazed at how much I'm digging this bass and it's been fun playing it for the last two days. I took it on a gig last night I and thought I would post a couple of clips for you all to hear. The quality is not very good but I plan to record other gigs with this bass and I'll try to give you a better idea on how this bass sounds in a live situation. It's amazing how many different sounds I can get out of this passive bass. I kept discovering great sounds all night. It was often hard to settle on something! I ended up keeping the pickups in series which gave the bass an incredible P-bass tone. It was soooooo fat! The thing plays incredibly well and sounds great through the entire range of the neck. It's been a blast discovering what these basses can do with Chunger. You da man!"

http://files.me.com/jasaman/wan7kq.mp3
http://files.me.com/jasaman/9z84vn.mp3


Basses for Newbies - Bass #4 arrives

Santa, the guy that drives around in the brown truck came yesterday and dropped this off.


Basses for Newbies - Bass #3 sold

I spent a few hours today meeting up with the guy who helped start this whole idea.

We chatted a while and fine tuned the settings on #1 and #3. I think we have them really dialed now down to the minutest of adjustments. He left with #3 and tonight, #3 is in the "wild" at the Madrone Art Bar in San Francisco. . . don't know if I'll be able to clean the greasy funk off of it afterwards

preliminary reports from the field are good (via iphone):

"First set is over and the bass rules. I'll freaking take it. The only thing to consider is the pickups. They may not be ready to hang with the big boys. They break up when really pushed. It feels and sounds incredible. #3 is the one for me! The band loves it too." - Jasaman

Basses for Newbies - Fret Replacement

OK. . .back to the regular programming. . . I found an SX P-bass neck on the classified section of the talkbass.com forum. The idea was to buy one of the remaining SX fretless p-basses and build a newbie-friendly fretted P-bass without violating my self-imposed embargo of the new Ursa series.  I do not like the new look of the Ursa series basses that Kurt at Rondomusic.com is now selling and have stopped buying SX basses until they change back to their more traditional looking headstock shape.

Upon close inspection of the neck, I found that one of the frets had been hammered in WAY too hard and had actually indented the wood and cracked the finish. As a result, the fret sits very low in relation to the other ones, and there was no good way to level that much material off of the entire fretboard.


(First Impressions) Basses for Newbies Bass 1-3

I finished mixing the clips I recorded at my last session, but the sound files didn't come out that good due to operator error. I was monitoring the pre signal instead of post and there may have been some clipping. I'll get better samples recorded in the next few days. But, for now, here are the "somewhat useable" ones. I should have been more careful.

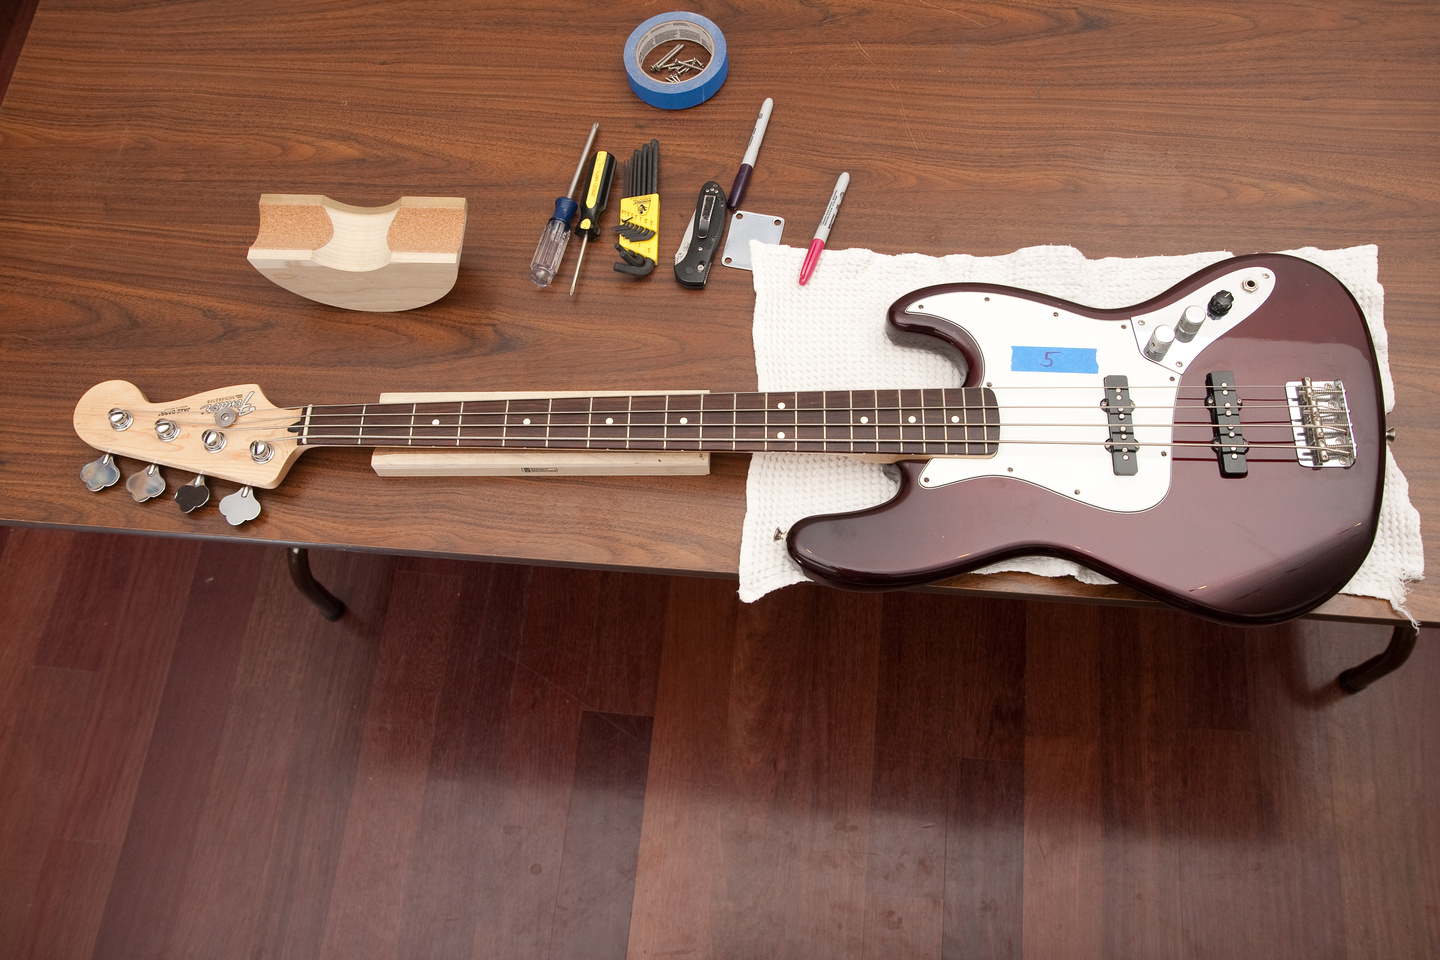
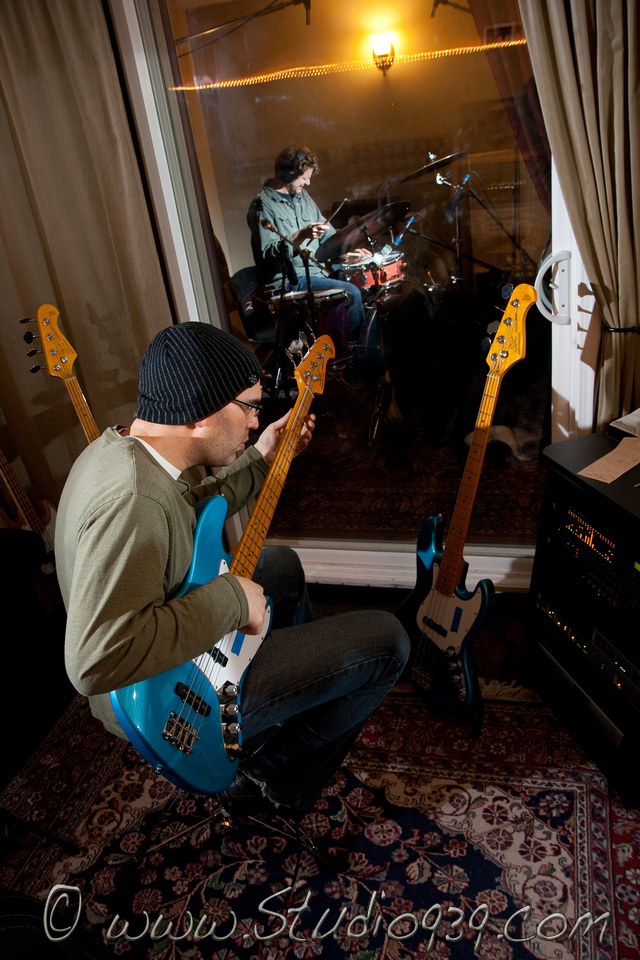
The signal chain for the bass channel is:

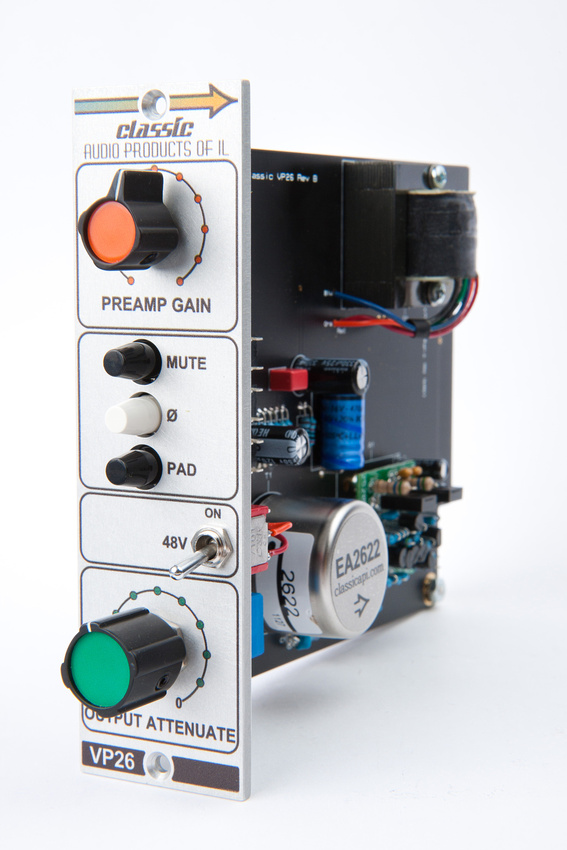
Countryman DI -->modded Ampex 351 preamp --> MCI JH-600 console --> AD converter --> Logic Studio

I tried to make it sound nice, but still be "honest". Usually, we've been tracking through a Sadowsky outboard preamp/DI, but I didn't put that in because it colors the sound. . . colors it in a way that I like, but you get a better feel for the natural sound of the bass without it.

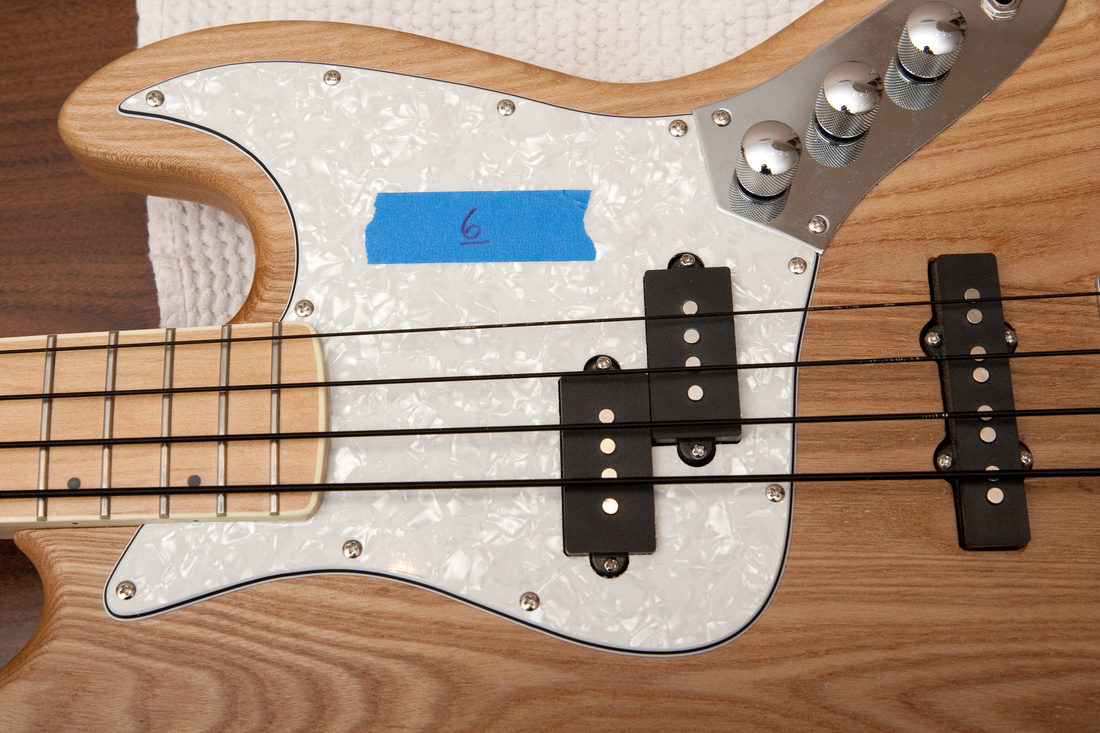
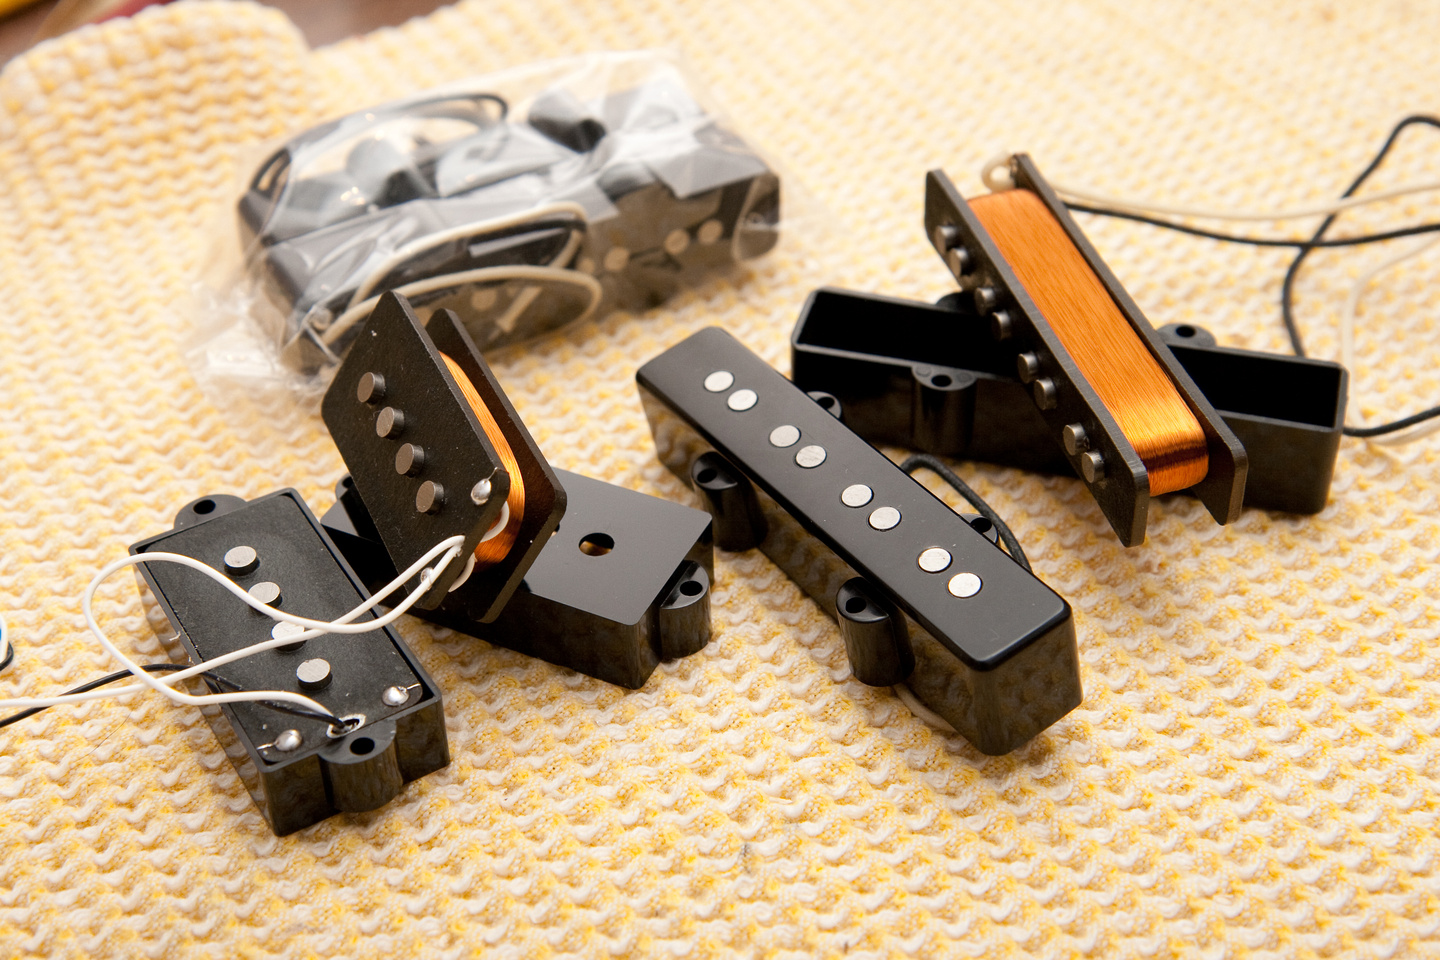
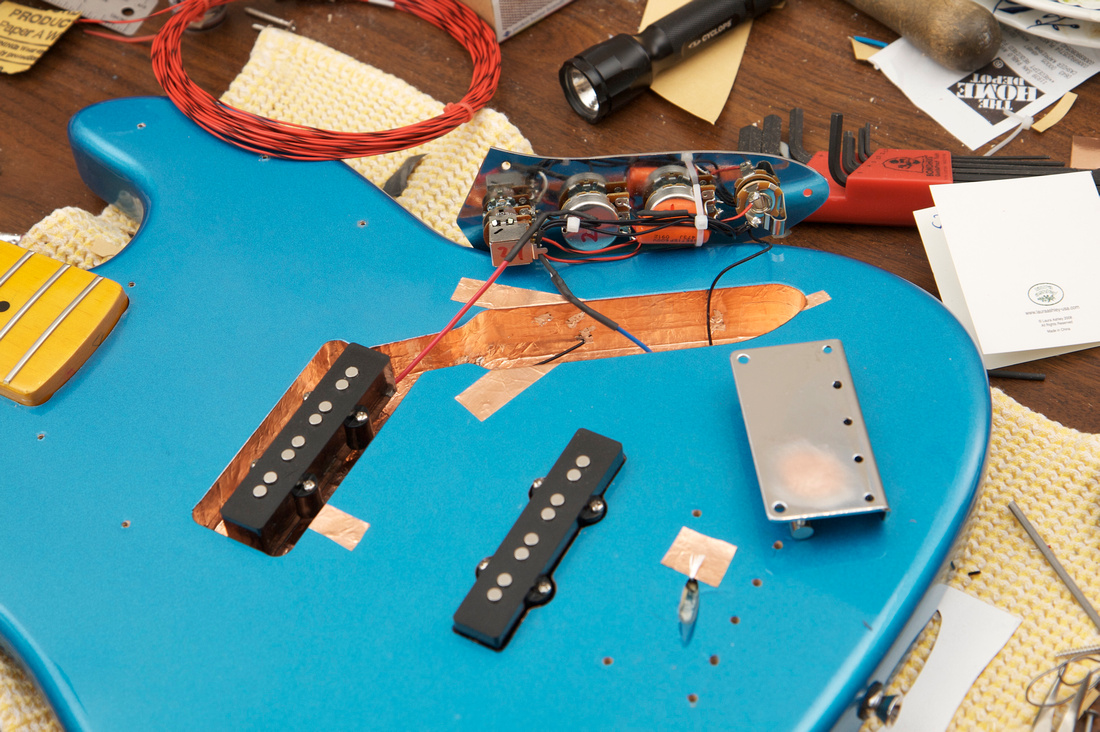
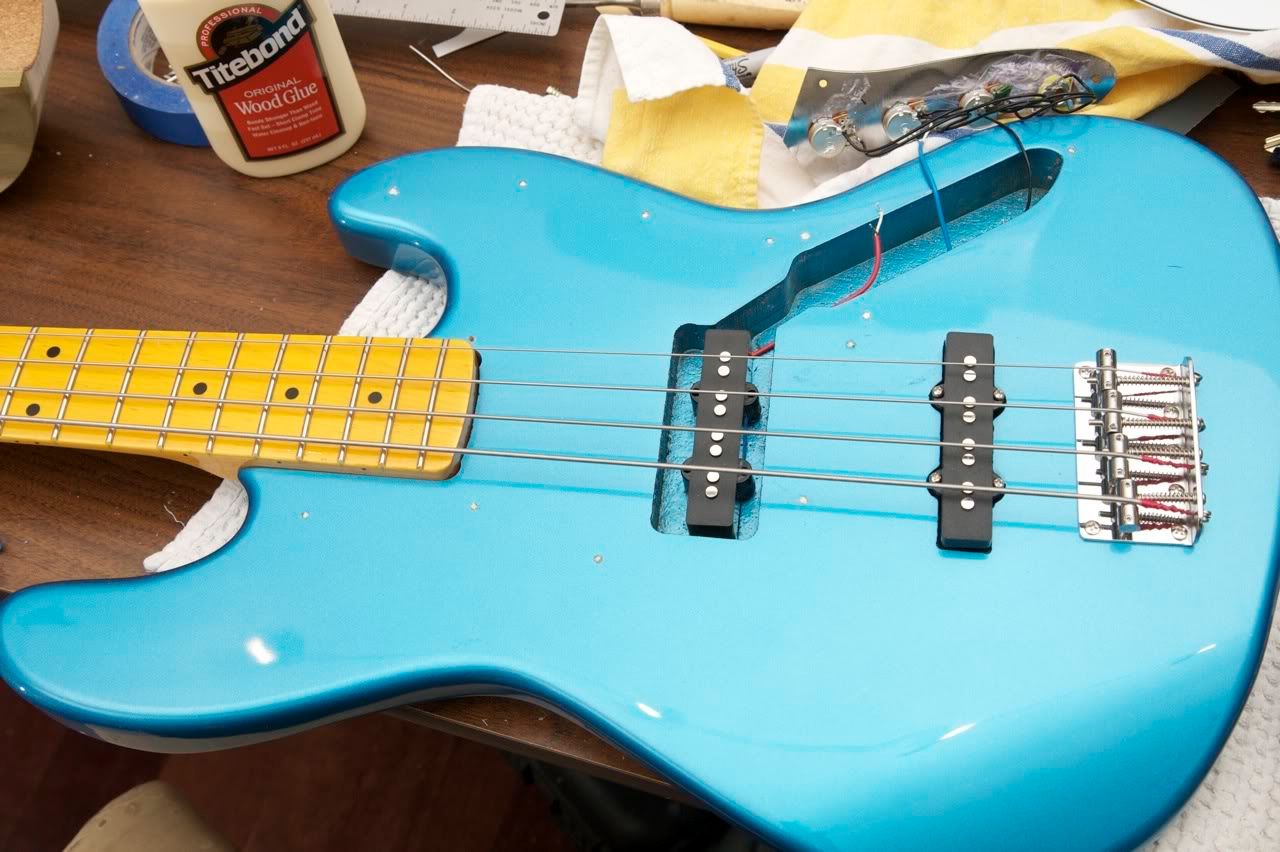
Solo tracks are parallel mode on the pickups, tone wide open, volume full up. I don't know what's happening on the jam clip in terms of bass settings, but the signal chain is the same. There is significant bleed however from the drum mics in the room. There is no EQ or compression on the bass (though I should have going in for all that slapping. . . would have avoided that ugly clipping).


I'll get better samples up when I can be in the studio at a time when I can actually focus on what I'm doing. The people itching to buy #2 and #3 are going to be pissed that I want to do more "testing".
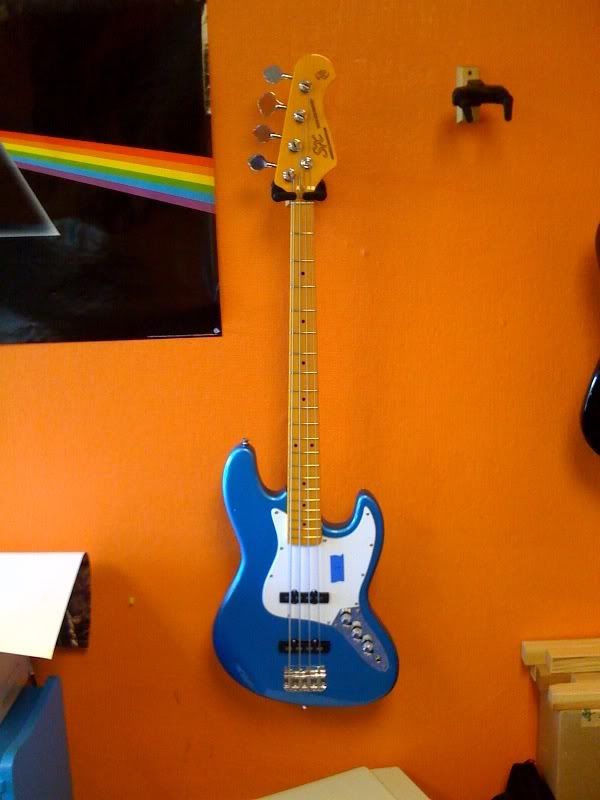
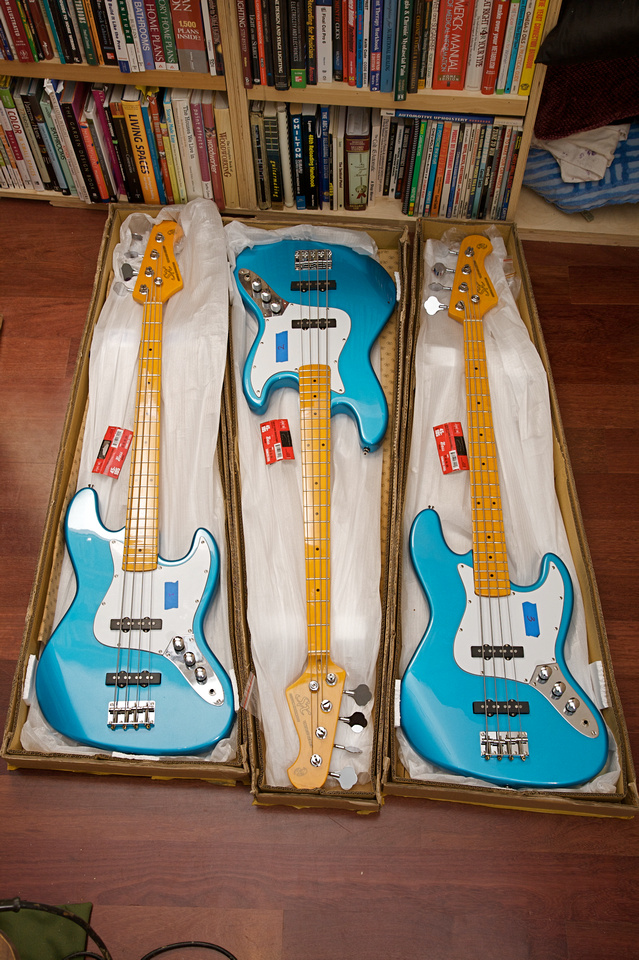
The good news is people love the way these basses play. . . the bad news is, the bass teachers and working professionals like them so much that they want to keep them for their own personal use. . . it's really the children that ultimately suffer. If anyone viewing this thread knows a way I can get my hands on more old-headstock 4 string SX P or J basses or if anyone has "outgrown" theirs, please let me know. I will buy them, fix them proper, and put them to good use. Perhaps the children will even benefit :P

(part 9) Basses for Newbies Bass 1-3

I took the 3 basses out "in the wild" for a test tonight at my friend's house where I helped build a recording studio. It was his birthday party, not really a recording session, but because it was his birthday, all of the bass players were there and were ableto play and jam on the bass. I was able to record some sample clips from all the basses, put down bass parts for a couple of songs that are in process in the studio, and get valuable feedback from working players.

In general, the response was very positive. . . maybe a bit too positive as 2 of my friends emphatically want to buy #2 and #3 from me which leaves one for the Nueva School's music program. These are just plain fun basses to play, and while they may not measure up to full blown custom jobbies, they get the job done and done quite well.

The real players appreciate immediately the work that went into these. They knew from the moment started playing up that these were not just your normal $120 budget basses. On tape, the basses sound good. Nice, solid jazz bass tone and the shielding keeps the noise respectably quiet for single coils.

I did not take my camera with me which was a mistake because this thread has been very photo-rich and the studio's a fun place to shoot, but I was dragging a lot of stuff with me as it is, and birthday parties are crowded places, but how 'bout I make up for it with sound clips in the next couple days once I get the samples mixed?

To hear these basses get wrung out in the most critical of settings and make music was a real treat for me after putting in a lot of time and effort. I think the project as a whole is a huge success. All 3 of these basses will find good homes and make lots of music. My only regret is not having purchased more while they were still available.

(Part 8) Basses for Newbies Bass 1-3

Well, not much to report that I haven't done 2x already. #1 went together pretty smoothly after the fret level.

Here the electronics are soldered together. One thing I did not show previously is the little piece of copper foil under the bridge pickup as well as the little sanded area under the bridge where it meets the wire/copper sandwich. My meter was telling me before that I wasn't getting good contact on the bridge and strings, so I did this to improve that situation on all 3 basses.


And finally, all 3 basses are complete.


(Part 7) Basses for Newbies Bass 1-3

Bugger!!! I cracked one of the inserts on #1 with about 1/16th inch more to go before it was seated. Had to drill and then grind it out.


(Part 6) Basses for Newbies Bass 1-3

I made some more significant progress last night. Fedex delivered my strings. . . very exiting. I got them at http://theperfectbass.com and used the "talkbass" coupon code for a nice discount. Good folks over there.


(Part 5) Basses for Newbies Bass 1-3

I got a lot done on #3 today. . . it's well on its way to being done.

first, I leveled the frets. This neck is one of the straightest I've seen on an SX without any major humps or dips when measured on the wood. I was hoping for a very straight forward fret level. All previous SX basses I've done required the removal of more fret material than I would have liked.

On this bass, frets 3 and 15 were low. . . well, 20 was low too, but I can live with the last fret being a little low.

Here's a couple of pics mid-process showing how I've touched most of the frets except 3 and 15:


(Part 4) Basses for Newbies Bass 1-3

I managed to make a little bit of progress today. . . finished the shielding on #2. This one's going to be the first out the gate.  I am waiting for strings and electronics parts to come in the mail. I ordered some Dunlops in stainless steel as a good quality, low cost string for general duty.


(Part 3) Basses for Newbies Bass 1-3

I leveled and crowned the frets on #2 today. . . I had the bass set up yesterday and thought about what was happening on the fretboard. I would have to deal with a gradual hump in the fretboard from ~4-7 frets, a dip in the fretboard from 13-16th fret and a pretty steep rise at the end of the fretboard at the 20th and 21st frets. I presume the sharp rise at the end of the fretboard could be caused by the neck shim and inserts pulling down hard. With the neck as straight as I could make it with the tools I have on hand, I got started by marking the frets with a sharpie.


(Part 2) Basses For Newbies Bass 1-3

Today, I ran into a bit of a snag as I was trying to sort out the pickguard and control plate repositioning on #2. . the holes on the SX control plate are smaller than the shaft diameter of my new pots, so I decided to drill out the pot holes to 3/8" to accommodate regular large pots.


(Part 1) Basses for Newbies Bass 1-3

The neck pickup on #2 was slightly mis-aligned. I'm going to have to re-position the pickguard and control plate to make it straight.

Doweled the screw holes and waiting for glue to dry:


Beginning the Basses for Newbies Project

I heard throught the grapevine that a friend of mine who teaches bass recently played my cheap SX bass that I had done an extensive setup on and is semi-permanently parked at the studio serving tracking duties. He commented that he couldn't believe the price I paid for such a nice sounding/playing instrument.

When we met up, we got to talking and thought how nice it would have been to have such a low cost, nice-sounding instrument when we first started, and how much frustration it would have saved. I also figured a player can go quite a long way with one of these in learning, gigging, and studio work without "needing" to upgrade.

So, I suggested I build a few more and have some teaching friends keep one on hand and offer these instruments to students they feel might benefit from a nicely set up instrument.

Well, today, I got some packages in the mail and am pretty excited about the whole idea.