Time for another round of studio tests. I have been working on a developing variety of microphone projects lately and have come to discover that good, actionable information about various microphone components is actually quite scarce on the internet. Usually tiny gems of data are scattered all over the internet and buried hundreds of posts deep in often un-related web forum topics. To compound the problem, egos, chest thumping, marketing hype, "trade-secrets", and general online drama often cloud discussions or turn into useless drivel.
Also, due to the infinite range of recording environments and monitoring systems, the often-provided lone audio sample can only describe a condition to a certain extent. One mic is "open". . . well, compared to what? Another one could be "opener". Because of this, I have found relative data to be more helpful, but that requires repetitive, structuring testing in a reasonably controlled way different from regular music production. Even then, concrete conclusions are hard to find and it is difficult to establish a "baseline", but in the end, these devices must be judged and improved by listening and meaningful comparison. So, even if messy and imperfect, we must try.
With that as a framework, I entered the studio earlier today with a trunk full of DIY microphones and prototypes to test and attempt to provide some actionable information for people looking to build recording microphones.
More after the jump.
Nuts, Cables, and Random Observations about Fret Tools
I was a bit tired and tired of basses today, but a package came in the
mail from Redco. I thought I had lost my trusted cheapy Mogami
instrument cable, but it ended up being at the studio. . . but, I had
already ordered parts to replace it. . . 75 feet of Canare L-4E6S Quad
mic cable.
I read on the talkbass.com web forum that if you wanted to get super-duper trick, you could use the twisted pair XLR cables and connect the shield to the instrument end of the cable and not at the amp end. . . essentially, you extend the control cavity shielding all the way down the length of the cable. . .so I thought I'd give it a go.

I read on the talkbass.com web forum that if you wanted to get super-duper trick, you could use the twisted pair XLR cables and connect the shield to the instrument end of the cable and not at the amp end. . . essentially, you extend the control cavity shielding all the way down the length of the cable. . .so I thought I'd give it a go.

Vintage U87 Circuit Clone Microphone Build
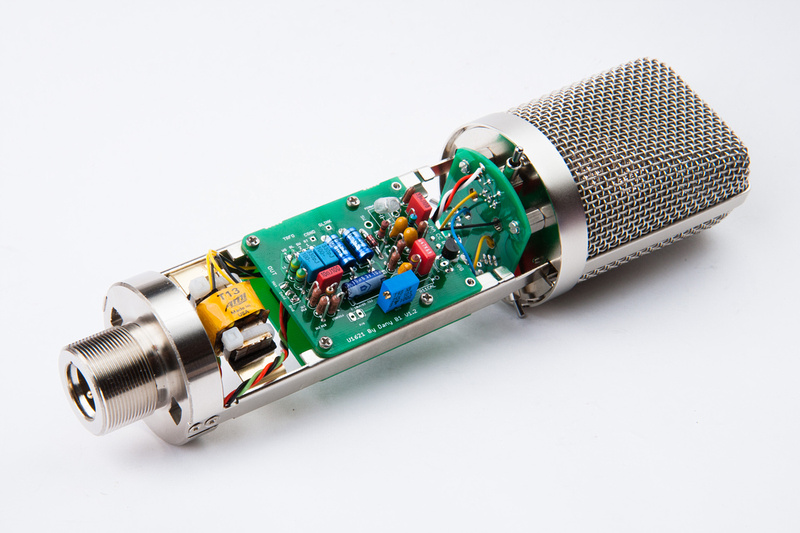
At the heart of every successful recording studio is a closely guarded vault of high quality microphones. The ability to match a high quality microphone to whatever is being recorded is of critical importance to the recording process. Many vintage microphones now cost tens of thousands of dollars and new production boutique microphones while not as costly as original vintage units in good condition also demand a high premium. With the help of some enterprising people in the DIY community, it is now possible with a little bit of research and determination to build quite a formidable arsenal of clone microphones that faithfully reproduce the original vintage electronic circuits. One staple large diaphragm microphone design is the original Neumann U87. In this post, I will build a clone of the original U87 circuit.
Classic Audio Products VC528 Build
After reviewing my in-depth photo documentation of several microphone preamp builds, Jeff Steiger, the owner and CEO of Classic Audio Products of Illinois decided to officially employ my photo-documentation services for his VC528 kit. This post utilizes the photos I made from the official build documentation.
The VC528 is a unique 500 series or 51X module in that it is a "go-between" design. While it is common to find preamp circuits from a variety of vintage consoles in lunchbox form, this module re-creates the rest of the channel strip circuit of the vintage API console all the way out to the channel fader. Many have referred to this module as "audio bacon" because it can be inserted after or before any other outboard device and add the analog goodness of a full frame vintage console at a fraction of the cost and space. VC528 allows for a wide range of experimentation with gain staging when inserted into the signal chain because you can drive whatever previous device hotter or softer than normal and adjust for proper gain with the VC528 before hitting the recorder. Another common use for the VC528 is inserting a pair on the main stereo mix bus. For this application, Jeff offers stereo kits with closely matched resistors for optimal consistency of the left and right channels.
In this post, I will show a complete VC528 kit build from start to finish. An assembly aid document as well as bill of materials, trouble-shooting tips, and calibration procedure can be found here.

Basses for Newbies - Pickup Shootout
Ever since we ran into the unfortunate "SX Effect" distortion problem in the stock SX pickups, I've been on a quest to locate a suitable replacement pickup for the basses for newbies builds. While it could be argued that the stock pickups work just fine for a beginner, one of my design goals is to deliver a bass capable of holding up to all types of situations a working musician may encounter. A real working tool that can be a long-term bass and not require upgrade (at least on the basis of playability or sonics). . . well, ever.
Basses for Newbies - Bass #6
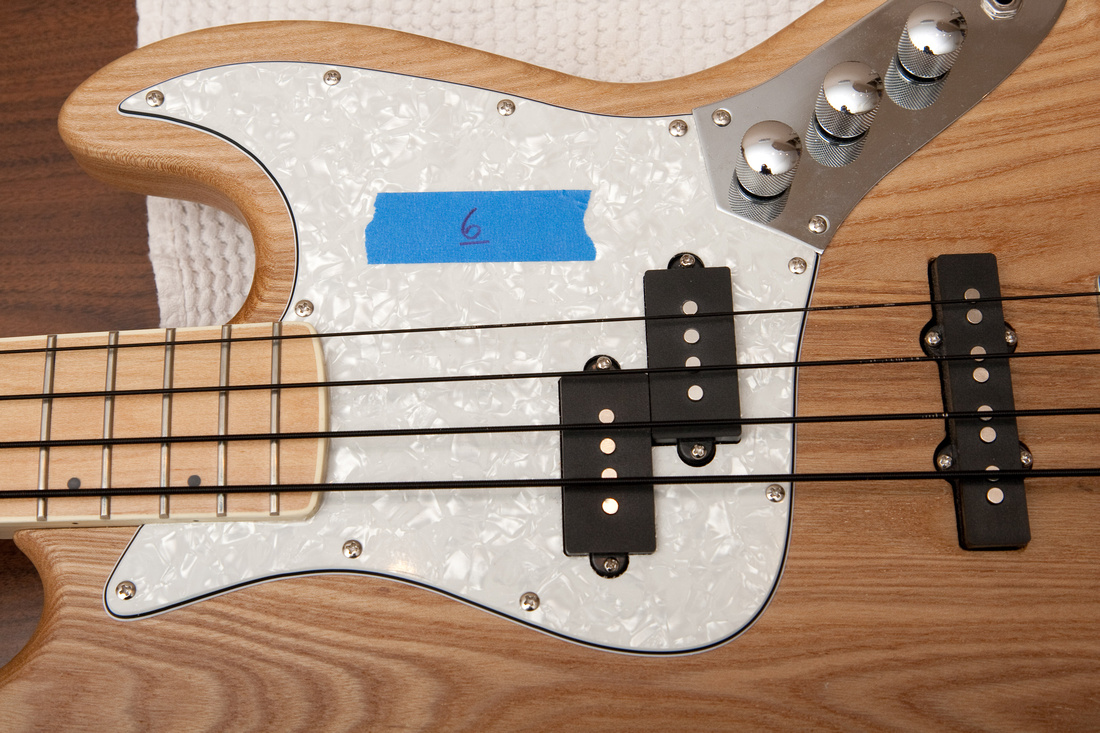
Let's get #6 started. . . back to SX's . I've been doing a lot of jazz
basses lately, so I figured I'd try something different with a P/J.
This bass was the one that's started this whole basses for newbies ordeal. It's been sitting in the studio making its way onto various projects that come through. I leveled the frets already, but think I need to take another look at the level job and probably cut more fall-off. Hopefully this one will be straight forward and fast. Mainly, this bass makes noise so I will try to shield and re-wire. . . and throw in neck inserts. I was debating the series/parallel switch on a P/J, but I think I'll put that in as well just for kicks and giggles. . . see what "super phat" mode sounds like.
Thinking about trying out a GFS p-bass pickup on the neck position and see if the shielding alleviates the hum issues on the stock bridge position SX pickup because the "SX effect" only seems to happen on the neck pickup. If it still hums, I'll have to look into a split coil bridge pup.

IJ Research F76 Compressor Build
The Universal Audio 1176 FET compressor originally released in 1968 is broadly recognized as one of the all time great audio compressors. It seems every major studio has a few of these in their outboard racks and the particular way the FET circuit compresses is distinctive and a "familiar" sound due to the widespread use of the 1176 through the years in the industry.
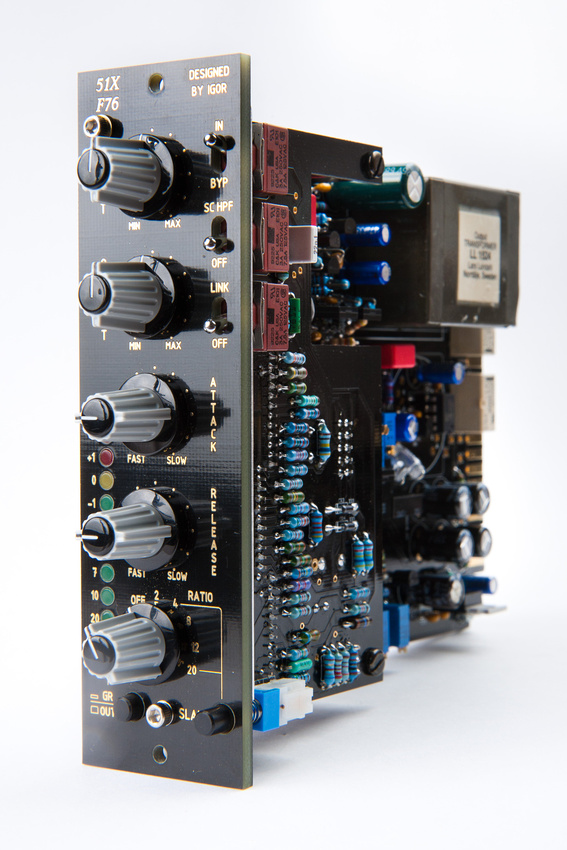
The I.J. Research F76 is a 51X format FET compressor designed around Universal Audio's revision F 1176 with a few very useful added features most notably, the addition of a 2:1 ratio, a side-chain high pass filter, and relay controlled true bypass. The kit also allows for a myriad of build options.
Igor Kapelevich based in Haifa, Israel can only be described as a prolific designer, and he is the mastermind behind the F76 compressor. Igor's primary business is building complete turn-key audio devices for various studios worldwide and his custom work is not cheap, but he is very active in the DIY community and makes his partial kits and PCB's available for purchase as a side business so that DIY people have an opportunity to build some fantastic sounding pieces of audio gear at very reasonable prices. For support and technical questions regarding this project, please refer to the official support thread. To purchase PCB's and font panel/hardware kits check out the IJ Research webstore. Complete kits may be available again from time to time depending on Igor's current stock of parts. In this post, I will try to show a complete build from start to finish.
Subscribe to:
Posts (Atom)