Several online tech personalities have dabbled with low cost water cooling products, but these experiments while providing some helpful information, have never been serious attempts to find a real-world solution that is an actual viable option for long-term use on high end gaming computers. For the most part, these have been parody in nature or utilized some parts with critical flaws. In the end, the conclusions that are drawn reinforce the prevailing opinion. . . Do not do it! I respectfully disagree and would like to argue my case.
Over the past couple of years, I have been building, experimenting, and learning about all types of gaming PC's and one of the funnest discoveries has been firing up a system under custom loop cooling and seeing silly-low temperatures across the CPU and GPU which allow for bigger overclocks that can extend all the way up to voltage limitations as opposed to thermal ones. I would love to put that thrill within reach of the average gaming PC builder.
It is my belief that highly effective, reliable, expandable, and easily repairable custom loop water cooling can be done at a much lower cost than the majority opinion in the PC community. It could even be characterized as "affordable". . . a word seldom if ever associated with custom water cooling. After a lot of testing, I present here what I feel to be a META for putting together the cheap, Chinese water cooling loop.
Finding good data about some of the components that I am interested in proved extremely difficult. For the most part, people are advised to "just spend a little more" and buy a name brand solution, but in the world of budgeting a custom water loop, the reality is death by a thousand cuts. An extra $5 for each fitting, and extra $30 for one of the best go-to pumps, an extra $8 per fan, and you can very easily spiral out of control to a $400-$800 price tag for a cooling solution which puts the entire endeavor out of reach for anyone who is actually constrained by their budget. Fortunately, the reverse is also true, but seldom discussed or advocated. With some reckless experimentation and careful testing for validation, we can claw back at the overall loop cost piece by piece.
Speaking of testing and validation, while I am pretty new compared with some people who test and operate in this tech space professionally, I have made an honest attempt at long-term testing of the critical components to try and validate my recommendations, and I will briefly describe some of the test systems before diving into a full component recommendation.
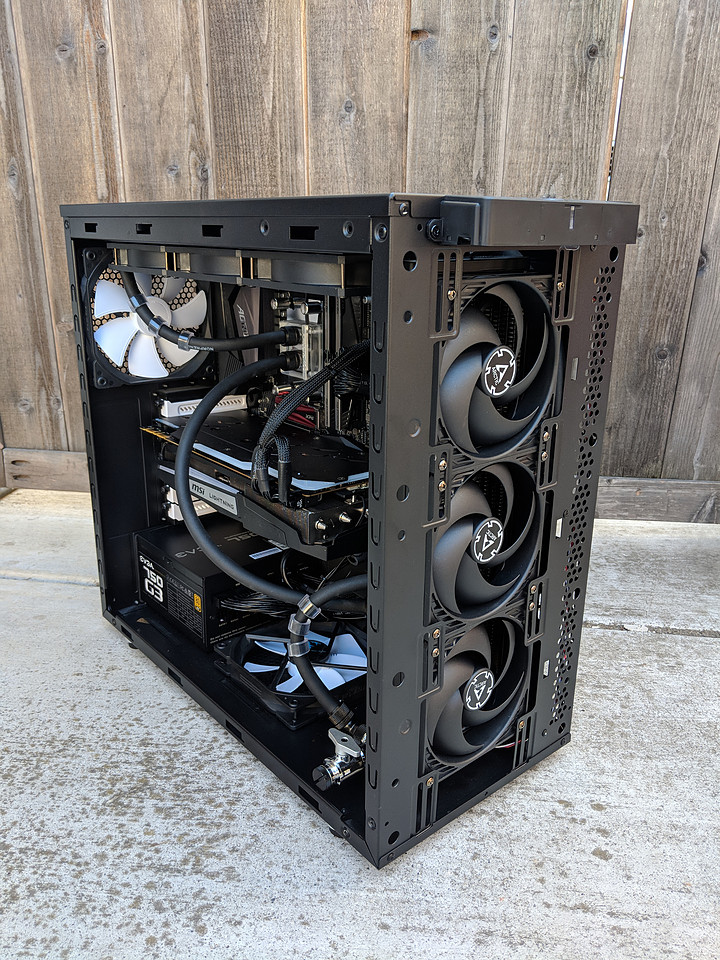
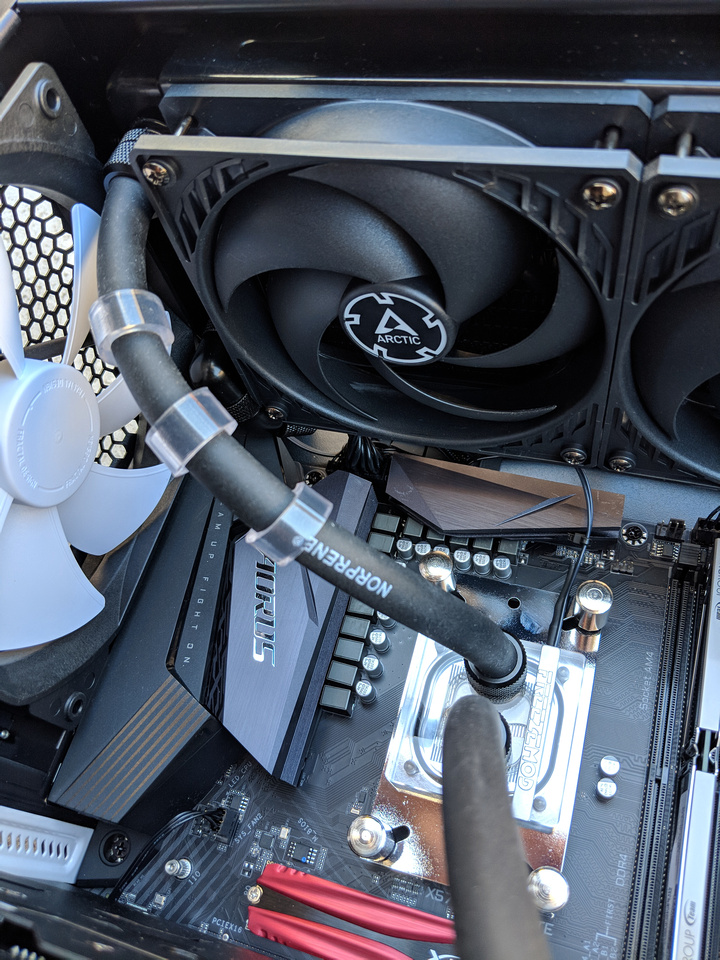
The first PC illustrated here is my daily driver which has gone through three major upgrades on the same loop. The original configuration pictured here is running an X5680 CPU and a GTX 980TI with water cooling on the CPU, GPU, and northbridge. This was my first stab at the cheap-Chinese loop META and it failed to be cheap due to the small form factor case which required far too many fittings to functionally route the loop and did not allow for large enough radiators to maximize cooling performance for the dollar. But, while it failed the "cheap" test, it worked well for noise and cooling performance especially given the tiny form factor.
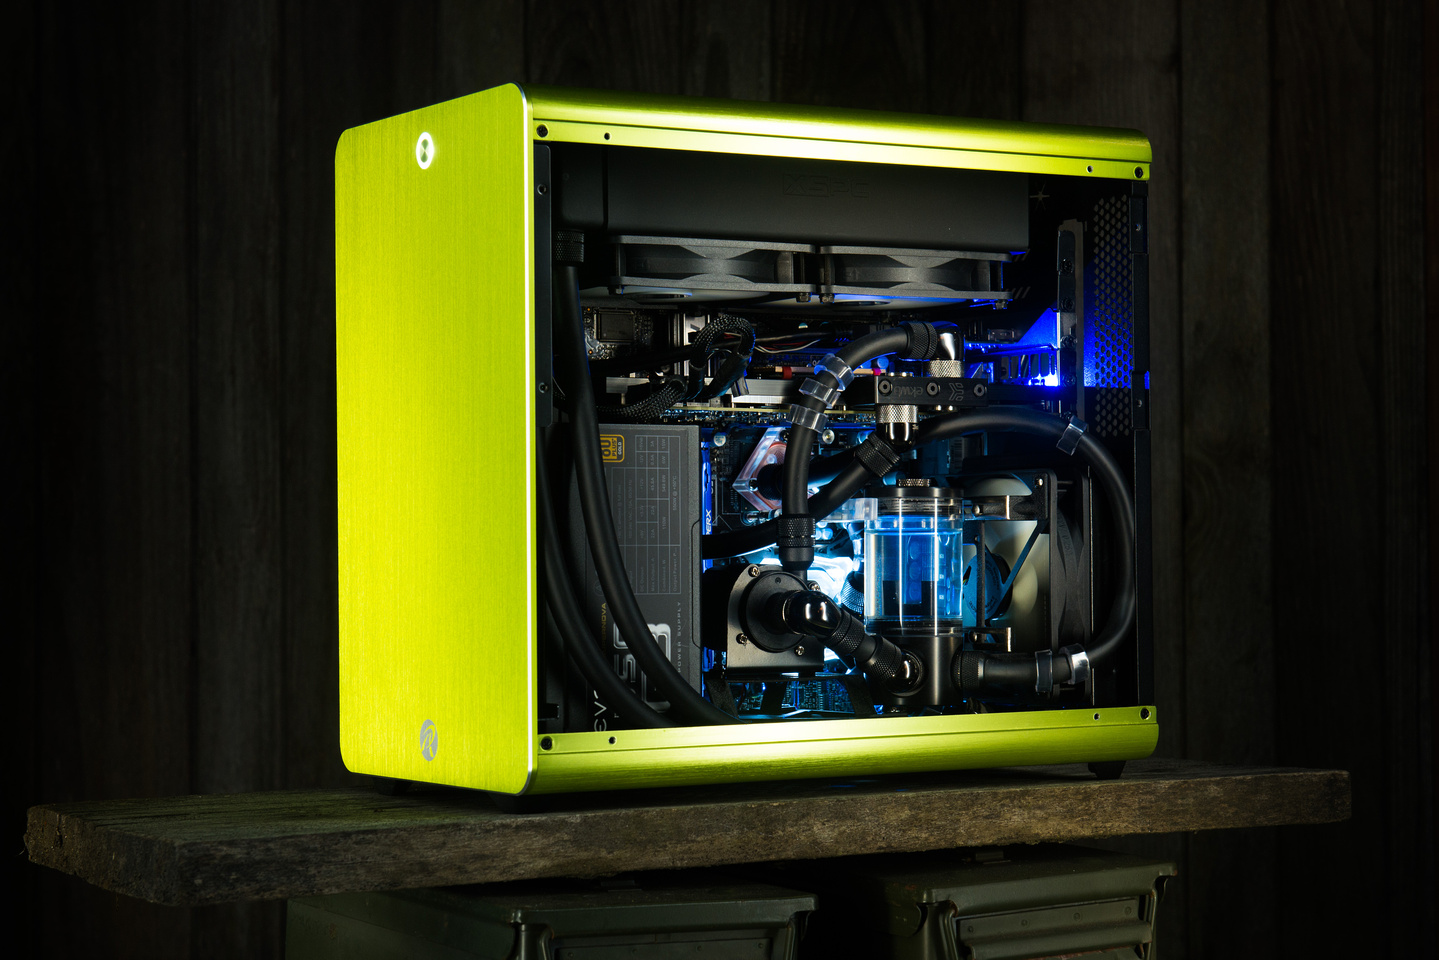
This build was subsequently reconfigured to a Ryzen 5 2600 and MSI GTX 1070 Seahawk EKWB, which was miles more energy efficient than the original configuration and ran amazingly cool, to its current configuration with a Ryzen 5 3600 and an EVGA 1080TI hydro copper. I use this machine daily, and I am typing on it right now! The core of the cooling components remain original and of the "cheap Chinese" variety.
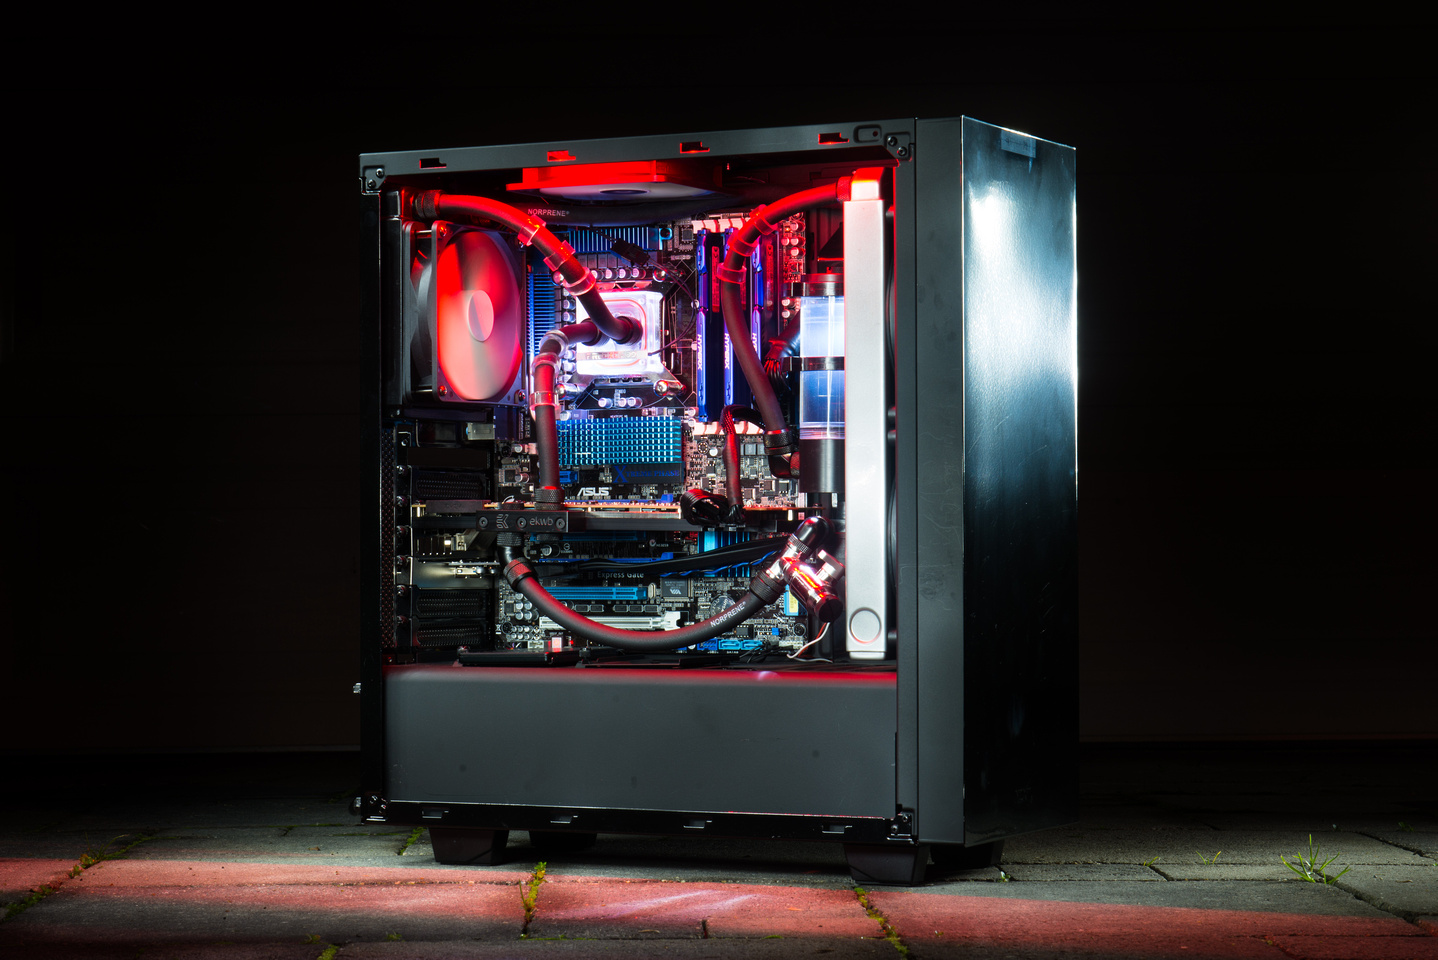
My next example is another X58 PC with an X5675 and another GTX 980TI. This system pulls upwards of 550 watts from the wall under gaming loads at the 4.6Ghz overclock which is quite a significant thermal load to contend with. The price performance for the cooling system is definitely more on target as the case was larger allowing for fewer fittings to be used, but the 280 radiator was sourced used and the outstanding BeQuiet silent wings 2 140mm fans that push air through the main radiator were acquired on a one-off deal for $5 each, so I do not consider the configuration readily repeatable, but the build confirmed in my mind that a truly affordable configuration could be achieved. Having tried a few different CPU blocks, I started figuring out a few poor performing options and a few gems.
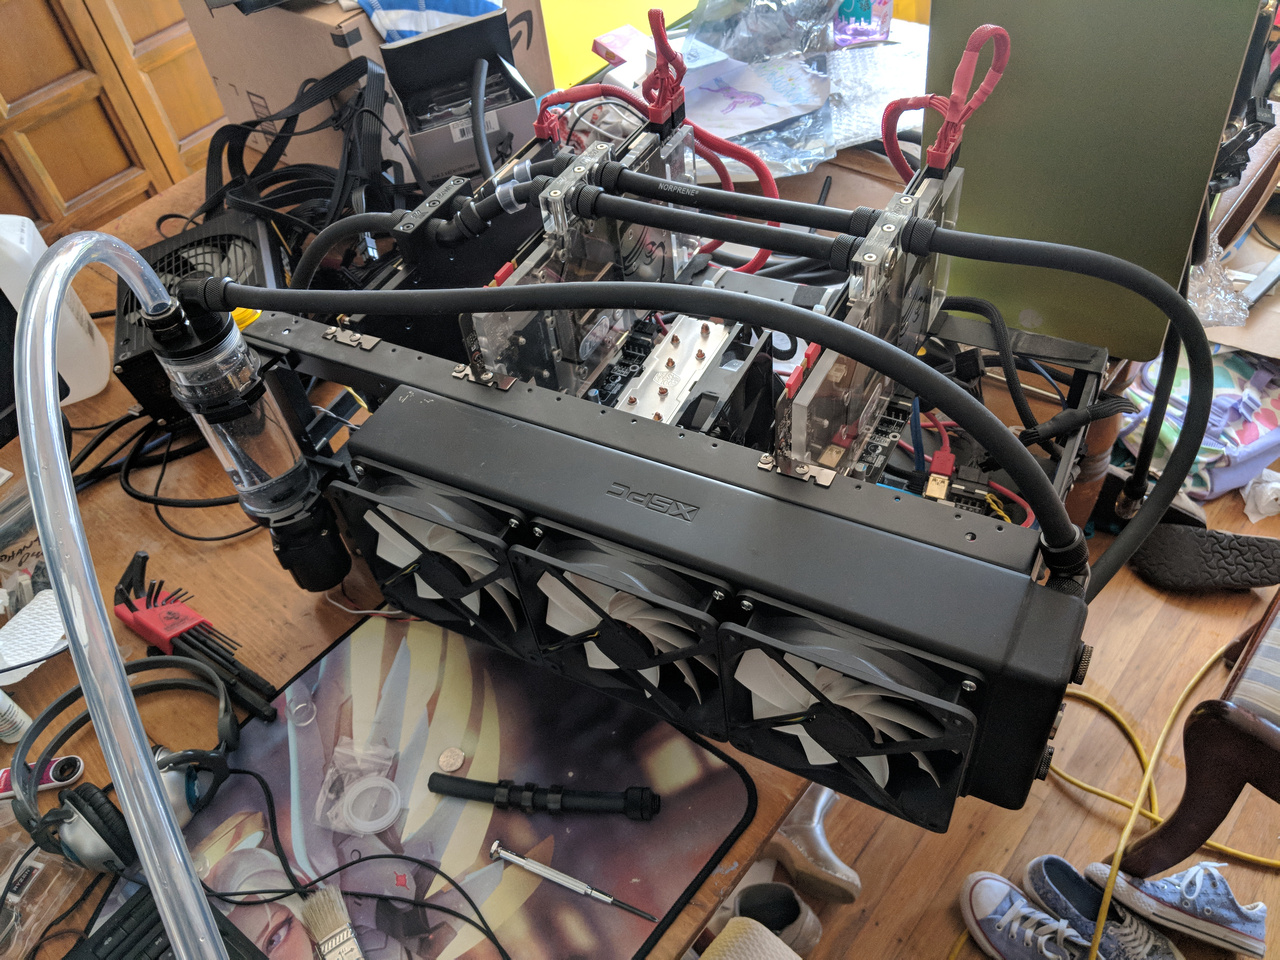
The next system is my main reliability test. This is a small mining rig with three GPU's on the water loop connected to a 360 radiator. This system has been running 24/7 for nearly nearly 2 years now at full thermal load. Up until about two weeks ago, it was running two GTX 1070s and one GTX 1080TI on the water loop. It is open air and lives in my living room so I know the noise profile at full load is quite acceptable. After running with zero maintenance for the entire time, I recently overhauled the loop to yank the 1080ti and transfer it to my daily driver replacing it with a 1070 on the rig. I also changed the tubing from clear to rubber as the tubes were getting severely clouded and gunking up the internals. I was also starting to see algae growth at the top of the reservoir probably because the system sits on a window sill exposed to direct sunlight. This system continues to run 24/7 on the same original pump and fans with no problems yet to report.

My primary loop testing concern for the mining rig was to verify that the pump would be reliable and reasonably quiet long term. There was simply no information online showing more than a few minutes duration test of this pump. While a sample size of 3 units is not comprehensive by any means, it is miles better than no data whatsoever, so hopefully I've uncovered something reasonably viable.
I preempt my description of my recommended META parts with these stepping stone examples because I wanted to show that I have been putting real components under long-term testing to validate my specific parts recommendations, and I know the lynch mob will probably be coming after me for trying to persuade people to go for lower cost solutions!
With that out of the way, let's just dive right into the heart of the matter which is how cheap are we talking about here?
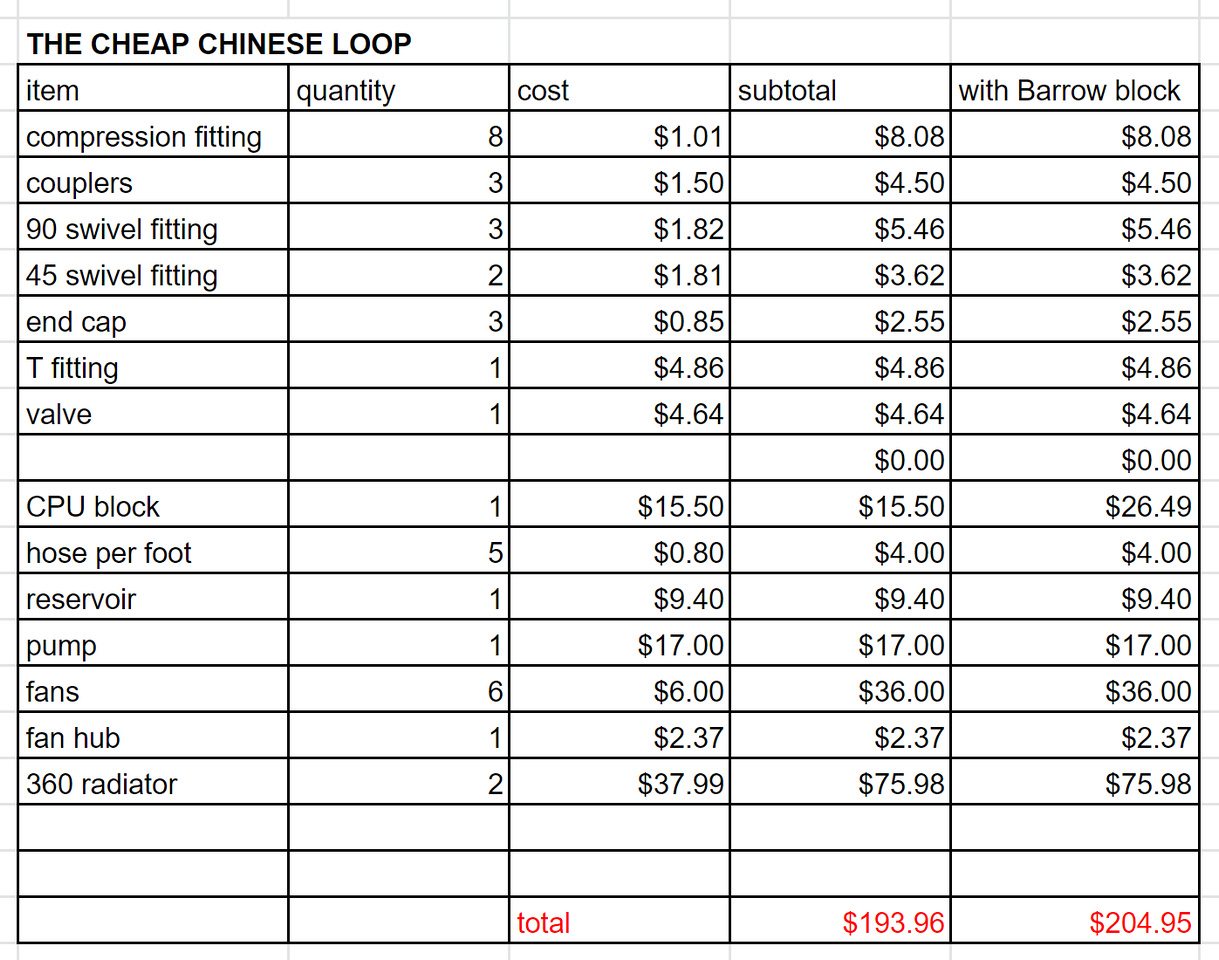
The test system that I assembled here is a CPU only loop with two 360mm radiators. From a price to performance perspective, my goal was to land in the ballpark of a high quality 360 AIO cooler but be in the performance and reliability ball-park of a top tier custom loop solution. Generally, 360 AIO's range from $120 to $200. This cheap Chinese loop solution is right around $200, but if we were to delete one of the radiators, two fittings, and 3 fans, we would be right at $135.95 and directly cost comparable to a mid-level AIO. The reason I decided to use two radiators is to demonstrate that the custom loop can scale cooling efficiency dramatically which an all in one solution cannot do. Two options are represented in the cost breakdown, and I will explain in more detail later, but I ended up testing two different CPU waterblock options and I found both to be viable and interesting.
Most of the core water-cooling specific components were purchased from AliExpress.com or Ebay.com . The way these cheap Chinese products are distributed is one or several factories produce them and it is very hard to figure out where that actually is or if multiple factories are making the same spec parts, but they are then sold through hundreds of different companies and sellers that may or may not apply their own branding to the product. In the end, if you look long enough through AliExpress, you will find the same item appearing over and over again under different branding in different shops. Once you learn what the item you are after want looks like and zero in on the commonly used descriptions, you can search for the lowest price. Pricing shifts all the time, so treat my list as a guideline.
At the heart of the cooling system is the pump, and I'm using an SC-600 pump. I do not even know who the actual manufacturer is of this pump, but a search in either Aliexpress or Ebay for "SC-600" will get the ball rolling. I have purchased these through 3 different vendors and my experience has been good so far on all three samples. The cheapest mounting option is coupling the pump directly to the bottom of the reservoir which saves a few fittings and brackets, so that is what I am using. This certainly does not move as much water or run as quiet as a premium Laing D5 pump, but I feel it moves enough water, is quiet enough, and in the 3 samples I have used, is reasonably reliable. The low cost also allows for a spare to be purchased for minimal down-time in the event of a failure.
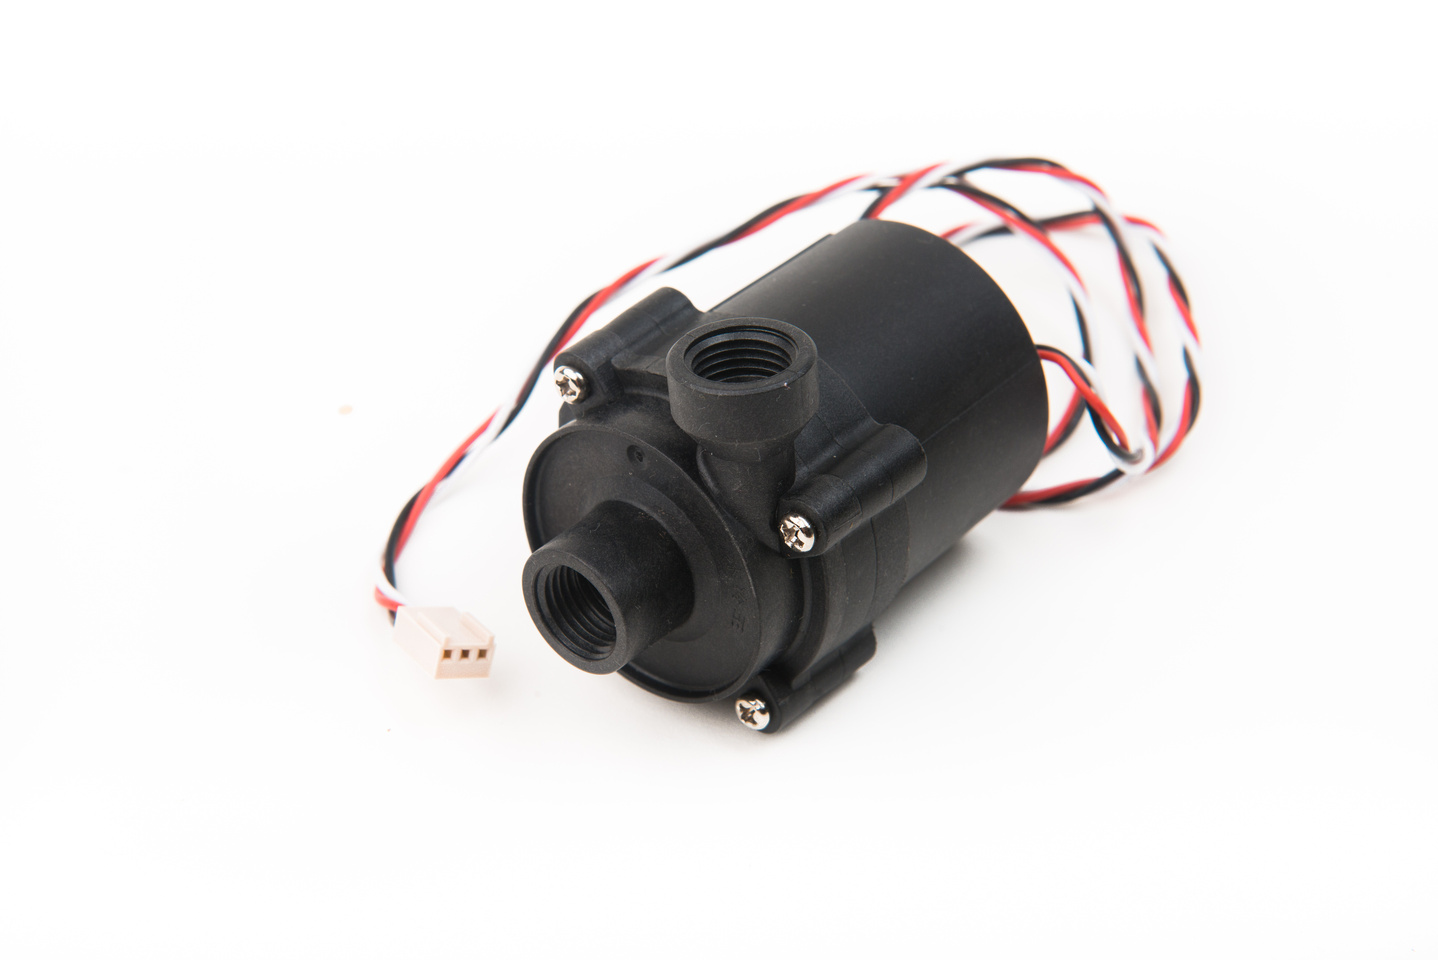
NOTE!!! I would not recommend plugging this or any pump directly into your motherboard's CPU fan header even though the connector fits. In the past, I have cut the power leads off of the 3 pin header and crimped on a Molex connector to access 12V directly from the PSU, but in this build, I connected this pump to my PWM fan hub which is powered directly from a Molex connector. The center port of the pump is intake and the outside port is exit.
For head dissipation, I am using two 360 copper radiators. The cheap radiators from China seem to be regular 25mm thickness 120, 240, 360, and 480 units. 280mm radiators are very difficult to find, and thicker core radiators are very expensive, so the META is to use 120mm based units. Because cases that fit 480 radiators are rare, large and expensive, the 360 hits the optimum level of cooling performance per dollar for a budget. Another consideration is thicker radiators or push/pull solutions yield diminishing returns so the the best way to go is to run standard thickness radiators and as much of it as practical. So, to optimize performance, I went with the reasonably priced (I got it for $60 on sale) Fractal Design Define S case that can accommodate two 360 radiators. As I see it, any copper radiator if properly maintained should last a lifetime in PC application, and it can move from build to build as needed so I went with copper instead of the cheaper aluminum options to avoid any question of galvanic corrosion associated with mixing different metals in the loop. These two radiators were the cheapest copper 360mm units I could find on AliExpress and were sourced from two different vendors. The paint is different between the two. One is glossy and one is matte. No guarantees what flavor will arrive in the mail.

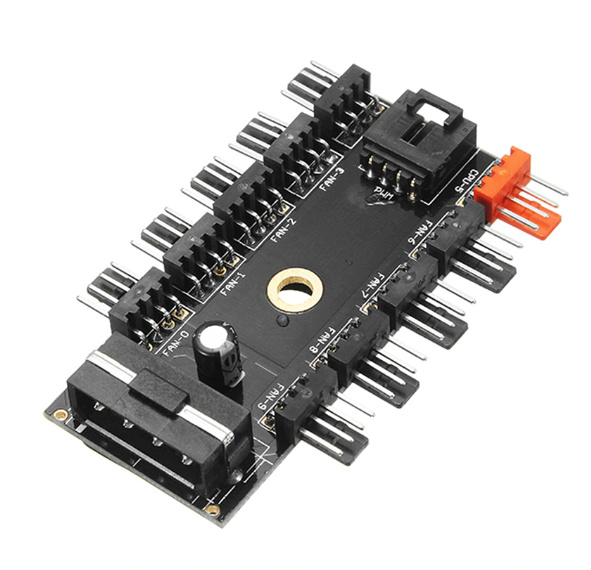
The fans I am using are the relatively new Arctic P12 PWM fans purchased in 5 piece "value pack" from Amazon.com. I have used dozens of the more established Arctic F12 PWM fans in all kinds of builds also purchased in "value packs" five at a time. I have purchased from Amazon.com, Newegg.com, and Ebay.com at various times depending on who has the best price at the time. All of the precursor cheap loop builds described above used the F12 fans. They carry a 6 year warranty, offer mid-range performance in open air, radiator, and air cooler applications, are very cheap ranging from $4.50-$6.50 each in the value packs, and run very quiet when set to low and medium PWM speeds. While a premium fan like a Noctua could push more air, the overall configuration that I am using is robust enough to not really need that extra boost to be extremely effective, and I will hopefully be able to run well under maximum fan speed even under heavy loads. Another advantage is these fans can be chained together directly if needed, but I usually install a PWM fan hub also from AliExpress so that I power my fans directly from the power supply and tap the control PWM signal only from the motherboard. The side benefit is I can also easily grab power for lighting, pump, and other things from the fan hub as I have never needed all 10 connections on the hub for fans. Another really nice note about the manufacturer is, I recently received one Arctic F12 fan which was not working correctly and had unusual bearing noise. Arctic immediately sent out a replacement fan without requiring a physical return of the defective fan (shipping would cost just as much as the fan) so my experience with the company is that they stand behind their product and do not play games with their warranty policies.

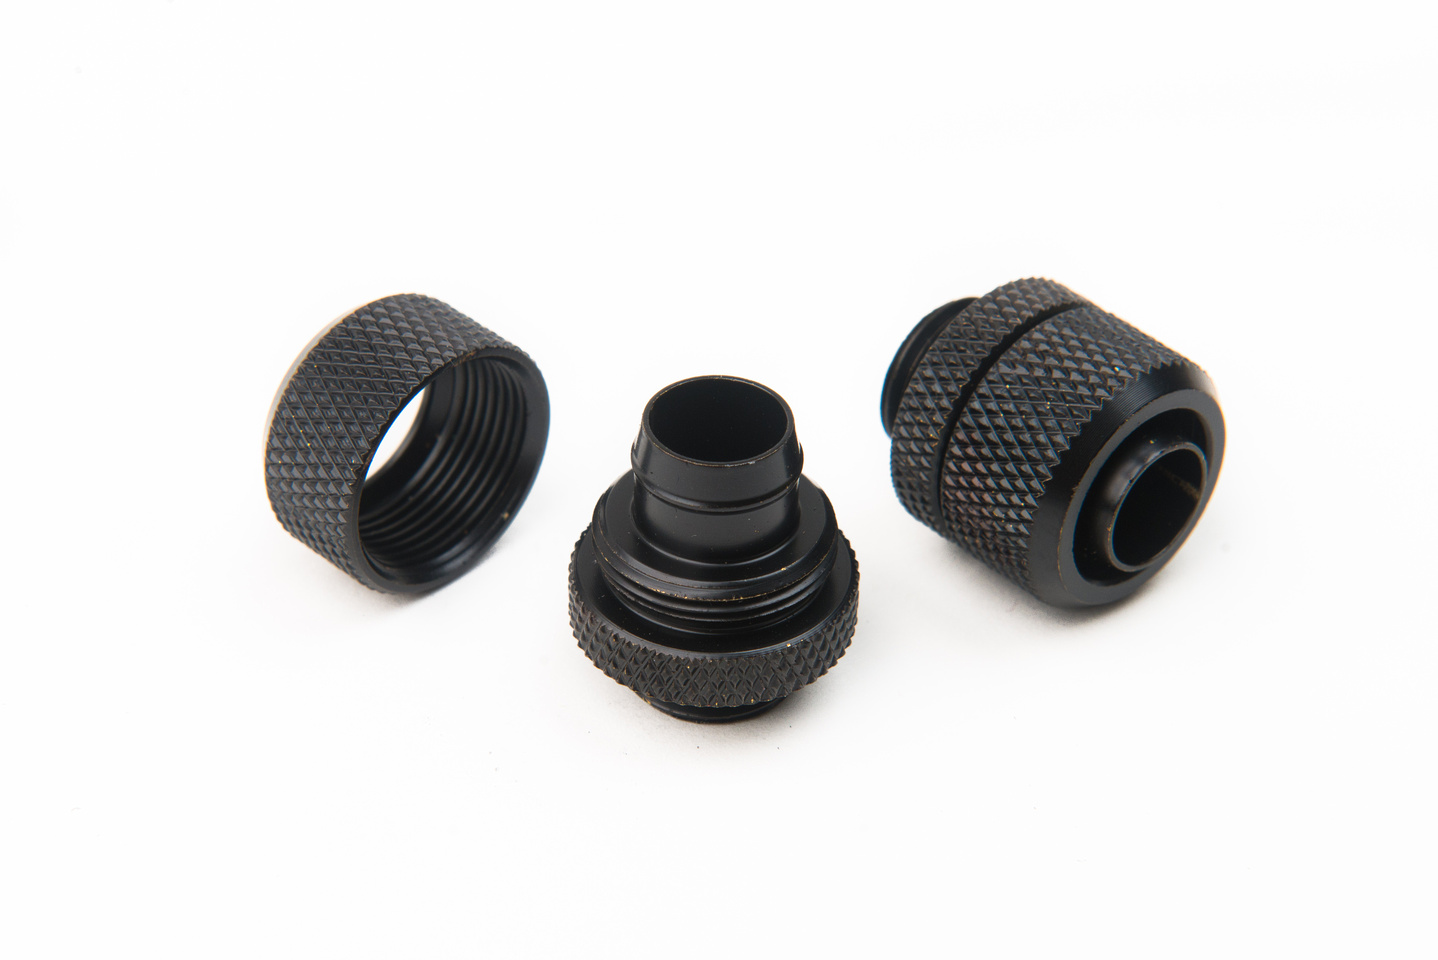
Connecting everything together are G1/4 thread 3/8" ID 1/2" OD compression fittings for soft tubing. These come in silver and black flavors, and to my eye, the finish quality on the silver is just awful, so I'm opting for black. This fitting choice for my cheap loop META is driven primarily by price. At around $1.00 per fitting, they really drive down the overall system cost. I was looking for something functional, reliable, and easy to use at the lowest possible price point. This compression fitting design is simple and tolerant to looser machining and quality control. Other sizes are available but are much more expensive. After three builds and multiple system changes on these fittings, I feel they are highly reliable and durable. As with most of the items I am using, these fittings are found from tons of different vendors on AliExpress and Ebay. I've purchased from multiple vendors and the only major difference I have seen is some come with a soft green O-ring seal and others come with a harder black rubber seal. Make sure to get the black rubber seals as they give you more adjustment wiggle room when tightening everything down. The green ones tend to "smear" if you over-tighten and the rings deform. Also, if you don't tighten the green ones enough, they are prone to shift. I find harder black rubber O-rings are easier to work with. For end caps, the green ones work perfectly fine. If I get a batch with the wrong seal type, I shift the green O-rings over to the end caps and put the black O-rings on the compression fittings and angle fittings.
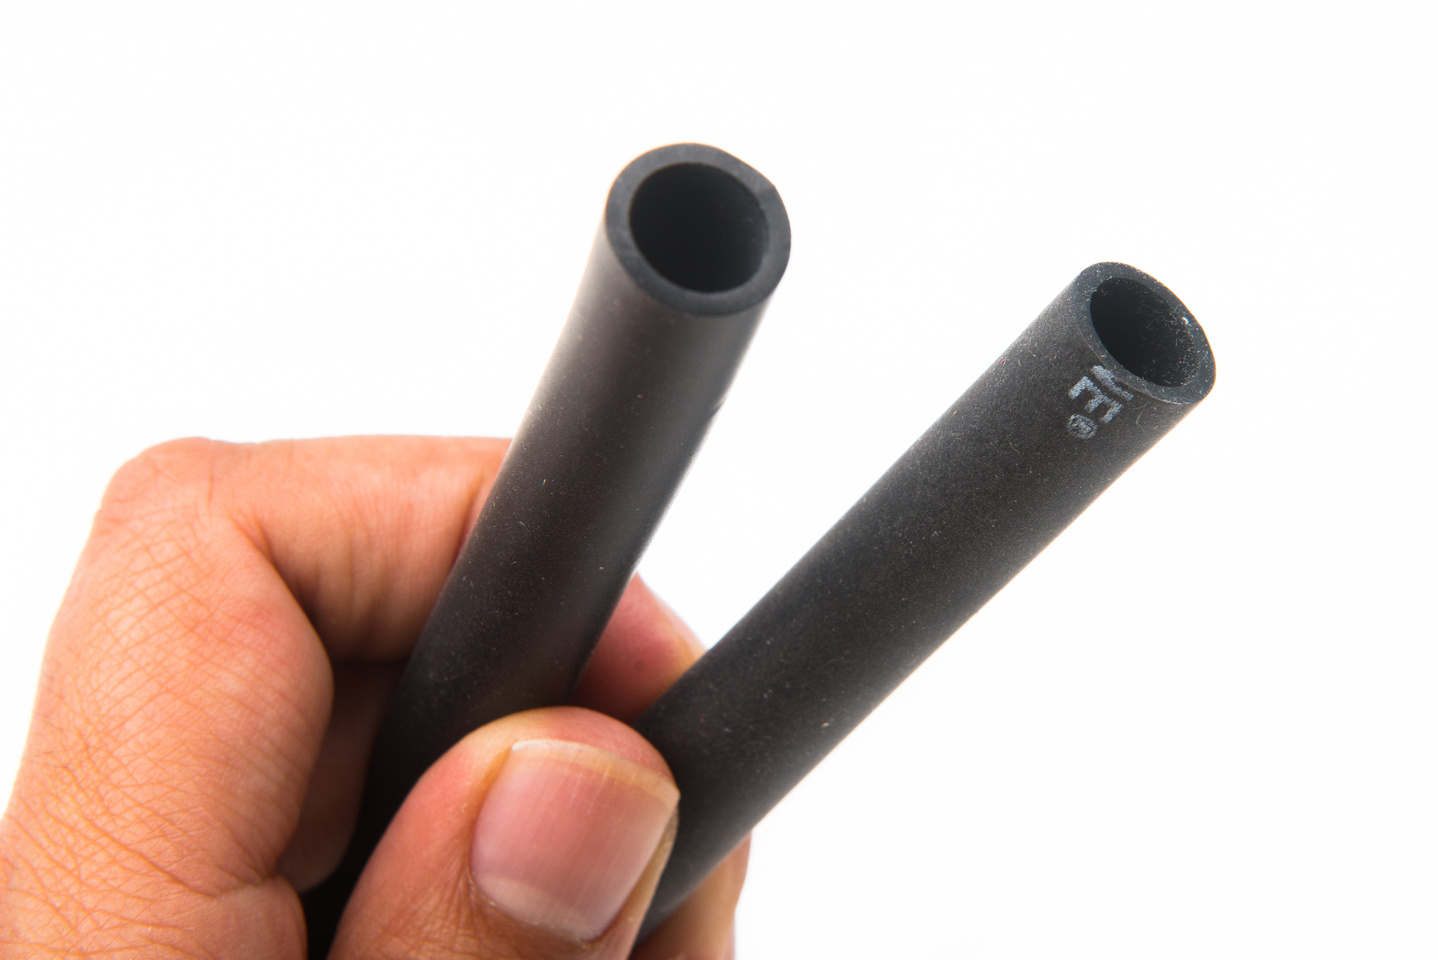
For tubing, I am using 3/8" ID and 1/2" OD EPDM rubber tubing and/or Norprene tubing of the same dimensions. I sourced mine from McMaster-Carr Supply Company and it is sold by the foot. The EPDM is softer and more flexible while the Norprene is tougher and a bit more stiff-walled. Both types have worked well and I honestly don't have a preference. In a small case with tighter bends, the EPDM works better, but in a large case, it makes less of a difference in that regard. I do find EPDM to also grab tighter to the compression fitting although I have had not problems whatsoever with the Norprene tubing coming off of the compression fitting after it is tightened down. I opted for rubber type tubing because all clear, flexible tubing has plasticizers inside that eventually leach into the water and gunk up the water in the system. This is a non-issue with rubber tubing, and we have the option to run robust ethylene glycol based coolant or even low-cost long-lasting automotive coolant without any problems or adverse reactions with the tubing. Over time, my experience, and the prevailing consensus is that clear flexible tubing will cloud and discolor over time, and I like sticking with low to no maintenance solutions that can run maintenance free for years.
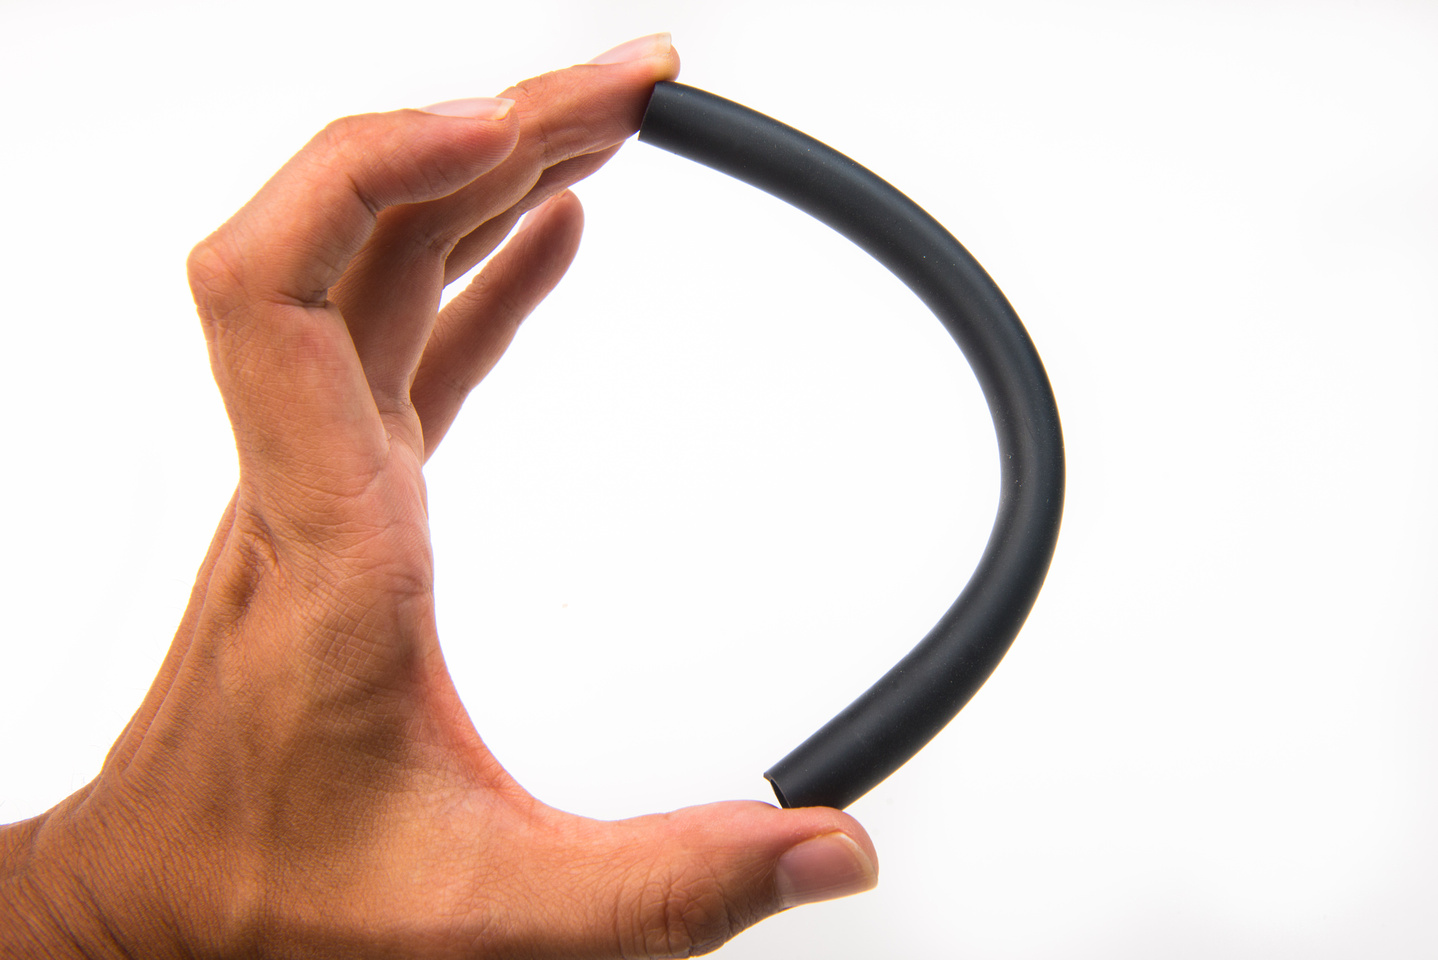
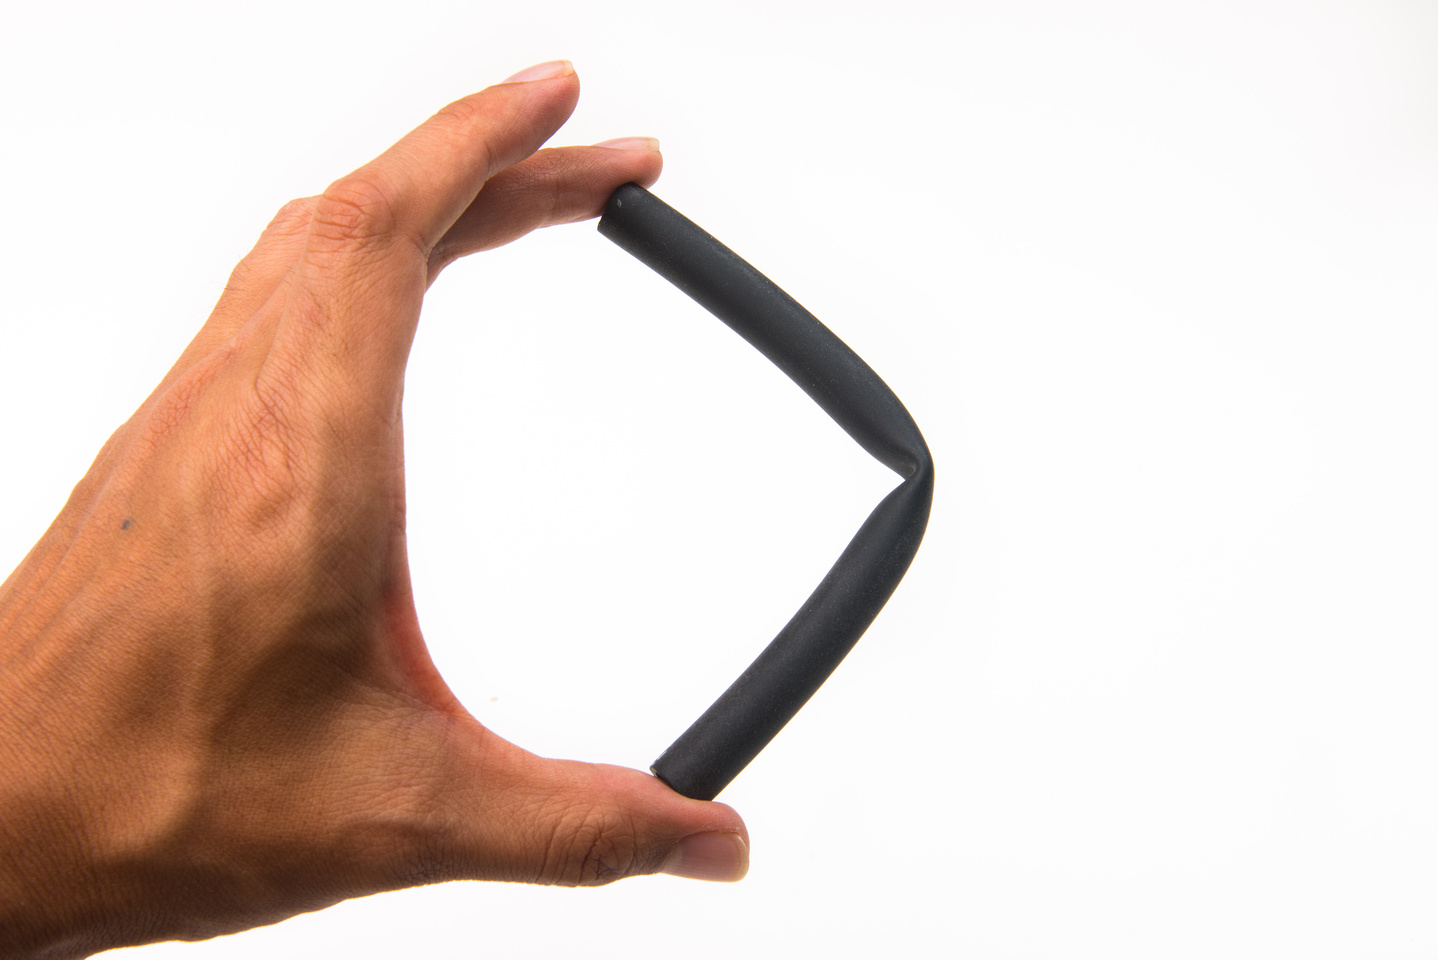
The biggest down-side to this tubing size is the thin tubing walls. This causes the tubing to kink pretty easily and I cannot make very tight turns in the loop. Here we can see EPDM at just about maximum bend radius before folding.
There are many ways to deal with this problem, but the cheapest way I found to prevent kinks in the middle of the inevitable bends in the system is to use a short length of clear 3/4" OD 1/2"ID tubing and cut a bunch of little rings out of them with scissors.
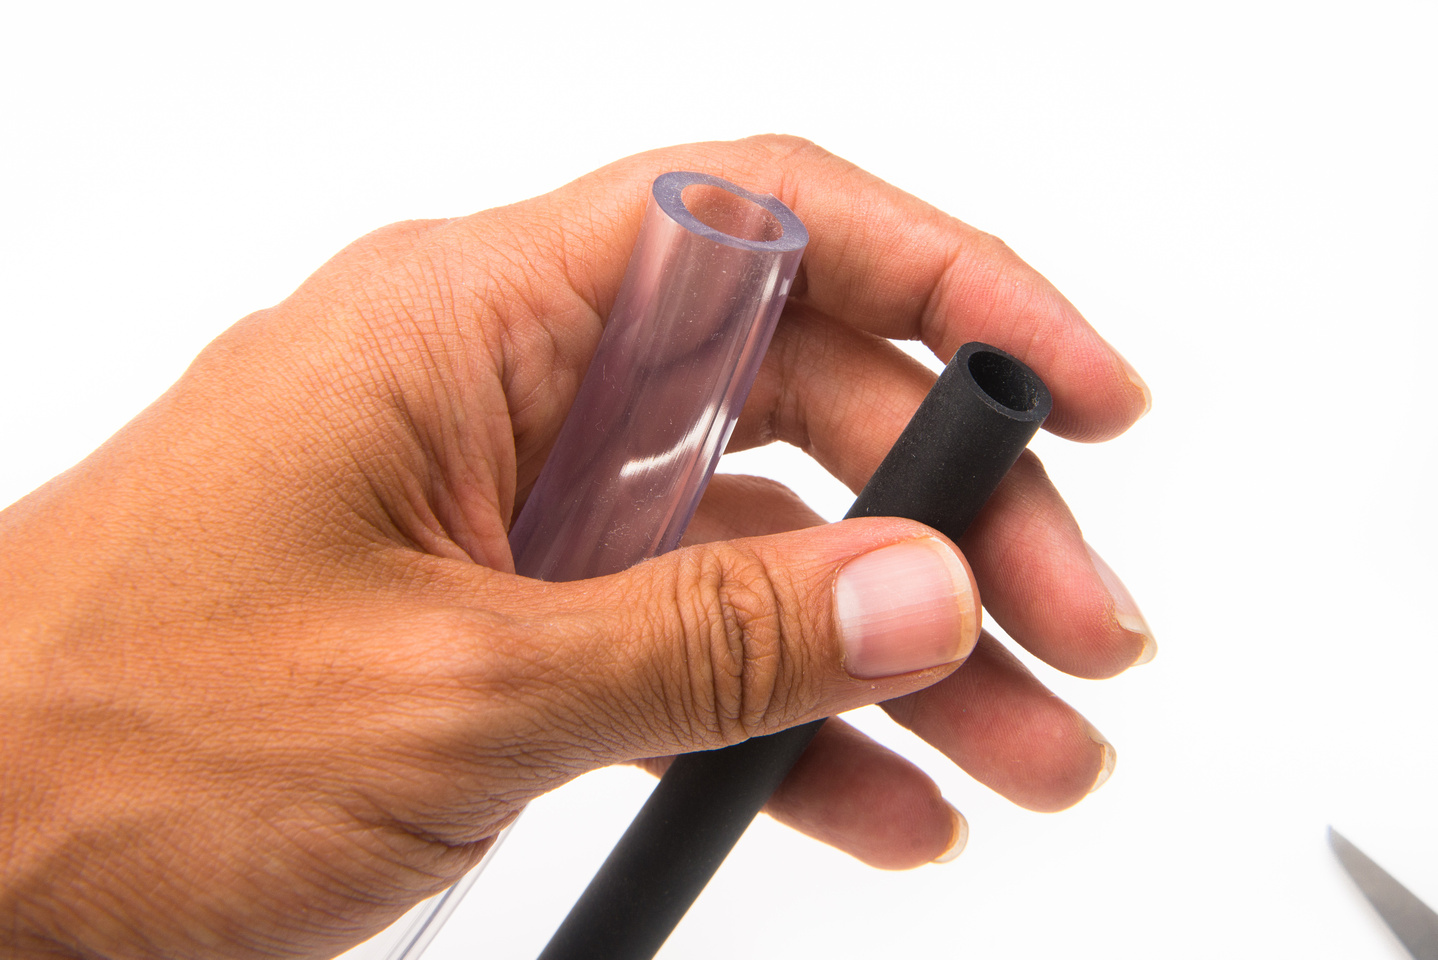

These rings can then slide over the top of the rubber 1/2" tubing and we can position them where needed in the turn to prevent the tubing walls from collapsing.

We really don't need much of the 3/4" x 1/2" clear flexible tubing so the cost is negligible. But in the inevitable situation where we cannot make the required turn in the case with our flexible tubing, we can use 90 degree and 45 degree G1/4 thread swivel fittings. At around $1.80 each, these are nearly double the price of compression fittings, so using a large, spacious case with multiple routing options will help reduce the number of swivel fittings required in the loop, but these are still cheap enough that I keep a stash of each type on hand just in case. AliExpress has these along with couplers and end caps. I usually use the search terms "g1/4" and "90" or "45" to find these on the website. Again, these should be available from multiple vendors so shop around for the best shipped price from Aliexpress and Ebay. Again, be aware that these sometimes come with green seals. Most of the time the product photos will show the differences, but the photos do not always match the delivered product.
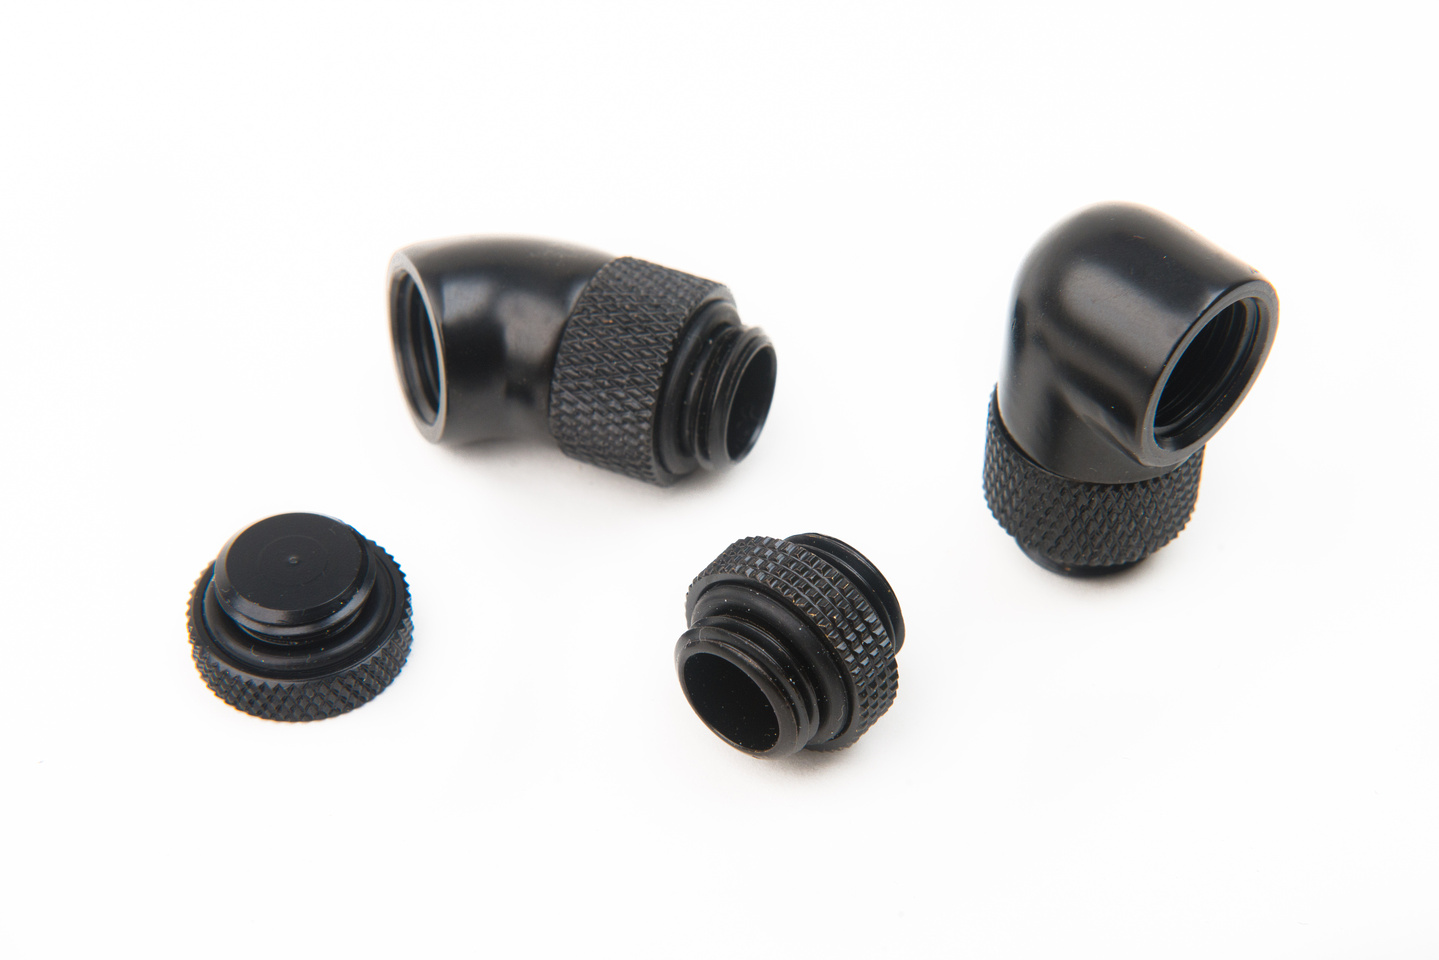
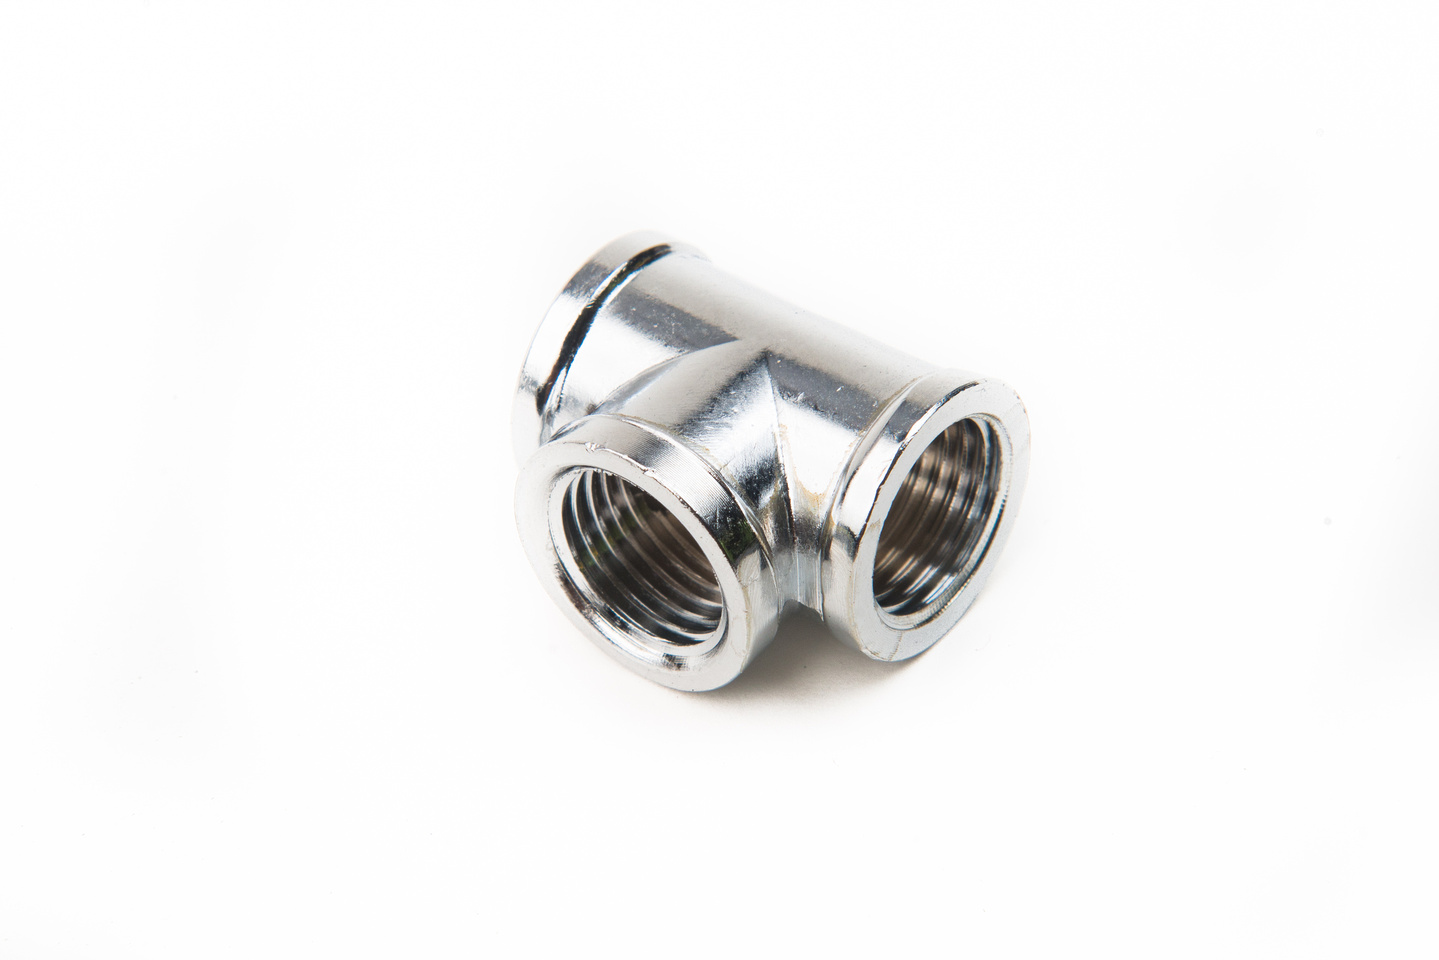
I also found a T-fitting and drain valve on AliExpress.

The cheapest options I found for reservoirs are acrylic 50mm diameter tube type units with POM plastic top and bottom caps. Larger diameter tube type reservoirs are available, but again, they cost a lot more, and at the end of the day, the reservoir just needs to hold the water and not leak or chemically react with the coolant. The type that I am using in this build has a single fill port on top and the main intake and exit ports are at the bottom of the reservoir with a divider plate to divert bubbles out of the flow path.
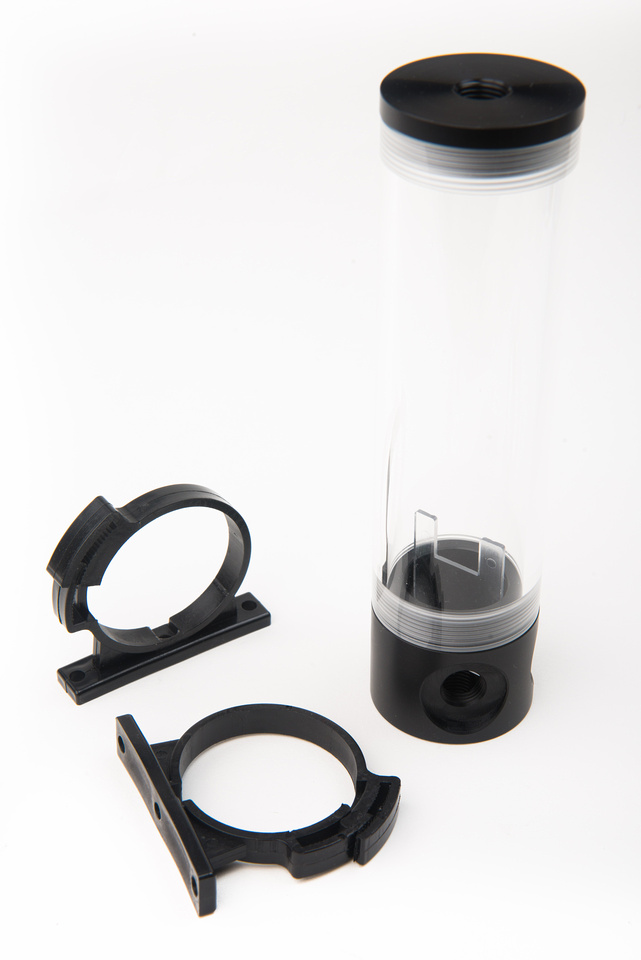
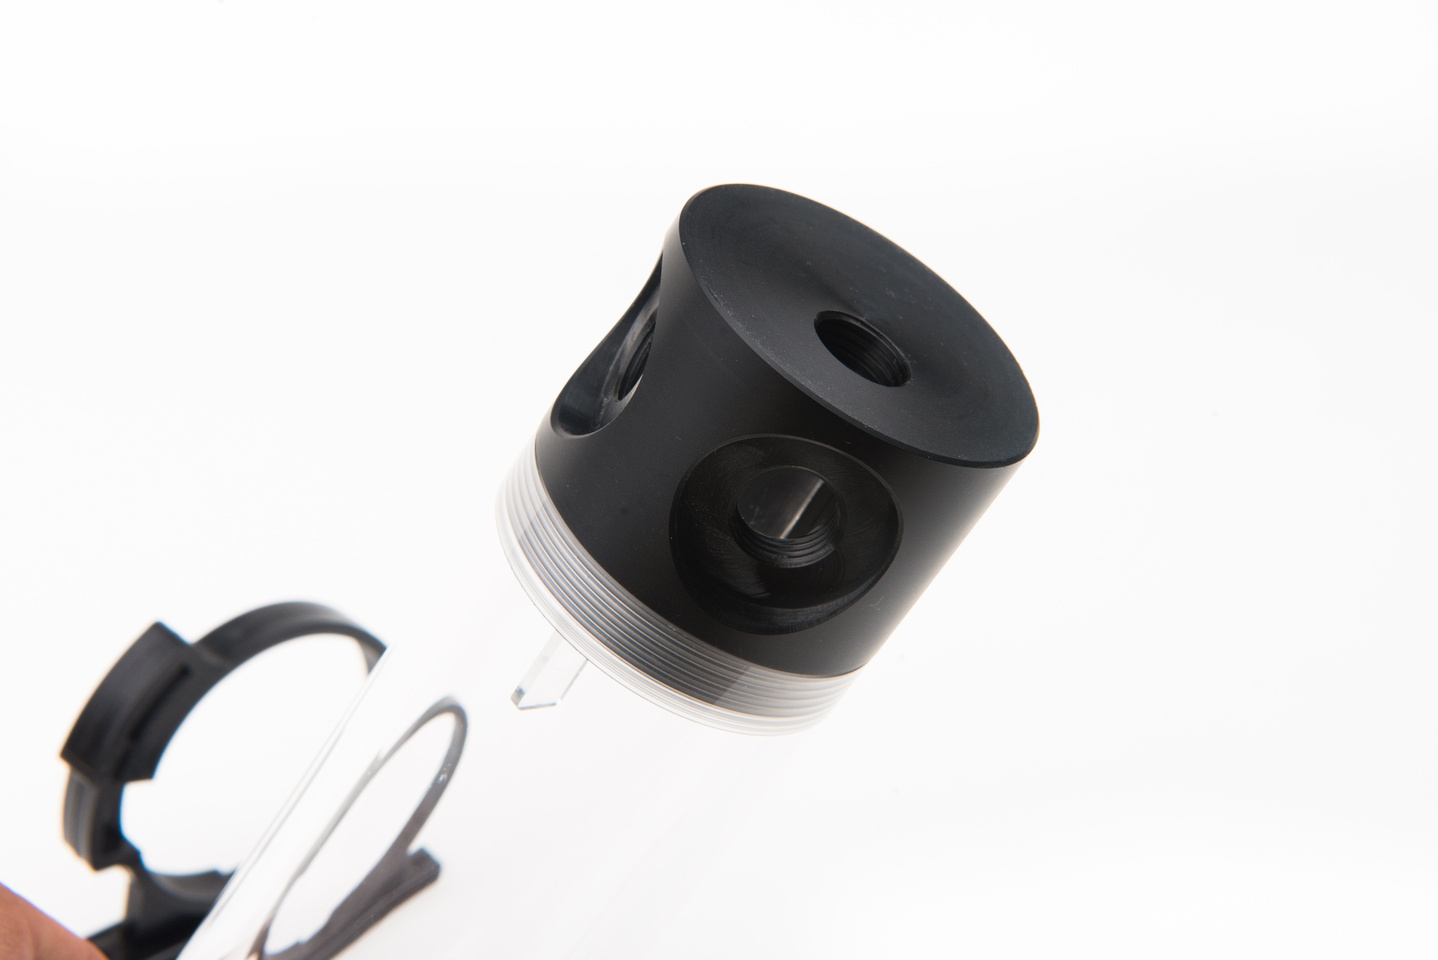
These 50mm diameter reservoirs come in various tube lengths. I will be using a 190mm length tube. Taller tubes are available, but jump up in price, and I want to stay with the cheapest options that work. These reservoirs also come in two different water flow designs. There is the bottom feeding type that I am using here, and a kind with an intake tube at the top of the reservoir with a little "straw" that sticks down from the top cap along with two ports at the top. One for intake (with the straw attached), and one for fill port.

If using the type with the top intake and tube, use a longer overall tube length because going with a short reservoir in that configuration will have bubbles pass straight down through the pump and have a hard time bleeding the loop. If you must use a very short reservoir, go with the bottom feeding type (right side in photo above).
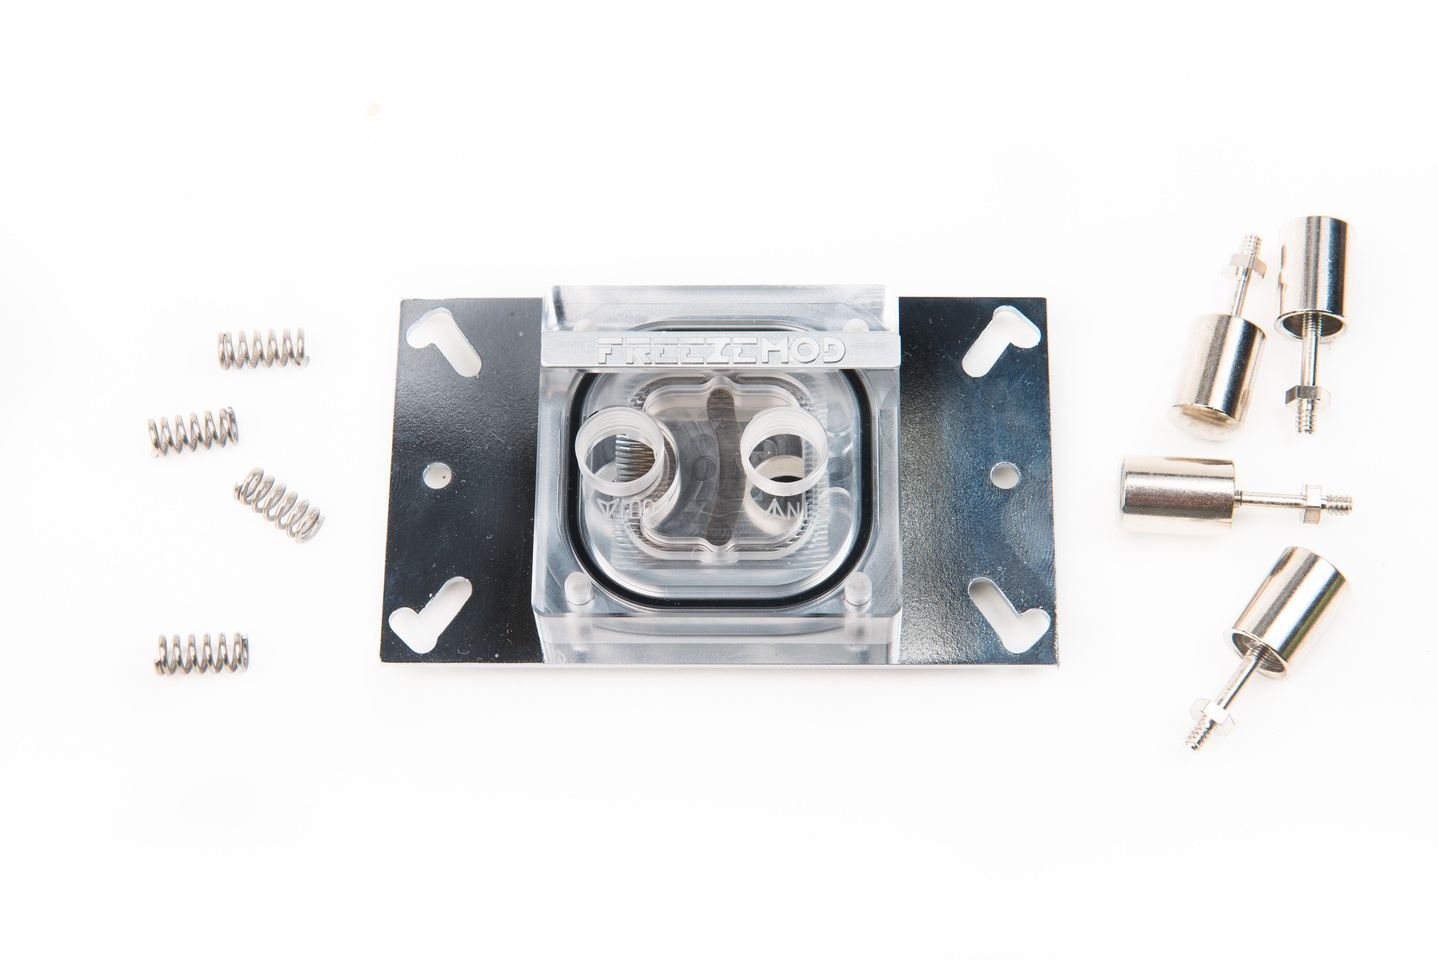
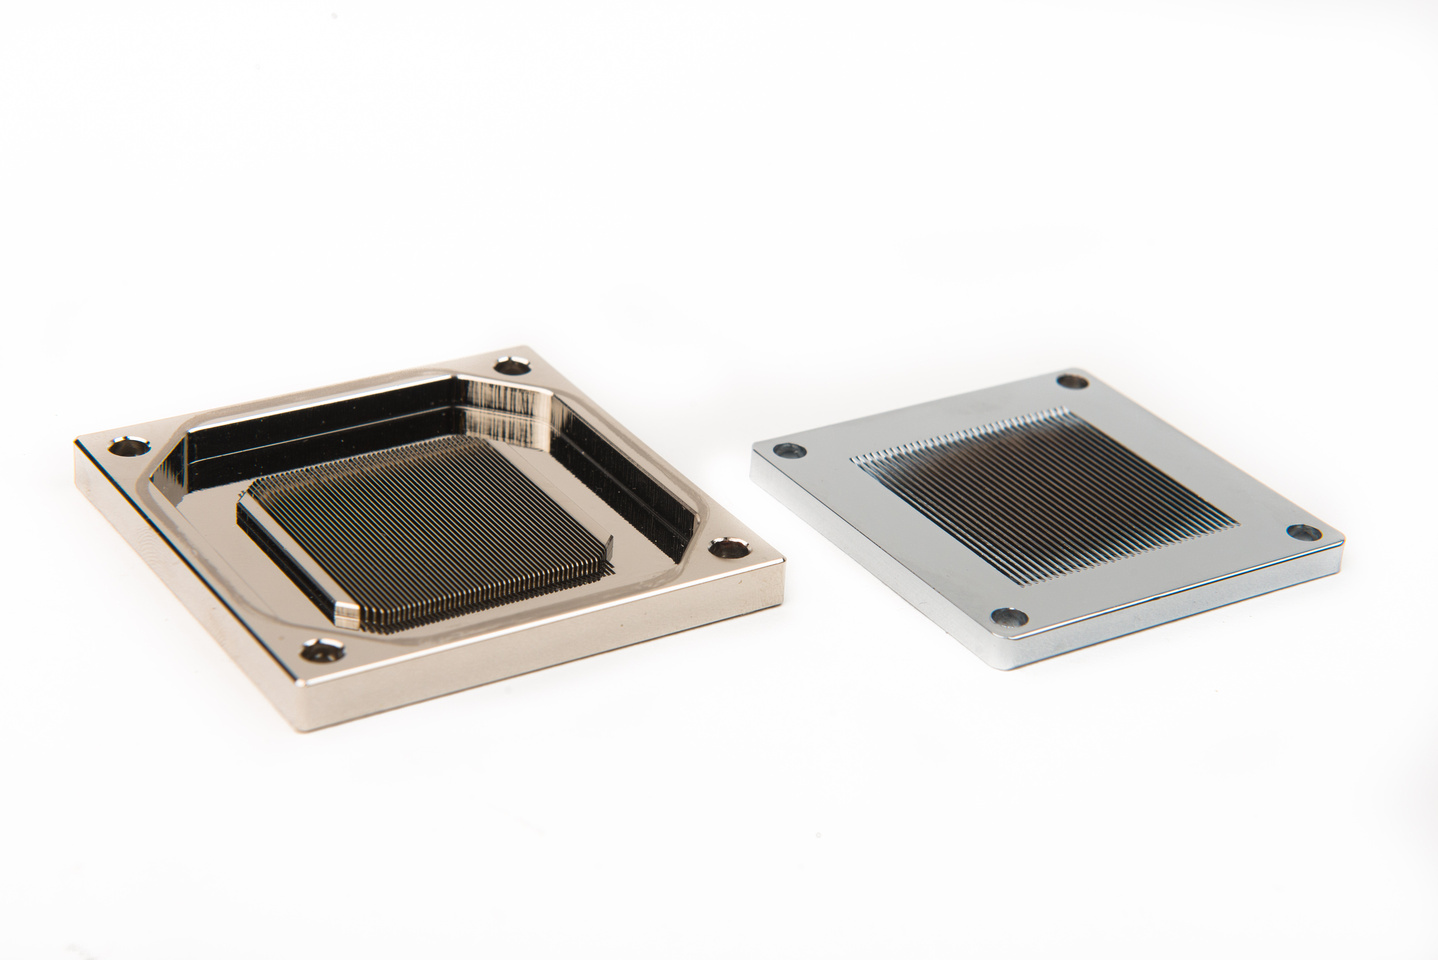
There are a dizzying a mount of CPU block options coming from Chinese factories. I am selecting based on two simple criteria. I am looking for a block with a metal jet plate and very thin water channels (.3mm). The cheapest block I found that meets these two criteria is the "Freezemod" branded unit shown here. It has .3mm water channel cuts and a metal jet plate. . . and costs $15.50 . The thermal performance of this specific CPU block absolutely impressed me in previous builds. So, for this META build, I went with the Freezemod block to start. I really wanted to showcase this configuration because the juvenile side of me wanted to say, "I put a $15.50 waterblock on a $500 CPU and it's AWESOME!".
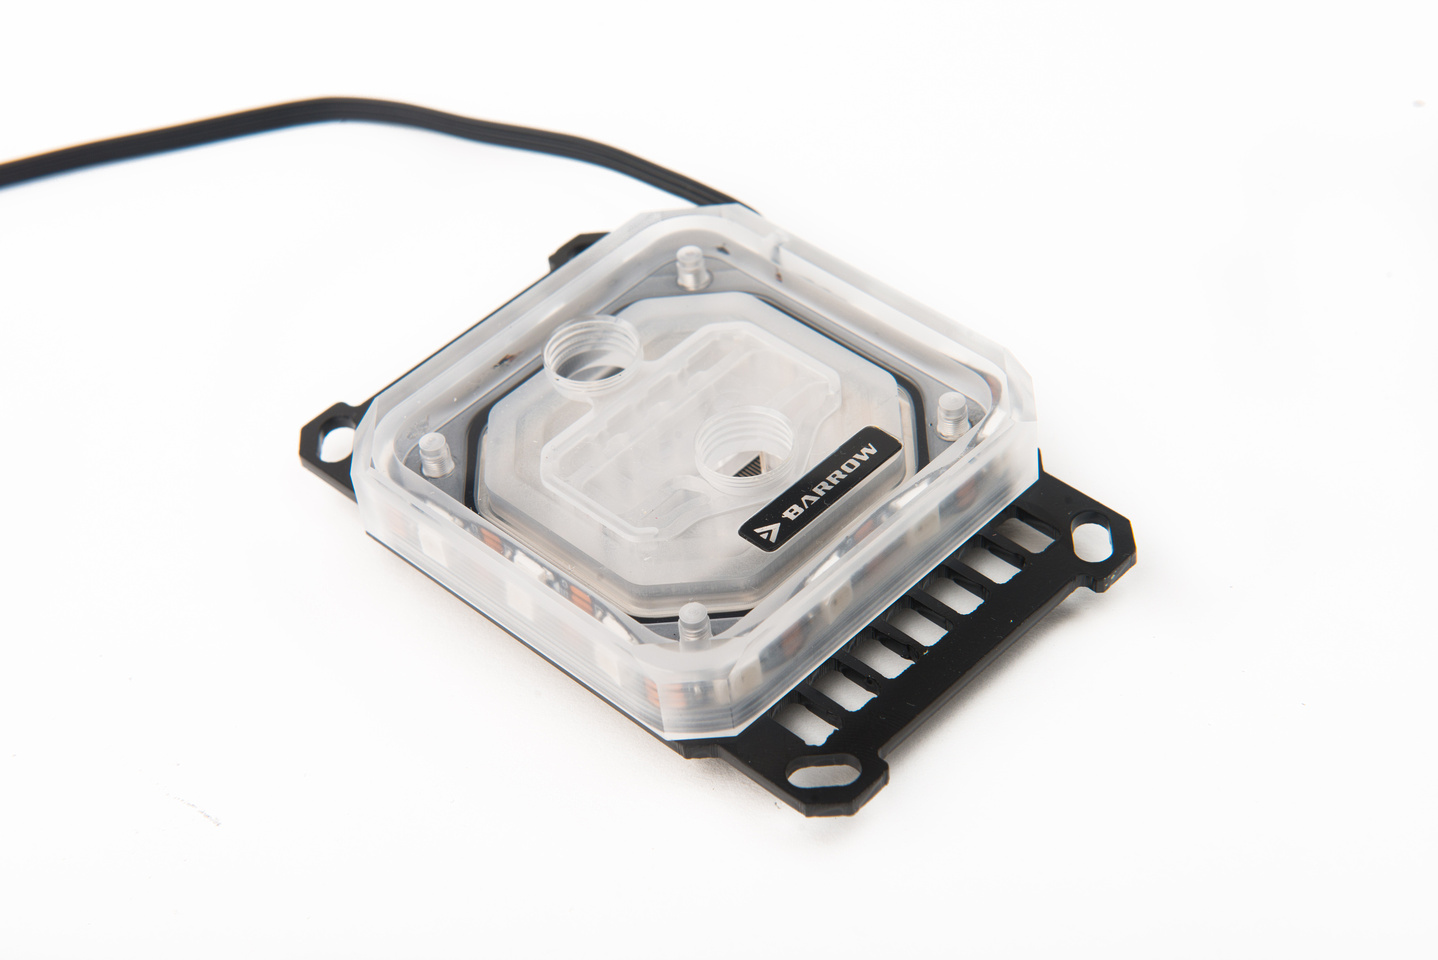
Without spoiling the final results too much, I feel the Freezemod block pictured above is one of the best value products available and I would have no problem running it in my test built permanently, but with one of the hottest running CPU's available and more radiator surface than I had previously tested with, I suspected the block itself in my specific test system became a performance bottleneck after I ran my thermal tests. There was only one way to get to the bottom of it, so I went ahead and ordered a Barrow CPU block at $26.49 to run a second round of tests to compare against. Indeed, the Barrow exhibited significant thermal improvements so I will present both data sets as I think both blocks are valid options. I also feel these two blocks straddle the tipping point for price/performance. One is probably the absolute cheapest solution that will perform well, and the other starts to rival high dollar name-brand parts for build quality and performance. Spending any more may not yield much in the way of better thermal performance unless the design is significantly different like a direct die contact setup.
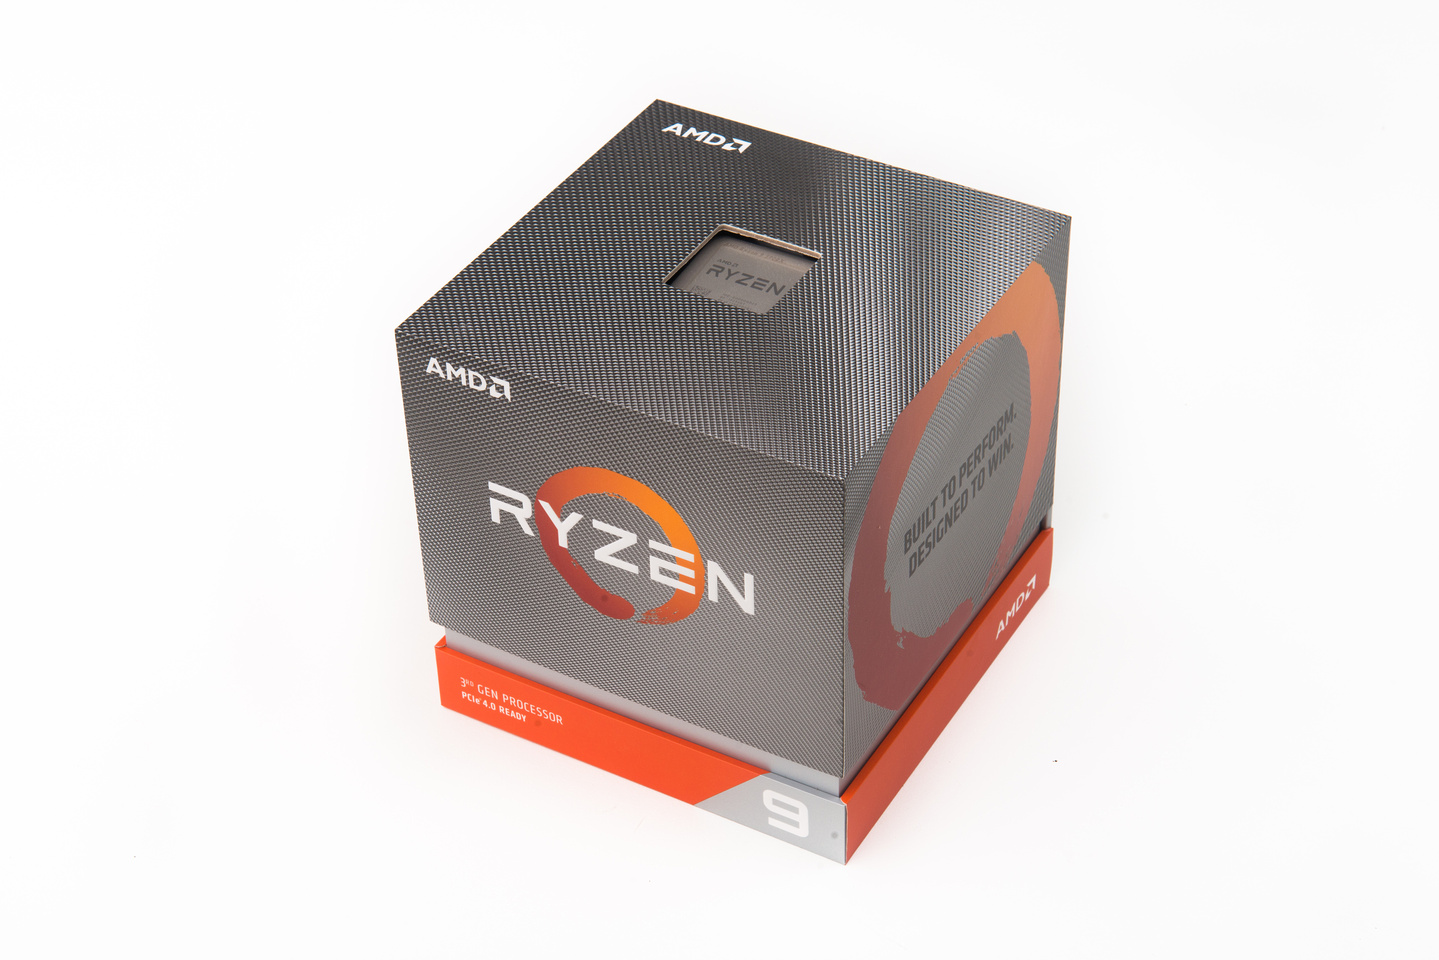
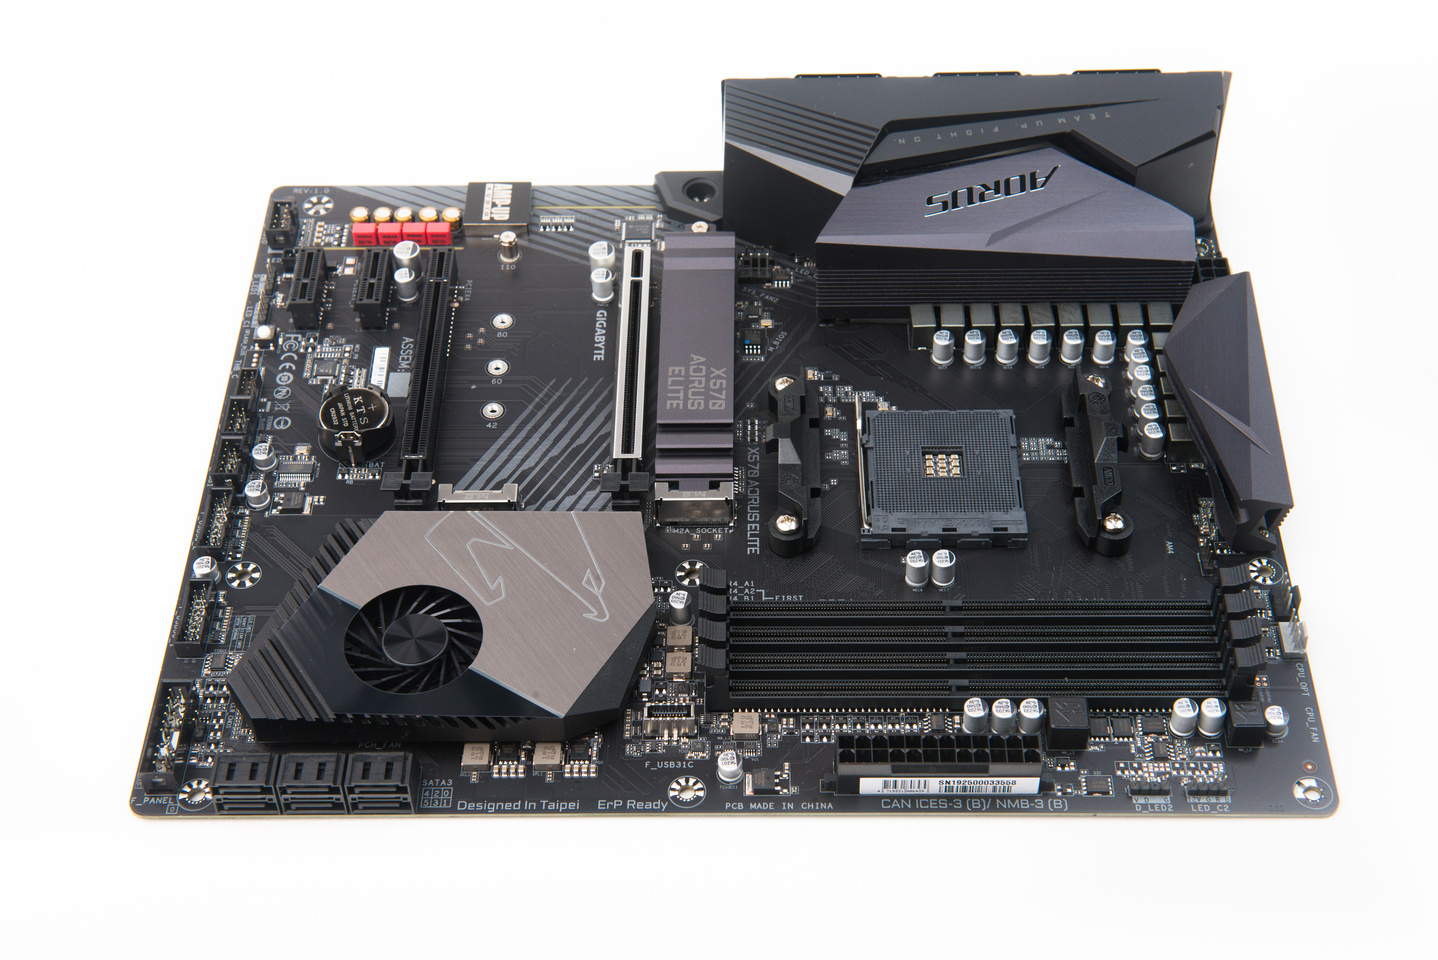
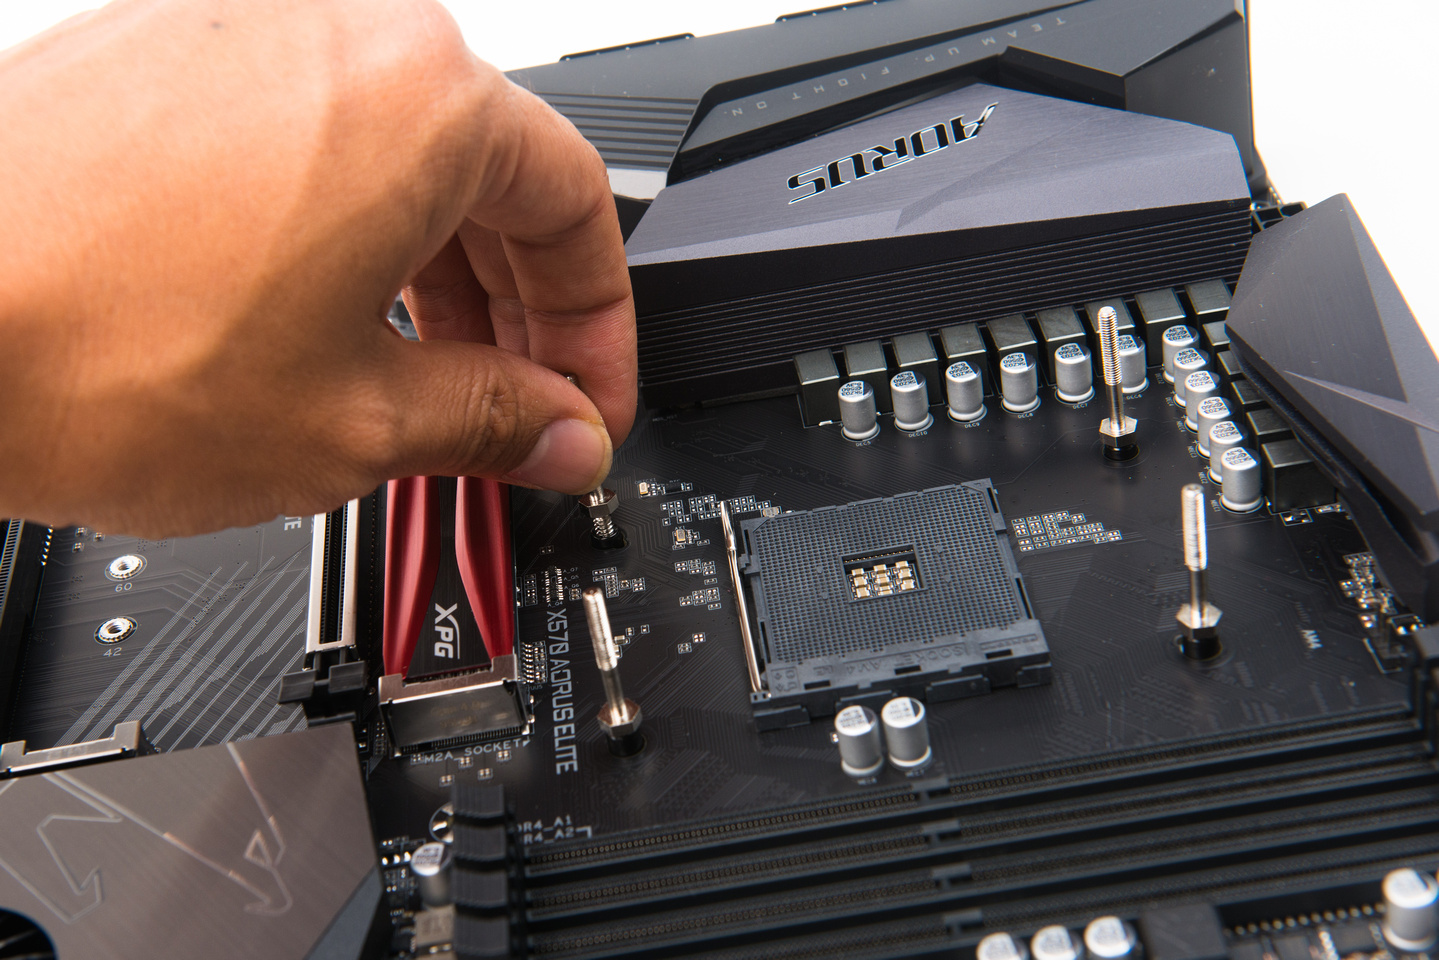
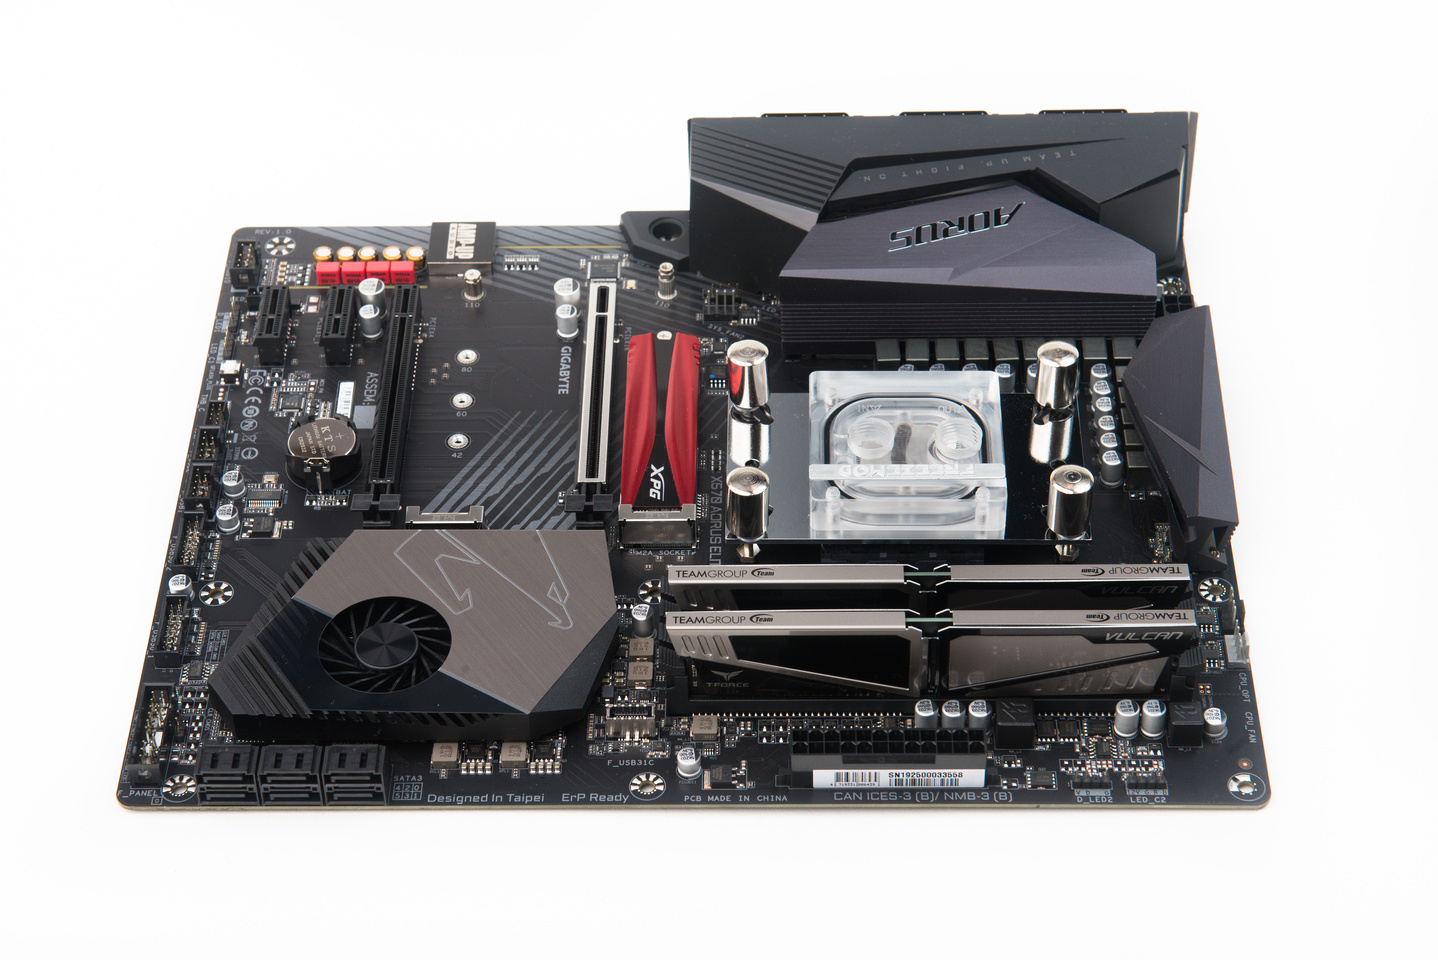
While this is not meant to be a comprehensive guide to building a custom water loop, I will go through a few interesting points in system build process. For my testing, I will be running a Ryzen 9 3900X CPU on a Gigabyte X570 Aorus Elite motherboard.
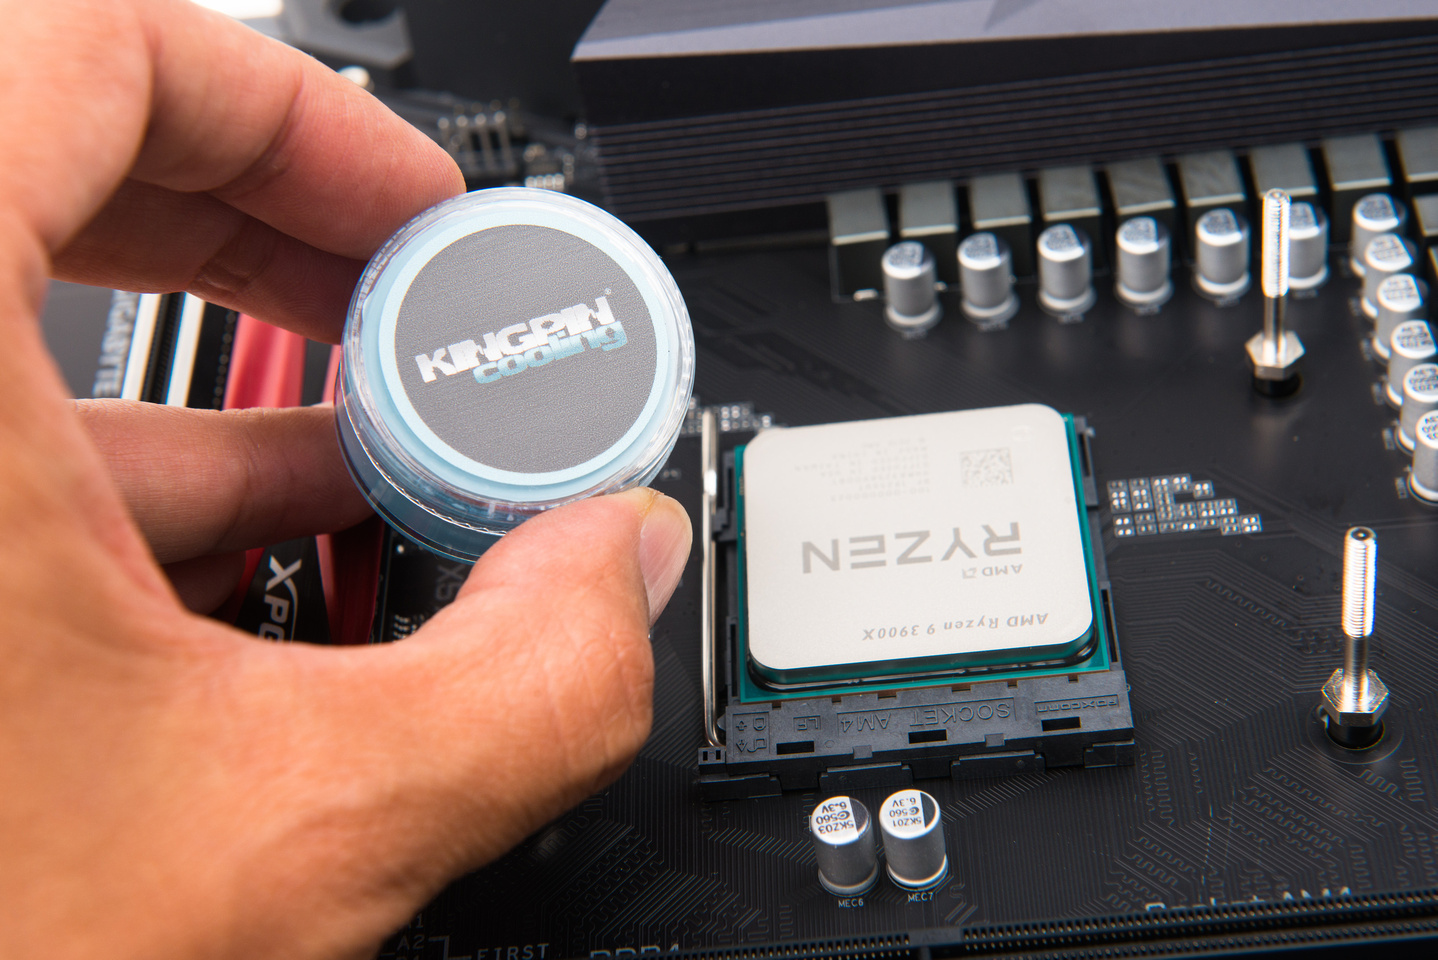
I have been using Kingpin Cooling Kpx thermal compound for all of my things lately, and it seems to be working fine. I have zero experience with sub ambient and liquid nitrogen cooling so I am not concerned at all with my thermal paste freezing, cracking, and failing at those extremes, but the Kingpin stuff was simply cheaper than the Gelid GC extreme that I was using previously at quantity, and from what I gathered online, performance is on par or better in regular use cases like mine. So, I went with it.
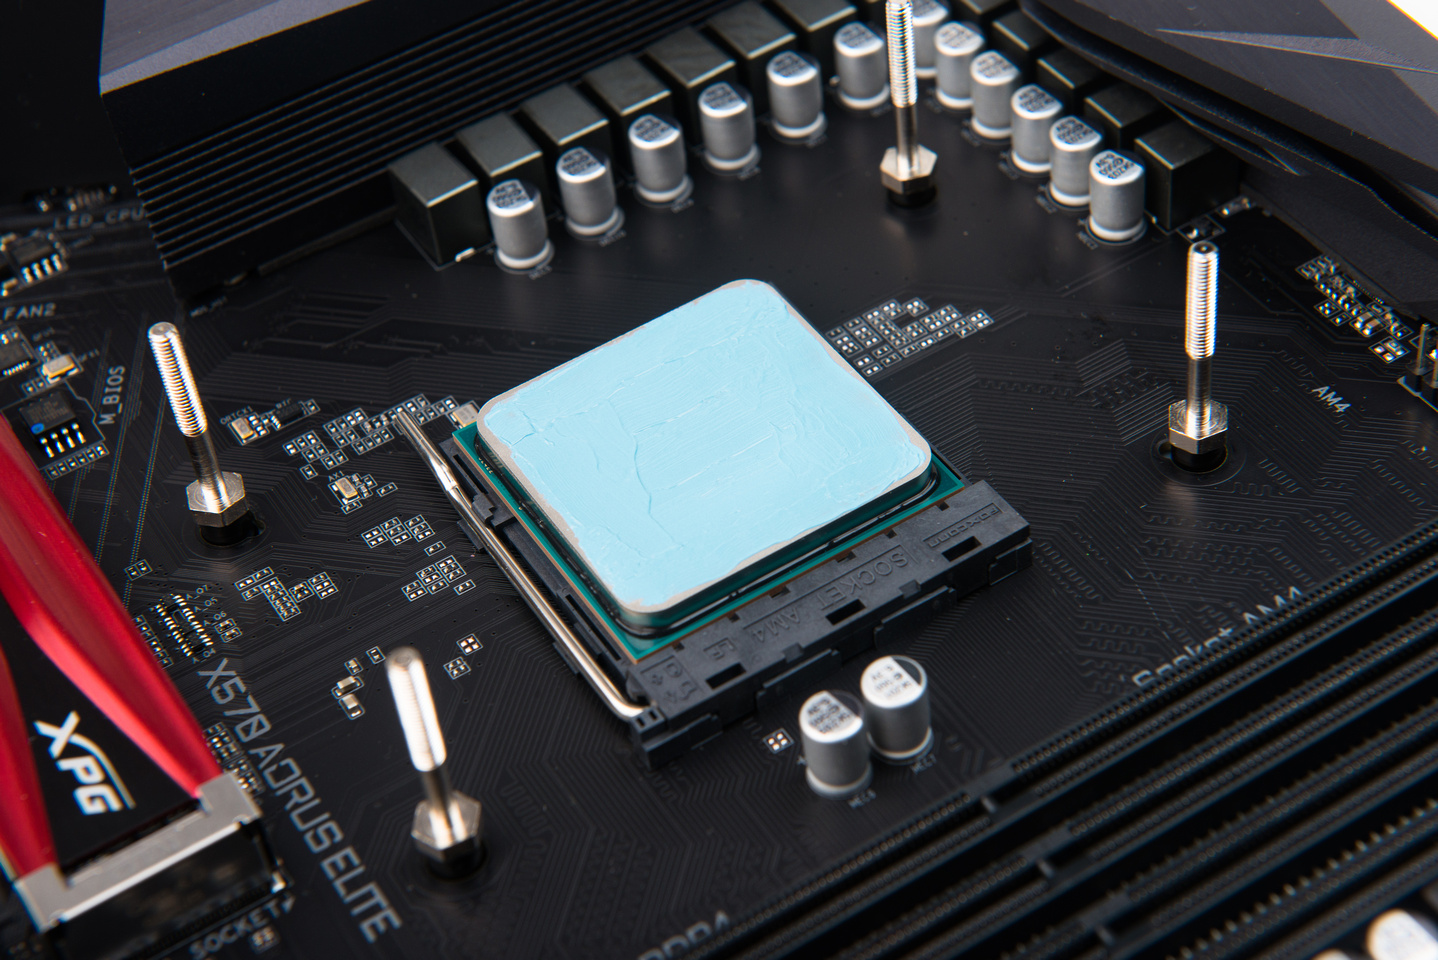
Spread method seems to be the implied best method for application given the included paste applicator so I went with it.
While this write-up does not center around LED lighting and aesthetics in general, on a purely practical level, I like to have illumination on my waterblock so I can easily see at a glance if there is any debris, leaks, or other problems at the block, so I soldered up a simple white LED and resistor for the waterblock.
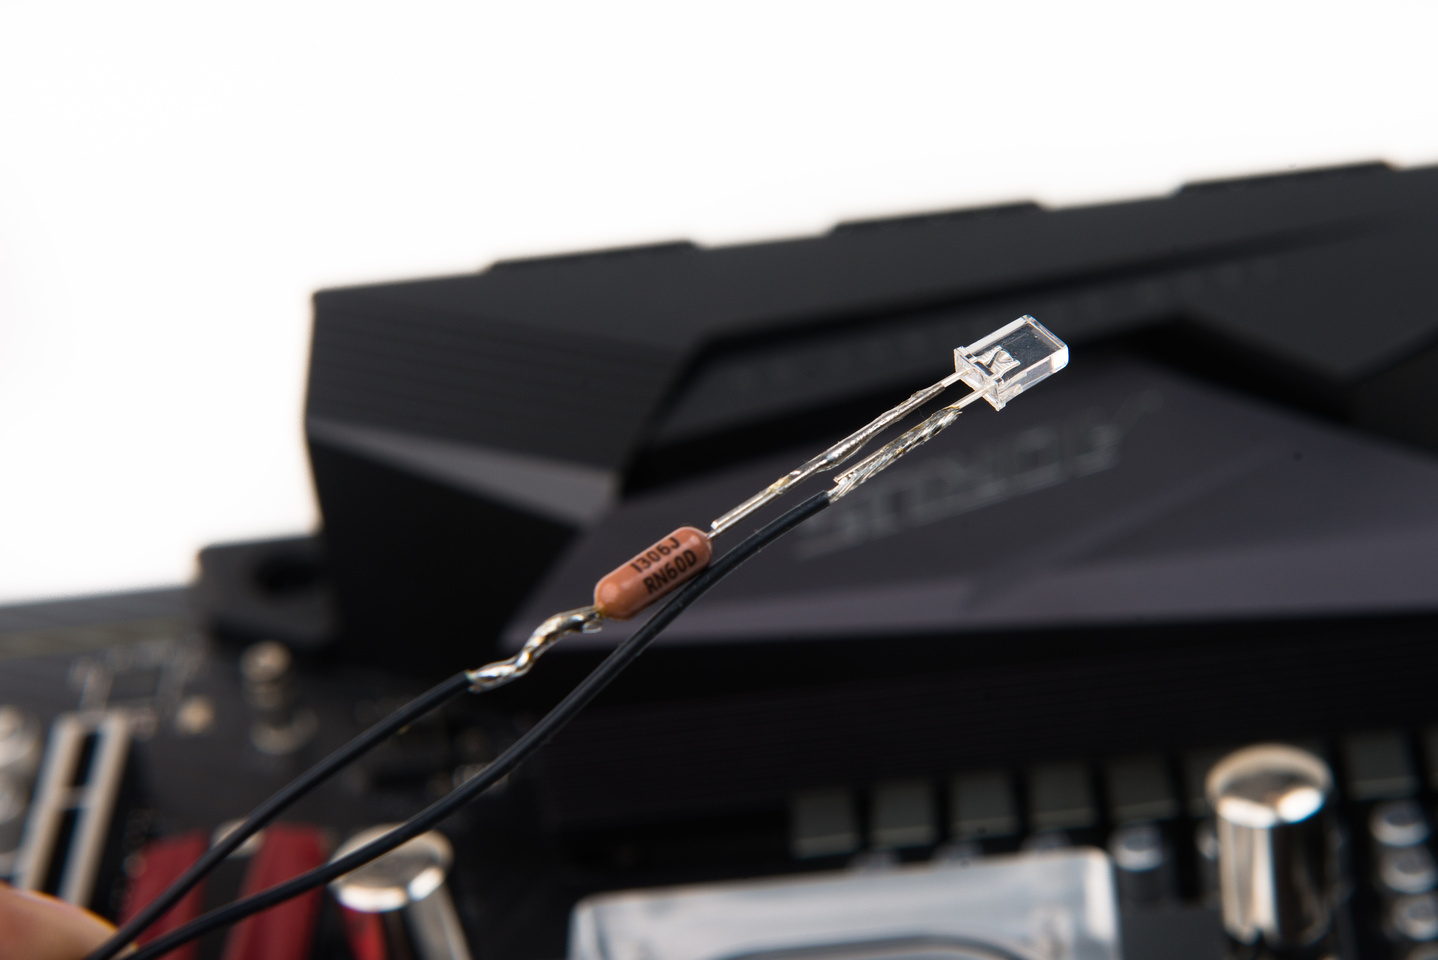
The Freezemod block has a slot for the lighting to slide into under the metal plate, and I soldered the resistor in a spot where the LED would be centered in the block. I will put heat shrink tubing around the leads before installation to make sure I don't short anything out.

After adding 16GB of cheap Hynix 3200mhz CL16 DDR4 RAM and a 512GB NVME drive, the motherboard is ready to install.
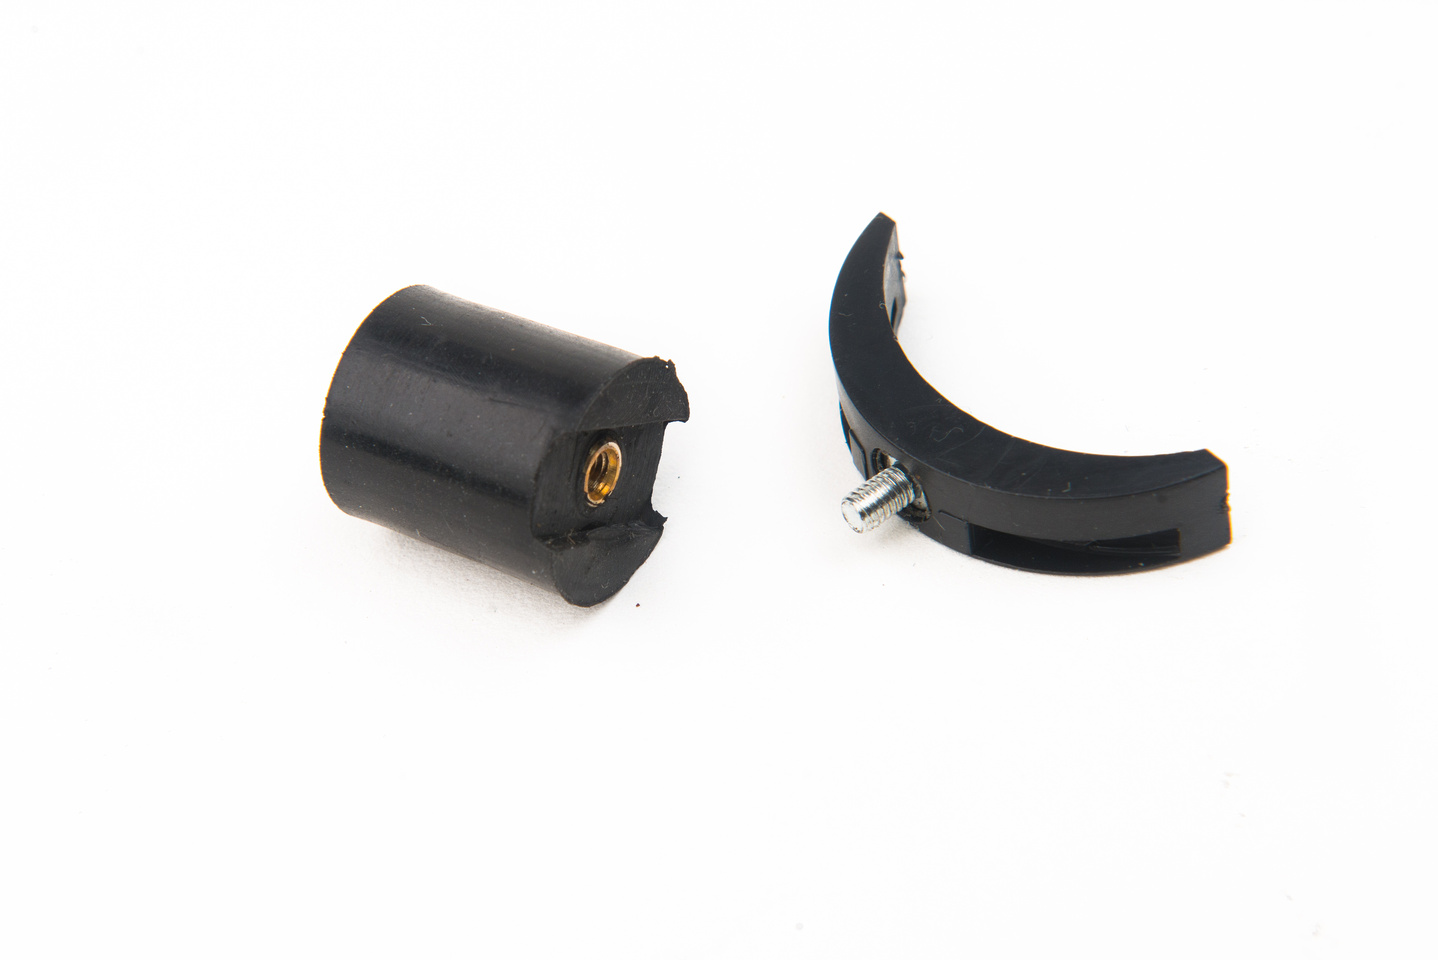
The Fractal Define S is really easy to install a custom loop inside so there are multiple mount slots for the reservoir, but I wanted to use rubber isolators to reduce vibration noise in the system especially because the SC-600 pump running at full 12V without speed control is louder than something like a Laing D5. So, I ended up using some microphone capsule mounts that I have a huge pile of sitting in a box because. . . . well, I import and sell parts for audio microphones and that's just what I had lying around that was rubber and would work.

I removed the saddle portion of the rubber capsule mount because I won't be mounting a microphone capsule.
and use an M3 screw to attach the rubber mounts to the bottom of my reservoir brackets.
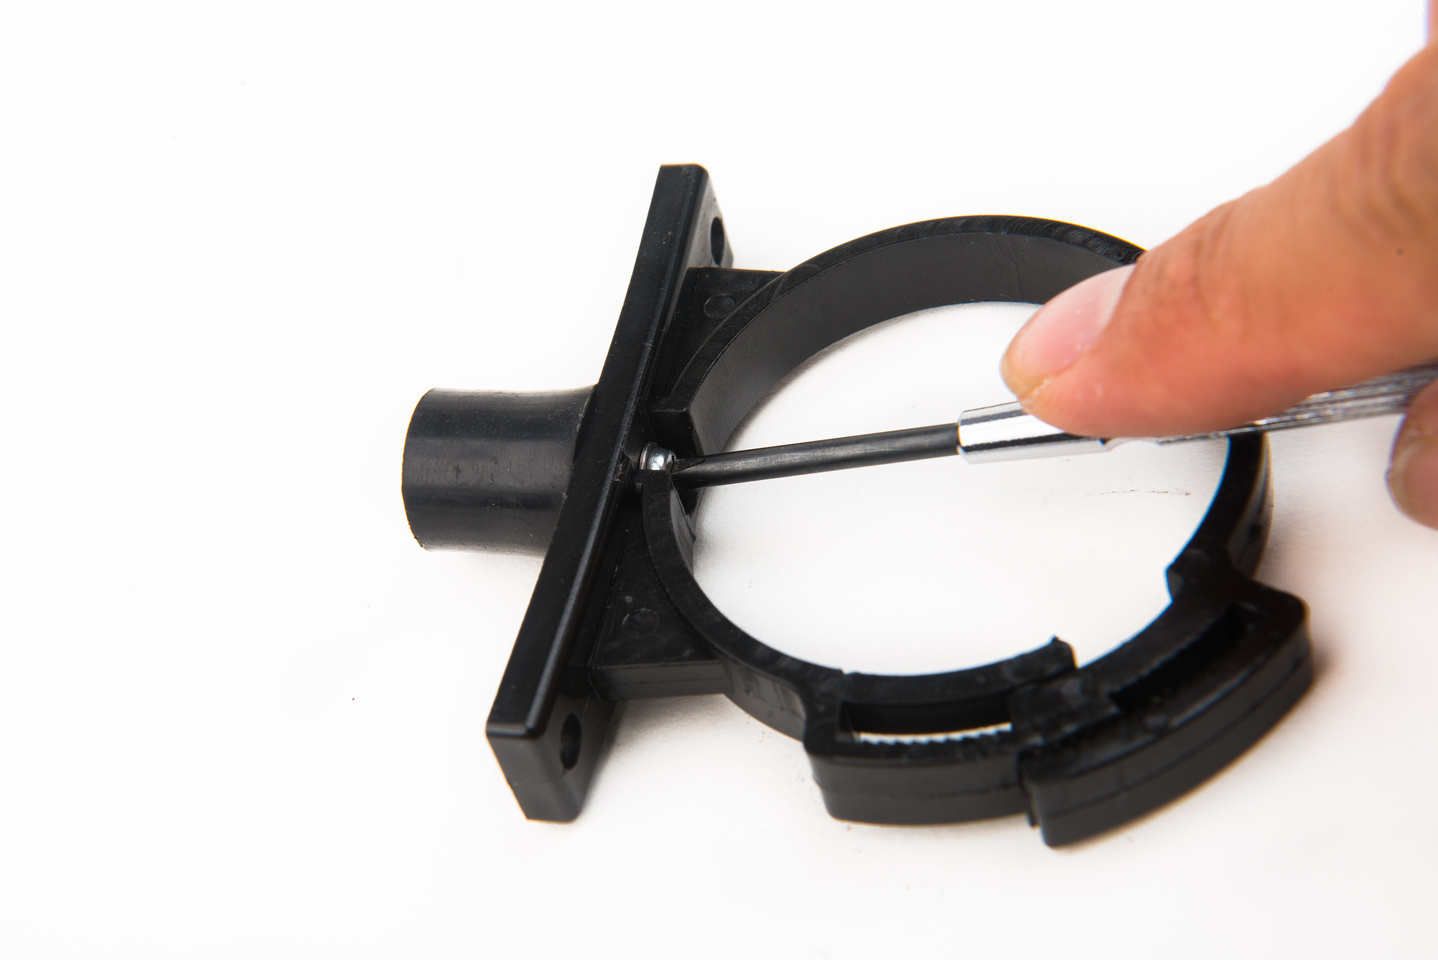
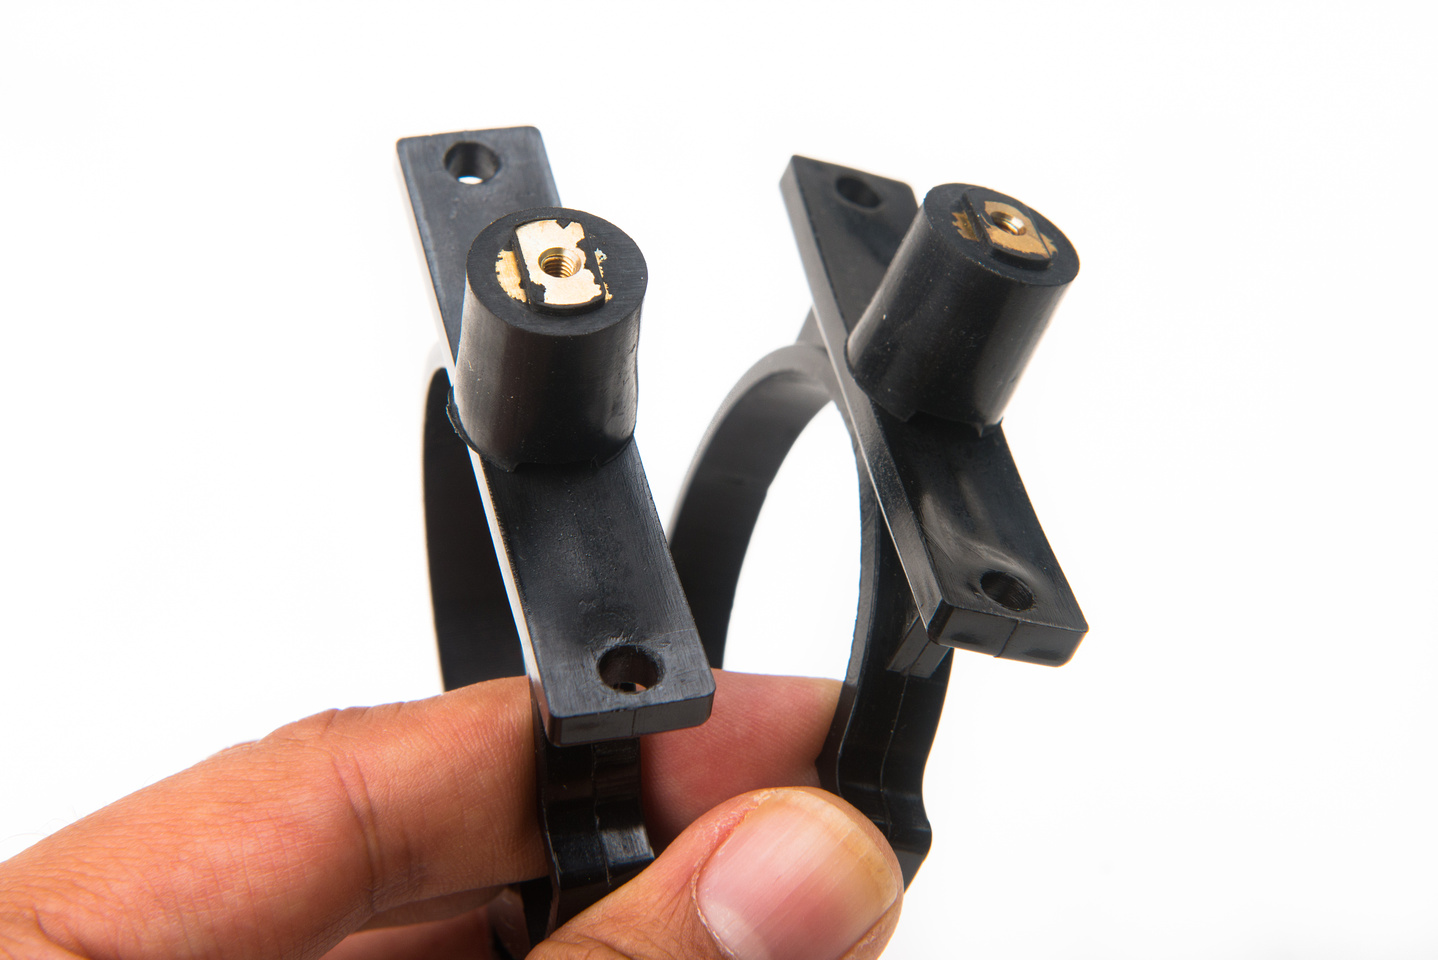
The bottom plate accepts M3 screws which I use to attach the reservoir to the PC case. In the Fractal Define S, there are slots available in the correct locations. For other cases, you may need to drill some holes.
What I wasn't really expecting was for these to fit so easily and to work so exceptionally well in this application. So, shameless plug. . if you want some of these capsule mounts, here's a link. . .
https://store.studio939.com/product/34-35mm-capsule-mount
These are in fact hard to find at in the US at small quantity so feel free to get them from my webstore if you want to give it a try. . . Because there are many types of mounts offered in the webstore, it's REALLY important that you select the option in the drop-down menu:
"RUBBER TYPE SINGLE HOLE MOUNT 34mm SLOTTED SADDLE"
Maybe even type in a note in your order that you are using these for PC water cooling and I'll know to pack the correct mount used here.
When buying the cheapest Chinese radiators you can find, I fully expect to spend some time cleaning them out. I read a few articles online about using a weak Hydrochloric acid solution to really get in there and clean copper radiators so I followed the instruction gleaned from this posting on the overclock.net forums and gave it a go.
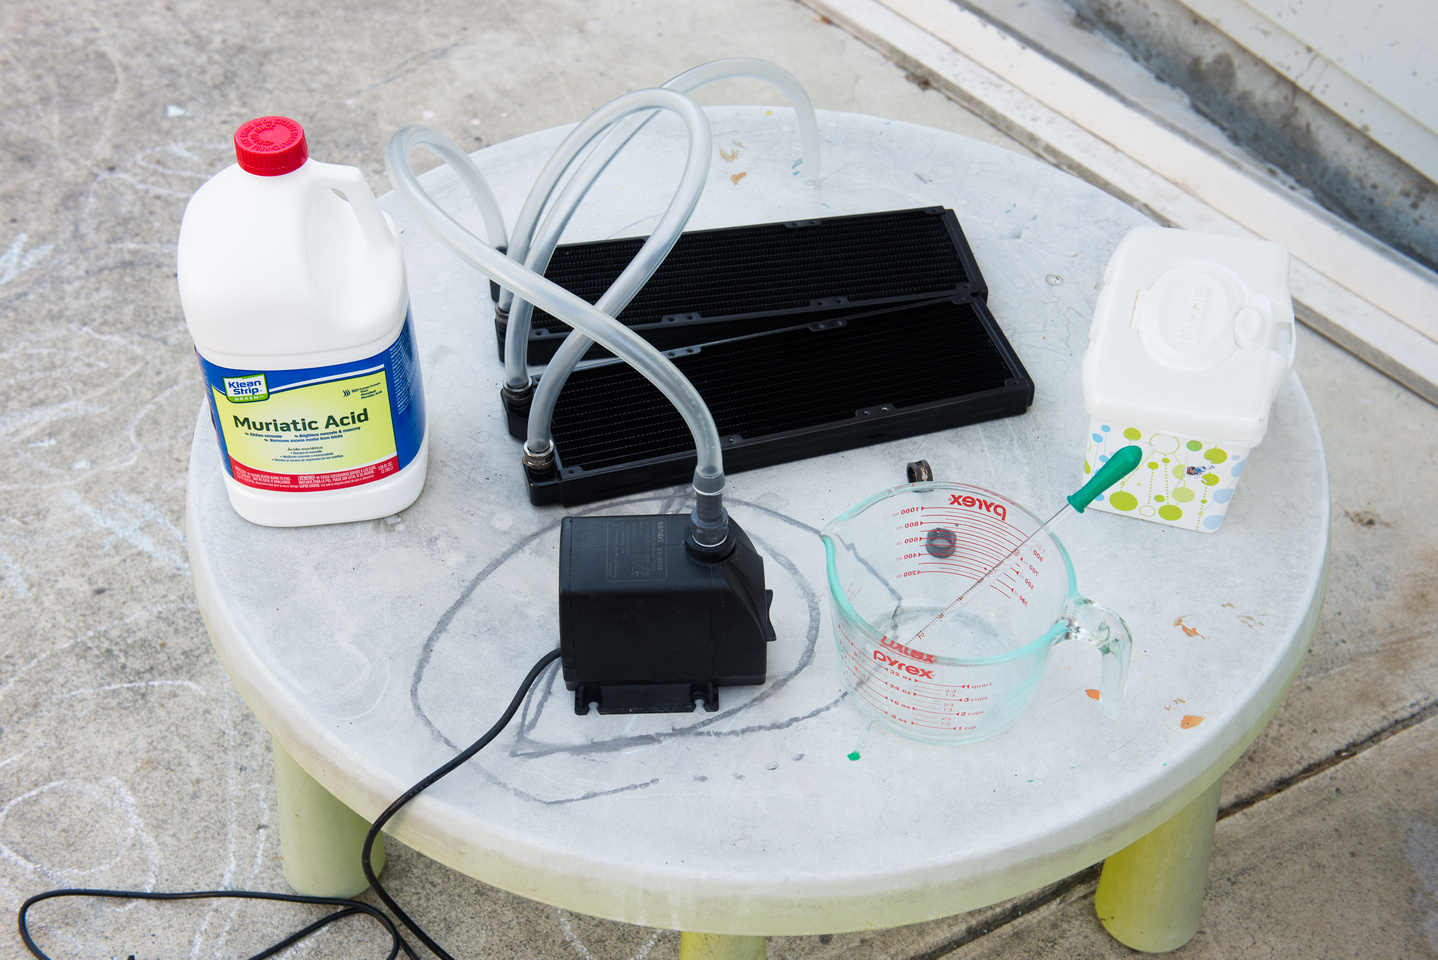
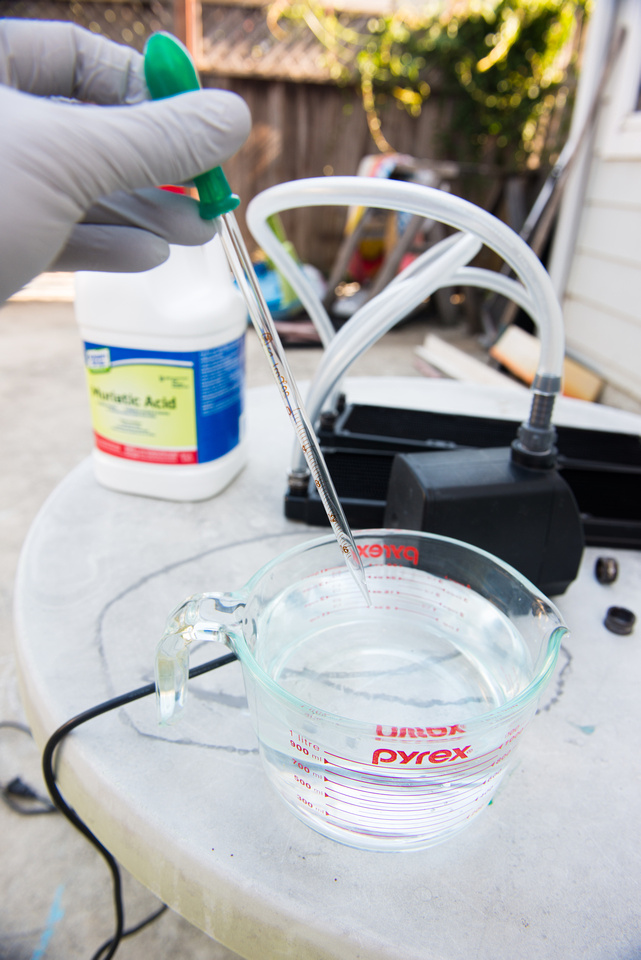
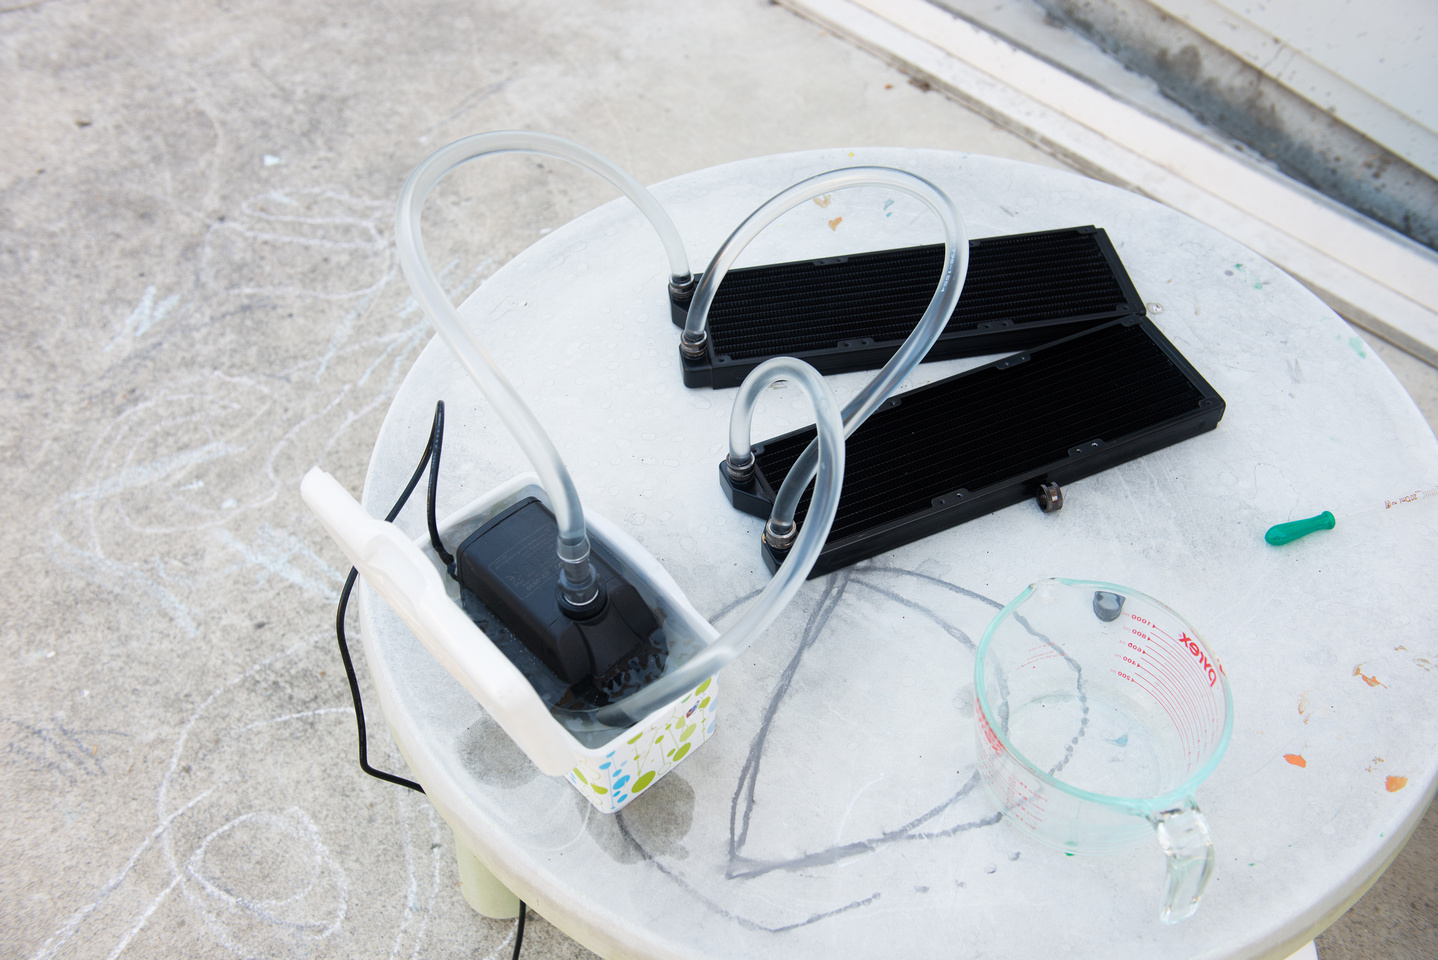
I use a strong AC powered aquarium water pump to clean my various blocks and radiators. It just so happens that a tub for baby wipes submerges the pump without using a lot of excess water, so that's what I use. Here, I am using a graduated dropper to add the calculated volume of Muriatic Acid to some distilled water to run through my loop. Again, I followed the directions described in the Overclock.net posting linked above.
And I ran the solution through my loop for a couple of hours.
And as expected, the radiators were filthy inside. . . what i also expected but did not happen was the water was supposed to turn green from the acid slightly etching the surface. . . so I guess the science wasn't working exactly as expected.
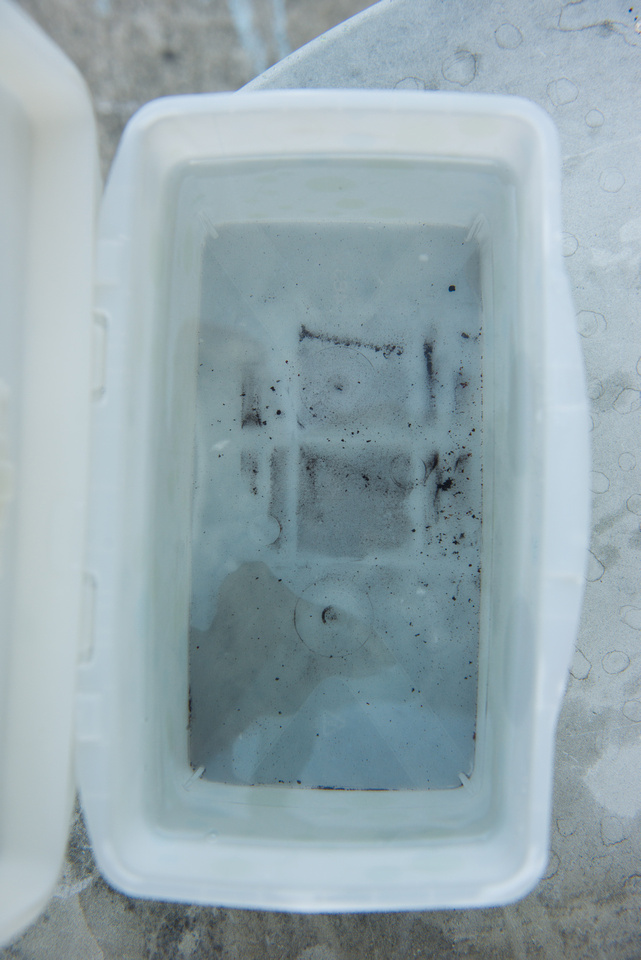
So, I went through my more "normal" flushing procedure. Again, people who know a lot better than me can probably show a better methodology, but what I did was first flush tap water through my loops with the pump draining into my bathtub for a few minutes. I figure at the initial cleaning stages, there are way more problems inside the radiators than any contaminants that might be present in the tap water. After this, I filled the radiators half way with 99% isopropyl alcohol and sloshed them around for a few minutes and drained them. After that, I ran the pump with a vinegar solution for about 30 minutes. Then, I flushed it through again with tap water for a few minutes draining out directly into the bath tub. After that, I started flushing the loop with distilled water about 5 times. I used my same cleaning pump submerged inside of the baby wipes container and fill the tub with distilled water and let it run for about 10 minutes. . . drain everything out, and then repeat. Regardless of the specific method or procedures you are comfortable with, these radiators should always be assumed to be very dirty upon delivery and need to be cleaned vigorously.
With all of the parts prepared, I can mount all of the main components in the case to get an idea of clearances and make a plan for routing my tubing. I will mount a front intake 360 radiator, a top exhaust 360 radiator, and the two 140mm fans that the case came with will be used for intake at the bottom as well as exhaust at the back.
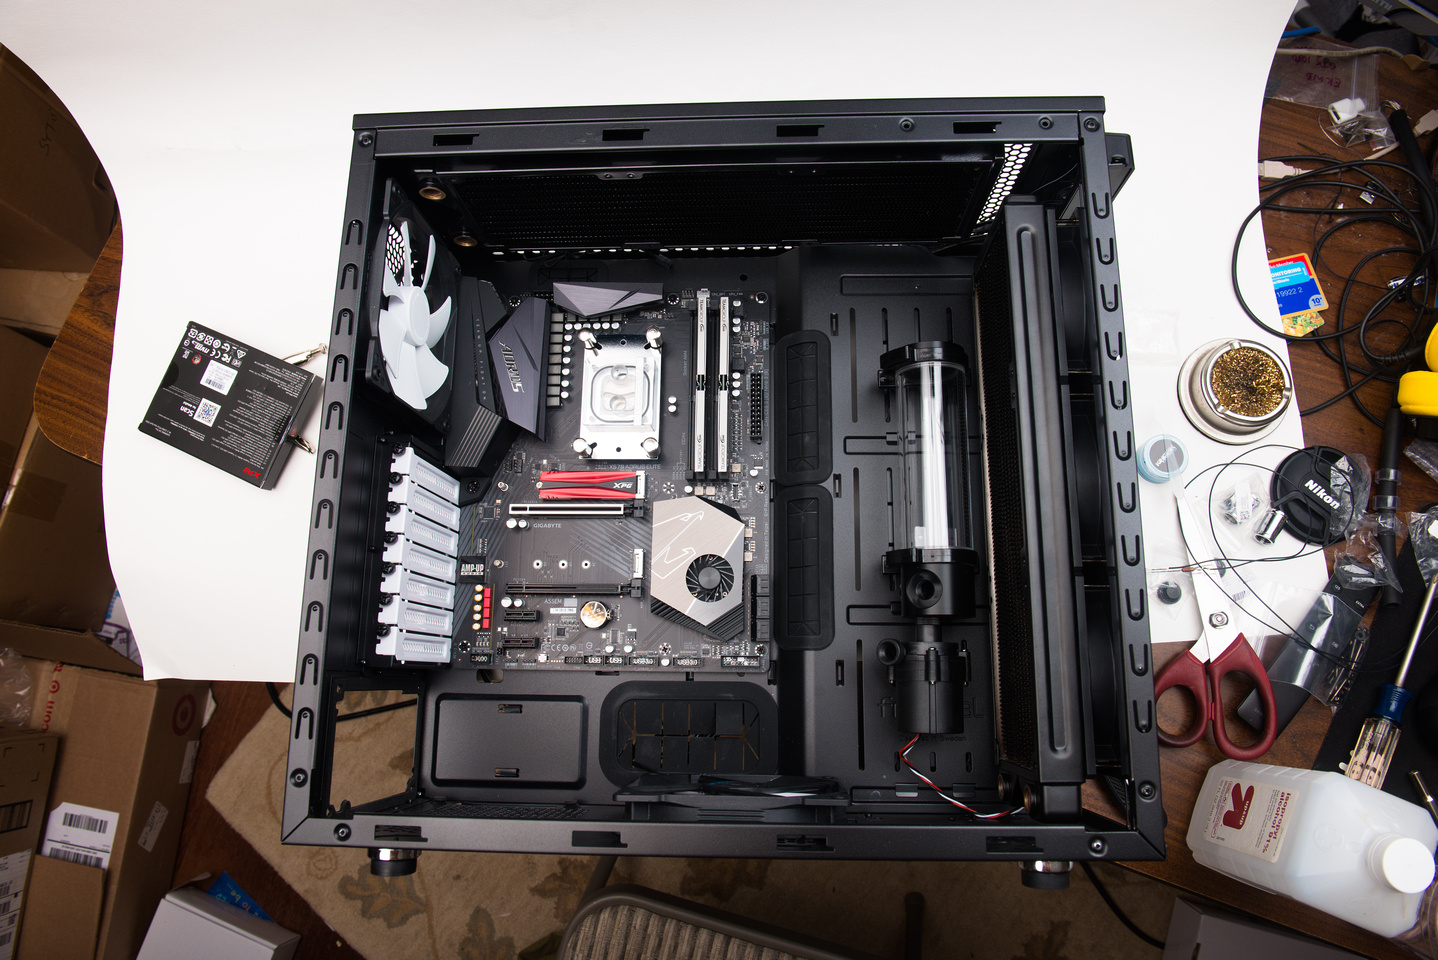
The reservoir sits very nicely on the rubber isolators and the installation was extremely easy. Because I will be using an MSI 1080TI Lightning Z, the clearance will be tight because the graphics card is so long. Luckily one of the pre-made slots will work and I will not need to drill holes. This is an exceedingly easy case to work inside of!

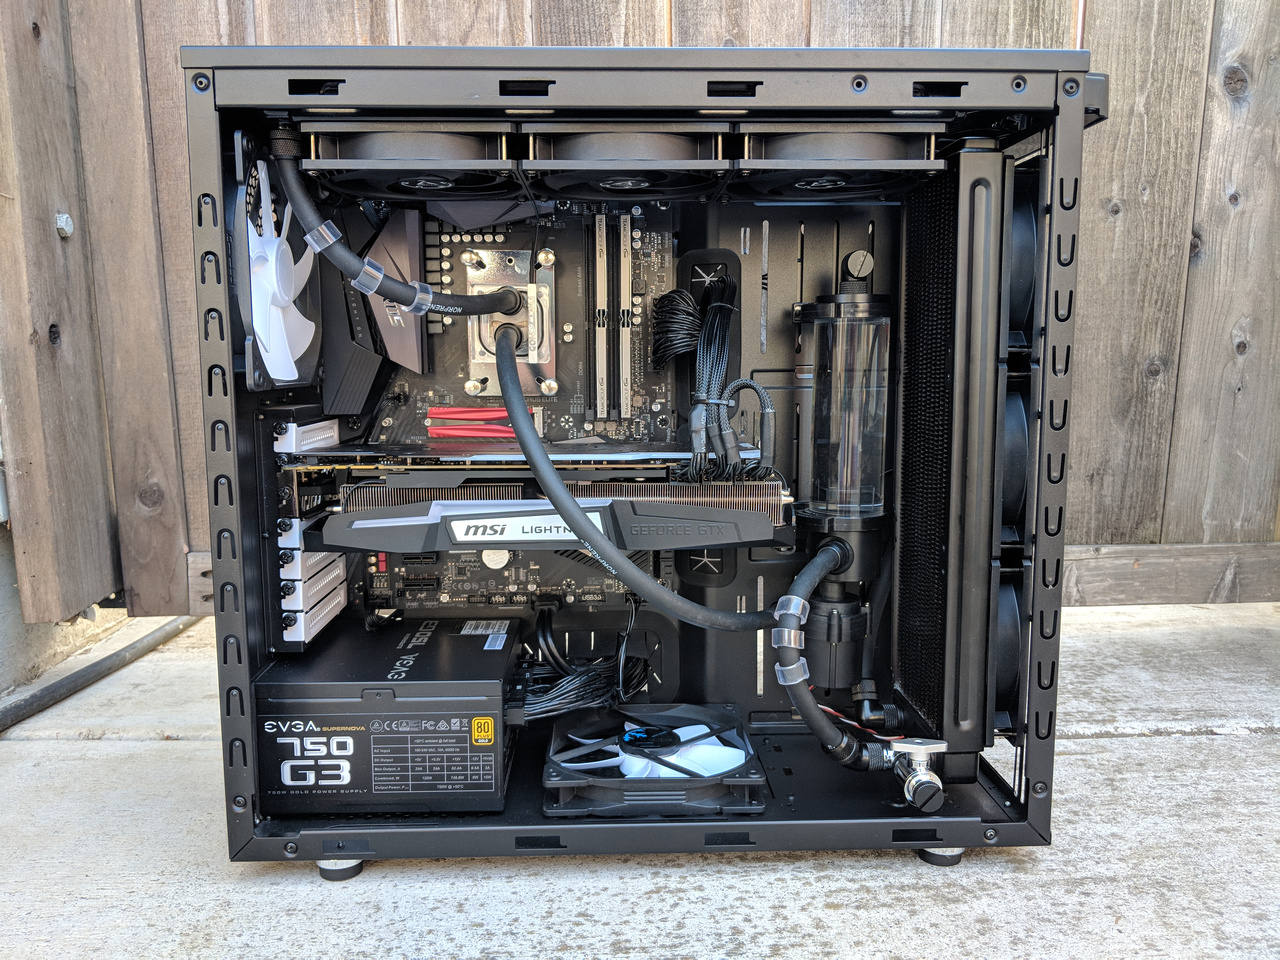
Again, as there is plenty of documentation available from people much more capable than me about loop routing, I will not go through all of the fine build details. This write-up is more concerned with getting the information out there about low-cost parts selection as opposed to a build guide. This entire setup is likely route-able without the use of any angled fittings, but to keep things clean especially on the run that is close to the motherboard tray connecting the two radiators, I used fittings to keep the tubing paths hidden and clean. Here, we can see the loop completed.
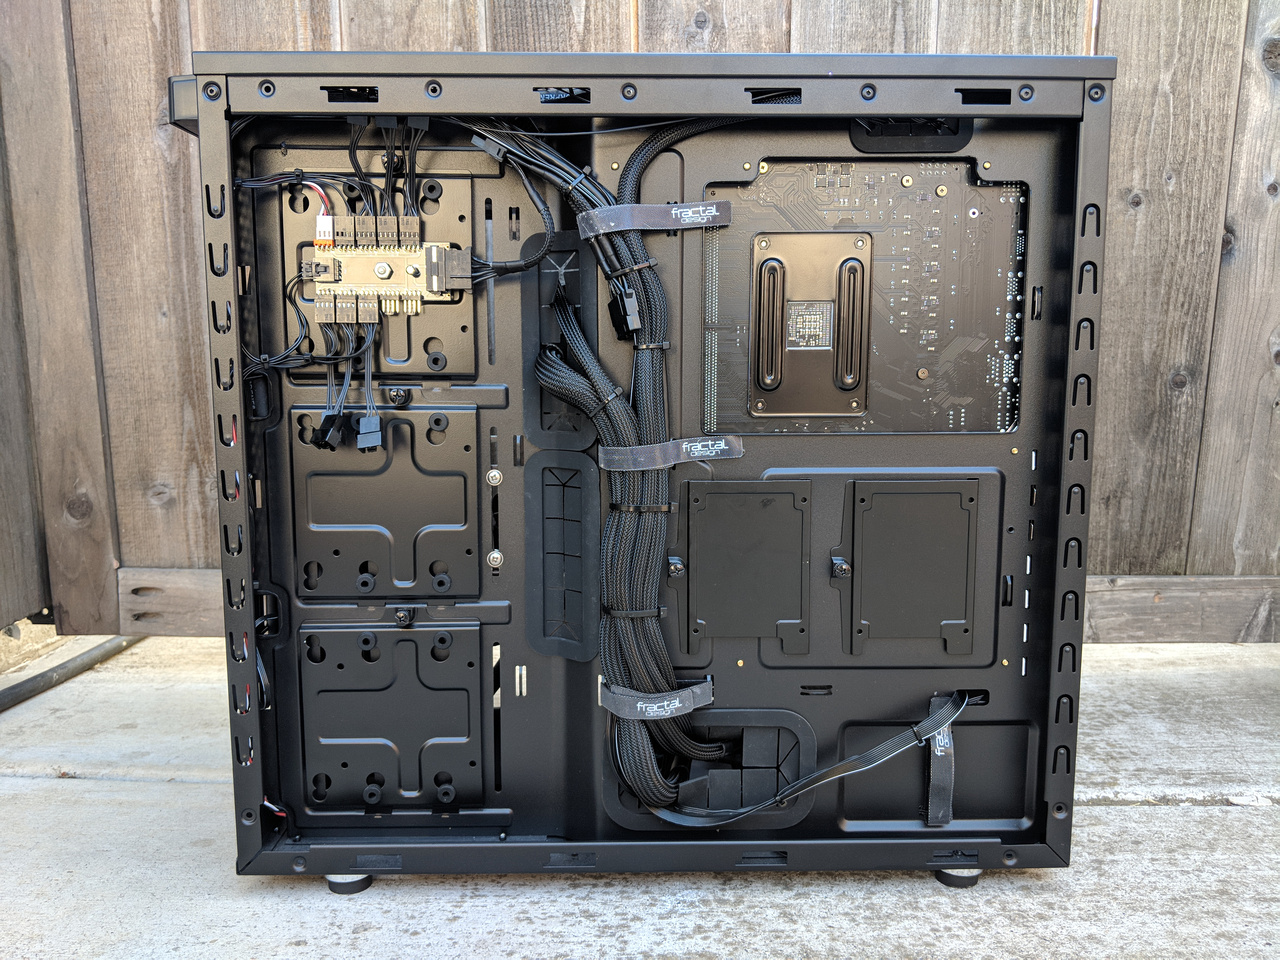
Here is the back side of the build with the cables routed and the PWM fan hub that powers the fans, the CPU block LED light, and the water pump.
A few more details showing some of the routing and component placement.

Humans Win!
Upon initial testing, everything was going smoothly with my normal CPU stress testing. The temperatures were exceptionally well controlled on all settings until I fired up Prime95 small FFT test while overclocked to 4.3Ghz all core. I hit a maximum temperature of 93 degrees C at 1.3V which was getting right into dangerous territory for me on an expensive CPU. Many people shy away from Prime95 claiming that it is neither the optimum stability test nor a realistic workload test because the current versions stress the CPU beyond any normal scenario. I like to use it because it is consistent and I like to test for a worst case. In my limited experience, it generates maximum CPU heat. With max temperatures running right up to the thermal junction limit, I wondered if something was wrong and looked into other people testing the 3900X. After digging through dozens of recently released reviews, I could not find anyone running Prime95 small FFT on the chip at all core overclocks. It appeared many reviewers were either using the stock cooler or a 360mm AIO cooling solution for their tests. I can understand that the stock cooler would not have a chance at taming that overclock but a 360 AIO surely can produce some useful results. If Prime95 was mentioned, most reviews brushed it off as an unrealistic test scenario. I did eventually find one test at 4Ghz all core and the temps exceeded 90 degrees C. I tried turning the CPU block 90 degrees to see if the arrangment would help given the specific position of the chiplets in the 3900X package, but the thermal results were the same. Having never used a CPU at this performance tier, my suspicion was that my cooling system was in fact performing quite well, but I decided to go ahead and buy the Barrow CPU block that I knew had a superior design and test it.

Here are the thermal test results that I measured. Cinebench is R15 all core and Prime95. I am using the current version of Prime95 with AVX running running small FFT for maximum heat and CPU load.

With Zen 2, Precision Boost automatically boosts frequency based on temperature, current, and other variables so I decided to also include some data about the slight differences in boost frequency that I saw between the two water blocks while running these CPU tests.

I hope you have found this experiment useful or at least entertaining. My goal was to present a viable and affordable path to custom water cooling. The thermal tests show that the system is capable of top tier cooling performance well within expectation for even a high dollar open loop solution. On the cost side, we are directly comparable to a high quality 360 AIO and about $100 more than a top tier air cooler. To ask someone planning a build to stretch $100 to play with "big boy" level cooling seems like a very reasonable proposition! Additionally, the loop presented here should easily be able to last through multiple system upgrades if properly maintained replacing the only wear item which is the pump. The system is also trivial to expand and upgrade incrementally. Perhaps you start with a single 360 radiator which would provide premium level cooling on its own. . and add additional radiators later when funds become available or if you start out with a smaller CPU and upgrade the cooling along with CPU upgrades. Incorporating a water cooled graphics card would be simple and require the addition of two compression fittings and another six inches of tubing. As someone who frequently buys used parts, I find some of the very best local deals are water cooled graphics cards because the owners are often more affluent (not penny pinching) and like to stay current with the latest and greatest options and upgrade frequently. The pool of people competing to purchase these cards is much smaller as not a lot of people run open loop cooling. For my uses, it has been nice to have an air cooled graphics card in this platform so I can swap cards easily and use the computer to test new purchases as they come in. I feel both of the CPU waterblocks are viable options and perform quite well.
While I do not have data to back it up, my guess is that the Barrow block performs on par with the best available name brand options and the Freezemod block is not far behind it. The only reason I upgraded was this particular build at the worst case synthetic scenario was running too close to the thermal limits for my comfort so psychologically, I felt a lot better after buying a few degrees of additional cooling. For any normal workload or for any smaller chip like a 3700X or 3800X, the bottom of the barrel Freezemod block would be capable of keeping things completely contained.
I sincerely hope this article helps put water cooling within reach of some builders who otherwise would not be able to afford it. This was a big hole that I saw in the sea of information out in the wilds so I thought I'd do my best to put my cheap Chinese watercooling solution out there. There are a huge number of guides online produced by people much more experienced than I am detailing custom loop assembly step by step, but if anyone wants a follow-up in the format that I produce here, please let me know, and I may put on my PC building cape again!
Wow I think its really nice work what you are doing. I really appreciate people trying this kind of stuff I would love if you could keep going with this series!
ReplyDeleteBtw do you think a beginner could try this?
Water cooling complicates your life a lot more than air cooling and is not as reliable but, if you find it intriguing, why not? I started out on cheaper used parts so if I blew the whole thing up, at least the parts weren't super expensive. After I gained some confidence and experience, I went for an expensive CPU more to prove a point than necessity. The Ryzen 3600 is perfect for my daily driver.
DeleteSo I am building a System with a RTX 2070 a ryzen 5 3600 a X470 pro carbón Motherboard. Do you think its worth whater cooling a System like this one?
ReplyDeleteI don't think the gains on a 3600 would justify the loop cost. The chip simply does not generate that much heat or overclock that high. That being said, I'm running a single 360 custom loop on a 3600 and 1080ti and it is heaps of fun. If you have won the silicon lottery and your chip can boost above 4.2Ghz at reasonable voltage maybe? If you have not yet purchased your GPU and you happen to find a really good local deal on a used waterblock card like an MSI Seahawk or EVGA Hydro-copper, the equation shifts towards water cooling depending on how good of a deal that graphics card is.
DeleteAwesome article man. I also believe that water cooling can be done way cheaper and have tried to steer people in that direction before. The problem main problem that most newbies seem to face is that to get the best (cheapest) setup, it requires trial and error/experimentation. Sadly most people don't do that anymore. Plus Chinese parts don't have much support and if their thousand-dollar machine blows up...well too bad.
ReplyDeleteYou become your own quality control with these cheap Chinese parts! Going over everything with a careful eye is important. All best practice loop assembly procedures should also be adhered to like thoroughly leak testing on a different PSU when filling the system and even leak-down testing with an air pressure gauge.
Deletebefore arriving at my recommendations, I went through a pile of parts that were either unacceptable quality or did not perform well. You may also notice that I progressed from used parts builds (albeit ones that had a lot of heat output) and worked my way up to new parts and then finally to relatively expensive new parts after a few rounds of testing. I'd say if you're not confident in your mechanical skills, doing something like a 1st or 2nd Gen Ryzen 5 on a B450 would not be a bad idea to start. It would be loads of fun and less risk.
Deletegreat article. I myself am diving into this area of cooling. previously picked up a used thermaltake 240 floe riing aio for $80 US. now I find I want to expand upon that. I'll be buying some of the items u mentioned.. wanted to also know ur thoughts on addressable rgb and how there are so many vendors that use different control interfaces. have u any recommendations on a good budget solution for setting up an addressable rgb build complete with fans an software?
ReplyDeleteAt the end of the day, it's 3 wires. 5V, control signal, and Ground. All of the addressable RGB options boil down to just those 3 wires, so if you know how to solder, you can conquer it all :) A crimper tool may be required for some connector types. If you want to integrate into your various devices from different companies, the trick is finding the connector that they use. Otherwise, cut the wires and directly connect what you need or change them all to a connector of your own choosing.
DeleteFor control, if the motherboard has decent software, that is the easiest solution. Chain everything to the motherboard's ARGB connectors and control everything through the control app. Otherwise, there are quite a few stand-alone RGB controllers some of which you can control with a phone app via bluetooth.
DeleteAs for Addressable RGB fans, I have not found any truly affordable options suitable for a radiator. I've only used really pretty and cheap solutions that had really marginal airflow characteristics but were "ok" when deployed in great numbers on air cooled systems.
DeleteThe Arctic F12 and P12 are "real deal" PWM fans that can actually move an acceptable amount of air through a radiator, run quiet, and are very cheap. I have not found an RGB equivalent.
Deletewhat are ur thoughts on a radiator for a cpu\gpu loop. have you done anything with various brands of full waterblocks that also cool vrm? I've got a evga 1080ti sc2. can I recommend anything for custom loops cooling. I do have access to a CNC mill and am very adept using AutoCAD
ReplyDeleteI think the common rule of thumb is a 120mm radiator for watercooled cooled system component at minimum and 240mm for pretty good cooling. So, a single 360 should be able to handle a CPU and GPU on the same loop quite adequately. Two of them like this test build should be able to add a 1080ti without any issue whatsoever. I have not personally used a MOS waterblock for VRM yet, but I have used a small universal block for an X58 Northbridge chip in the first "green machine" pictured in the write-up.
DeleteThis comment has been removed by a blog administrator.
ReplyDeleteThis comment has been removed by a blog administrator.
ReplyDeleteThis comment has been removed by the author.
ReplyDeleteThis comment has been removed by a blog administrator.
ReplyDeleteThis comment has been removed by a blog administrator.
ReplyDeleteThis comment has been removed by a blog administrator.
ReplyDeleteThis comment has been removed by a blog administrator.
ReplyDeleteThere's plenty of Modular Aio Water Cooling system are available for PC to make advanced cooling, which is immense in any way, with the buying process can be complex as such. You can discover PCs in each of these cooling at a variety of price points; some of the air cool is price way cheaper than the liquid counterpart. Thus the vital thing to consider is how you like to use your PC; both high-end PC and standard PC have different applications.
ReplyDeleteSorry for the super late reply. . . I'm sure your system is done by now, but EPDM tubing can be found at McMaster Carr, and that is where I got mine.
ReplyDeleteThis comment has been removed by a blog administrator.
ReplyDeleteGreat read! I've been getting into cold therapy recently, and your post really highlights the benefits of having the right setup. A
ReplyDeletewater cooler for ice bath sounds like a total game-changer—no more constantly buying bags of ice or waiting for the tub to chill. It’s definitely on my list now for building a more convenient and consistent cold plunge routine.
Interesting perspective shared here. In our daily work at Kwik Kar Auto Dallas, we often help drivers dealing with a car stuck in gear manual issue that can quickly affect safety and drivability. A car stuck in gear manual problem usually requires expert Auto Repair and timely Car Repair Services to prevent further transmission damage. Visiting a trusted Auto Repair Shop for proper Car Repair and maintenance, Auto Care, and reliable Automotive Repair Services ensures accurate diagnosis. When a car stuck in gear manual situation occurs, a professional Vehicle Repair Shop or Car Repair Workshop can restore smooth performance and support long-term Car Maintenance and Vehicle Repair.
ReplyDelete